Loading...
Loading...
Loading...
Loading...
Loading...
Loading...
Loading...
Loading...
Loading...
Loading...
Loading...
Loading...
Loading...
Loading...
Loading...
Loading...
Loading...
Loading...
Loading...
Loading...
Loading...
Loading...
Loading...
Loading...
Loading...
Loading...
Loading...
Loading...
Loading...
Loading...
Loading...
Loading...
Loading...
Loading...
Loading...
Loading...
Loading...
Loading...
Loading...
Loading...
Loading...
Loading...
Loading...
Loading...
Loading...
Loading...
Loading...
Loading...
Loading...
Loading...
Loading...
Loading...
Loading...
Loading...
Loading...
Loading...
Loading...
Loading...
Loading...
Loading...
Loading...
Loading...
Loading...
Loading...
Loading...
Loading...
Loading...
Loading...
Loading...
Loading...
Loading...
Loading...
Loading...
Loading...
Loading...
Loading...
Loading...
Loading...
Loading...
Loading...
Loading...
Loading...
Loading...
Loading...
Loading...
Loading...
Loading...
Loading...
Loading...
Loading...
Loading...
Loading...
Loading...
Loading...
Loading...
Loading...
Loading...
Choose your application type for a getting-started guide
Manage users and their access
Authgear is a highly adaptable identity-as-a-service (IDaaS) platform for web and mobile applications
Authgear is an authentication & user management solution which makes it very easy for developers to integrate and customize their consumer applications, it includes these features out of the box:
Zero trust authentication architecture with (OIDC) standard.
Easy-to-use interfaces for user registration and login, including email, phone, username as login ID, and password, OTP, magic links, etc for authentication.
Support a wide range of identity providers, such as , , and (AD).
Support biometric login on mobile, Passkeys, and Multi-Factor Authentication (MFA) such as SMS/email-based verification and authenticator apps with TOTP.
A user management portal, like password resets, account locking, scheduled deletion or anonymization, and user profile management.
Single Sign-On (SSO) provides a single unified experience for your customers to log into multiple web/mobile apps, including Web2Web, Web2App, and App2App SSO.
Session management with Authgear Portals, and a pre-built setting page for users to control concurrent sessions.
Customizable UI with a user-friendly drag-drop low-code dashboard.
Various security features such as audit logs, brute force protection, smart account lockout, password policy, etc.
APIs for further integration and customizations.
Most importantly, you can with Authgear for free.
Authgear contains the following high-level components:
Client App SDKs - for developers to quickly implement authentication with Auth UI on your web and mobile applications. Check out for tutorials and API References.
Auth UI - is the default batteries included UI for login, signup and setting page. You can customize the style via the Portal, including the CSS and HTML of each page.
Authentication Flow API (coming soon) - for developers to implement their own login, signup and reauthenticate UI (e.g. a mobile native view); or to define a customized login, signup and reauth flow.
- for developers to use Authgear with other software that already support OIDC login, you can use Authgear as an OpenID Connect Provider.
- explain the common approach of using Access Token or Cookies (JWT or random string) to authenticate an API or HTTP Requests.
- allow your backend to interact directly with Authgear for user management purpose.
- call external web endpoint or use the hosted type-script to customize the behaviour of Authgear. E.g. blocking certain type of sign up, or call external endpoint for each login
Authgear Portal - You can configure your projects, manage users, check out , or customize the AuthUI
Analytics Page - View reports of your total users and active users over a specific time interval on the .
The Authgear Android SDK provides an optional Okhttp interceptor which handles everything from refreshing the access token to putting the access token in the header.
The extension is included in the SDK. Please refer to the above section for getting the SDK.
Configure OkHttpClient to use AuthgearInterceptor as follows:
Authgear authgear = // Obtain the authgear instance.
OKHttpClient client = new OkHttpClient.Builder()
.addInterceptor(AuthgearInterceptor(authgear))
.build()The client would then include the access token in every request and refresh the access token when necessary before the requests.
Implement Authgear to control access to your applications
Authgear simplifies the use of open industry standards like OAuth 2.0, and OIDC. Users can log into your applications with a variety of user login options. This set of how-to guides provides you with detailed instructions, code snippets, and configuration examples for each type of login method.
Create an app in the Linkedin Developers Portal.
In the "Products" section, choose "Sign In with LinkedIn"
In the details page of the created app, click the "Auth" tab
Take notes of "Client ID" and "Client Secret", add https://<YOUR_AUTHGEAR_ENDPOINT>/sso/oauth2/callback/linkedin to "Redirect URLs" in "OAuth 2.0 settings" section
In the portal, go to Authentication > Social / Enterprise Login.
Enable Sign in with LinkedIn.
Fill in Client ID.
Fill in Client Secret.
Save the settings.
🎉 Done! You have just added Linkedin Login to your apps!
Setup your own AD FS server
Create an application in your AD FS Server, obtain "Client ID", "Client Secret" and "Discovery Document Endpoint". Discovery Document Endpoint typically ends with /.well-known/openid-configuration. Configure your application with redirect uri https://<YOUR_AUTHGEAR_ENDPOINT>/sso/oauth2/callback/adfs.
In the portal, go to Authentication > Social / Enterprise Login.
Enable Sign in with Microsoft AD FS.
Fill in Client ID, Client Secret and Discovery Document Endpoint.
Save the settings.
🎉 Done! You have just added Microsoft AD FS Login to your apps!
Authgear lets you customize your users’ entire authentication experience
Brand and customize login experience for your users where you can customize domain, email, and localize to handle different languages.
Learn how to use SDKs for mobile apps to interact with Authgear
You can use your own translation or change the default text in the AuthUI.
Go to Portal > Localization > Manage Template Contents
Override translation by providing a JSON file in the text box.
Monitor your Authgear implementation
You can monitor the Authgear app, and see and retrieve log event data.
Traditional web app that runs on the server
If you have a traditional web application like Java EE, Express, PHP, GO, Laravel, or ASP.NET Core MVC and you want to integrate authentication features.
See information about the total number users and active users on your Authgear project
The Analytics section on the Authgear portal provides reports on your project activities. For example, the report shows the total number of users that sign up and active users over a specific time interval.
In this guide, you'll get detailed information about the information provided on the Authgear Analytics page and how to interpret it.
The Analytics page shows two activity bar charts that show a weekly or monthly summary of user activities on your Authgear project.
The first chart shows the total active users per week or month. Active users are users who sign up, log in, or access their accounts within a specific time.
The second bar chat in the Activities section shows the total number of users your Authgear project has over a specific time interval. That is the total number of accounts created minus deleted users.
The signup conversion piechart shows how many users visited your signup page (unique pageviews) and how many went ahead to complete the signup process. This report also shows a percentage of the signup conversion (unique pageviews vs. total signups).
This section shows how many users you have per signup method in a pie chart.
Note: The data on the Analytics page may take 24 hours to be updated.
How to guides related to user profiles
An API or service protected by Authgear
If your API or backend service needs authentication, you can validate the JWT token in your application server code.
The Authgear Android SDK comes with kotlin support out of the box. In fact, the SDK is written in kotlin!
If you are using kotlin, you can benefit from the suspend function APIs authgear provides. For example, the above authorize example can be written as follows:
Decide how should the application requests be identified, either by access tokens or by cookies.
Authgear provides token-based or cookie-based authentication. You will need to decide which approach you are going to use before starting the setup.
This approach is suitable for mobile apps or single-page web applications.
In Token-based authentication, Authgear returns the access token and refresh token to the client app after authentication.
The client SDK will automatically renew the access token with the refresh token for you, so you don't have to worry about it.
Your client app should call your backend with the access token in the Authorization header, and you can verify the access token by integrating Authgear with your backend. The HTTP requests can be authenticated by or .
Request example:
This approach is suitable for all types of websites, including server-side rendered applications.
In Cookie-based authentication, Authgear returns Set-Cookie headers and sets cookies to the browser. The cookies are HTTP only and share under the same root domains. So you will need to setup the custom domain for Authgear, such as identity.yourdomain.com.
In this setting, if you have multiple applications under yourdomain.com, all applications would share the same session cookie automatically. After that, you can verify the cookies by integrating Authgear with your backend. The HTTP requests must be authenticated by .
Request example:
Authenticate incoming request by cookie in the HTTP header.
By using Authgear, you can add a login to your website easily. Authgear supports various authentication methods, that you can easily turn on and configure in the portal.
To authenticate with cookies, you will need to set up a custom domain for Authgear, so that your website and Authgear are under the same root domains. e.g. Your website is yourdomain.com, and Authgear with a custom domain auth.yourdomain.com.
In this setting, if you have multiple applications under yourdomain.com, all applications would share the same session cookies automatically.
Your app server will receive a request with the cookie
To verify the requests in your app server, you must Forward authentication to Authgear Resolver Endpoint.
The following tutorials show you how to add user login to your website using Authgear.
Allow users to log into your app via OTP with WhatsApp, as a secure alternative to SMS
Authgear let your users login passwordlessly with WhatsApp OTP.
To enable this feature from the Portal:
Go to Authentication > Login Methods, we are going make few changes on this page.
In the top section of Select Login Methods, select Mobile.
In Authentication of Select Login Methods, select Passwordless.
In the tabs section below, switch to the tab Verification and OTP.
In the dropdown Verify phone number by, select either WhatsApp or SMS or WhatsApp only.
Press Save on the top left corner.
When the user login with their phone number, a WhatsApp message with an OTP and the app name will be received. They can copy the code by tapping on the "Copy code" button and log in by the code.
If "Verify phone number by WhatsApp or SMS" is enabled, the user can switch to receive the OTP via SMS instead in the login page.
How to pass the Apple Store review process if your app uses passwordless login.
When you try to publish a mobile app on the Apple AppStore, there will be an . You need provide a demo user account for the reviewers to access the features of the app.
However passwordless login via email/phone OTP cannot be used in the review because the reviewer do not have access to the email inbox or phone number of that demo account.
You can create a demo account with email/phone and password by turning password on temporarily. In the project portal:
Go to Authentication > Login Methods.
In Select Login Methods, select Custom.
In the tabs section below, select the tab Custom Login Methods.
In Custom Login Methods, activate Password.
Go to User Management, press Add User in the command bar.
Create the demo user by entering the email address and password
Go to where you were in Step 4, deactivate Password.
Now you can login as the demo user in your app with the email and password.
Submit your app for review with the credentials.
You can add a privacy policy and a terms of service link to the sign up page.
These two links can be easily added in the project Portal
Go to UI Settings in the Portal
Fill in the Privacy Policy Link and Terms of Service Link in the Link Settings section
Save the settings.
The values will be used as the href of <a> HTML tag so they must be valid URL. If both of the links are left empty, the whole paragraph on the signup page will be hidden.
You can also add these links by including two special translation keys in translation.json.
The keys are terms-of-service-link and privacy-policy-link. The values will be used as the href of <a> HTML tag so they must be valid URL.
For example,
If you wish to hide the whole paragraph, set BOTH to empty string.
Customize the look and feel of Authgear to match your branding
You can change how the end-users see Authgear in the UI Settings page in the Portal.
Authgear provides 7 theme color presets. You can also input color codes that match your brand.
Authgear can change the UI appearance based on the system settings of the end-users. Turn on Dark Theme to enable this feature.
The app logo helps the end-users to identify your app, and it is shown in all pages, emails, etc. JPEG, PNG and GIF are supported.
Change the favicon to match with your web or mobile app to provide a coherent experience for the end-users.
Let end-user to contact customer support in case they need help in the login process.
In the case of losing access to the MFA authenticators, the end-user can recover their account by using the emergency Recovery Codes. However they may have lost the codes and need customer support.
You can add a customer support link in the Portal.
Go to UI Settings in the Portal
Fill in the Customer Support Link in the Link Settings section
Save the settings.
The value will be used as the href of <a> HTML tag. It can be a URL or a mailto: link.
You can also modify the text shown to the end-users by including two special translation keys in translation.json.
You need to protect a JavaScript SPA application that runs entirely in a browser
import kotlinx.coroutines.*
class MyAwesomeViewModel(application: MyAwesomeApplication) : AndroidViewModel(application) {
// Other methods
// This is called when login button is clicked.
fun login() {
viewModelScope {
withContext(Dispatchers.IO) {
try {
val app = getApplication<MyAwesomeApplication>()
val state = app.authgear.authenticate(AuthenticateOptions(redirectUri = "com.myapp://host/path"))
// User is logged in!
} catch (e: Throwable) {
// Something went wrong.
}
}
}
}
}Settings
Controls
Primary Color
Color of the buttons and links. The should match your brand's primary color.
Text Color
Headings and paragraph text.
Background Color
Background color of the Signup, Login and Settings page.


Passkeys give users a simple and secure way to sign in to your apps and websites across platforms without passwords.
Passkeys replace passwords and other passwordless login methods. It is built on the WebAuthn standard (also known as FIDO Sign-in), which uses public key cryptography to authenticate the user. With 1 click, Authgear upgrades your app to support this cutting-edge auth technology.
The passkey standard is supported on the latest versions of Chrome, Safari, and Firefox browsers. On iOS 16 and macOS 13 (Ventura), Apple has added passkey support to the iCloud Keychain service. Passkeys are also supported on Android 9 (API level 28) or higher. A passkey is synchronized and relayed with an iCloud account and can be used across a user's devices.
Users can log in to their accounts using their biometrics easily. On Apple devices, Touch ID and Face ID authorize the use of the passkey which then authenticates the user on the app or website.
Besides the built-in support of all major desktop and mobile platforms, passkeys can also be stored in hardware security keys such as YubiKeys, which provide the highest security against attacks.
Authgear adds a passkey feature to your apps and websites instantly. To enable it:
In your project portal, go to Authentication > Login Methods.
In the Select Login Methods section, turn on the Enable passkey support for compatible devices. toggle.
Press "Save" and your app now supports passkey login!
See the list of Passkey support via Authgear on different platforms.
macOS 12: Passkey is supported on major browsers. However, the credentials are deleted when clearing browser data.
iOS 15.5: Passkey is supported on Safari and stored locally a the device. Credential will be deleted by "Settings > Safari > Clear History and Website Data"
iOS 16 Beta 3: Passkey is synced with iCloud Keychain. The individual credentials can be viewed and managed in "Settings > Passwords"
Android 9 (API level 28) or higher: Supported.
To configure "Sign in with Apple" for Authgear, you will need to fulfil the following:
Register an Apple Developer Account. Apple Enterprise Account does not support "Sign in with Apple"
Register your own domain.
Your domain must be able to send and receive emails.
Set up Sender Policy Framework(SPF) for your domain.
Set up DomainKeys Identified Mail(DKIM) for your domain.
Create an "App ID" by adding a new "Identifier" here, choose app IDs, enable "Sign in with Apple" enabled.
Create a "Services ID" by adding a new "Identifier" here, choose service IDs, enable "Sign in with Apple".
Click "Configure" the Next to "Sign in with Apple". In "Primary App ID" field, select app ID created above.
Fill in and verify the domain created above, add https://<YOUR_AUTHGEAR_ENDPOINT>/sso/oauth2/callback/apple to Return URLs
Create a "Key" following this guide with "Sign in with Apple" enabled. Click "Configure" next to "Sign in with Apple" and select "Primary App ID" with app ID created above. Keep the private key safe, you need to provide this later.
In the portal, go to Authentication > Social / Enterprise Login.
Enable Sign in with Apple.
Fill in the Client ID with the Service ID obtained above.
In Apple Developer Portal, view key information of the "Key" created above.
Jot down the Key ID and download the key text file (.p8 file).
Copy the content in the key text file to Client Secret text area in Authgear Portal..
Fill in Key ID field using the Key ID obtained from step 5.
In Apple Developer Portal, click username on the top right corner, click View Membership.
Find the Team ID from Membership Information, fill in Team ID field in Authgear portal.
Save the settings.
🎉Done! You have just added Sign in with Apple to your apps!
Create an Azure Active Directory (Azure AD) account here
Setup a tenant by completing Quickstart: Set up a tenant
Register an application by completing Quickstart: Register an application with the Microsoft identity platform
Choose "Supported account type", the following options are supported:
Accounts in this organizational directory only (Contoso AD (dev) only - Single tenant)
Accounts in this organizational directory (Any Azure AD directory - Multitenant)
Accounts in this organizational directory (Any Azure AD directory - Multitenant) and personal Microsoft accounts (e.g. Skype, Xbox)
"Personal Microsoft accounts only" is not supported yet. Remember the account type chosen as this affects the configuration on Authgear portal
Configure "Redirect URI" with https://<YOUR_AUTHGEAR_ENDPOINT>/sso/oauth2/callback/azureadv2
Follow this section to add a client secret. Remember to record the secret value when you add the client secret, as it will not be displayed again. This will be needed for configure OAuth client in Authgear.
In the portal, go to Authentication > Social / Enterprise Login.
Enable Sign in with Microsoft
Fill in Client ID with Application (client) ID of your just created Azure AD application.
Fill in Client Secret" with the secret you get after creating a client secret for your Azure AD application.
For Tenant field:
If single tenant (first option) is chosen, fill in the Directory (tenant) ID of your Azure AD application.
If multi tenant (second option) is chosen, fill in the string literal organizations.
If multi tenant and personal account (third option) is chosen, fill in the string literal common.
Save the settings.
🎉 Done! You have just added Azure Active Directory (Azure AD) Login to your apps!
Sign in Microsoft Azure.
Create a B2C tenant by following this tutorial.
Enable self-service sign-up for the tenant by following this doc
Go back the main page of Microsoft Azure and search for "Azure AD B2C"
Create a app registration for Authgear by following this guide.
Configure "Redirect URI" with https://<YOUR_AUTHGEAR_ENDPOINT>/sso/oauth2/callback/azureadb2c.
Follow this guide to create a sign-up and sign-in user flow.
After creating the user flow, configure it
Open "Application Claims".
Make sure "Email Addresses" is checked.
If you have finished the above prerequisite, you should have the following information:
The Tenant Name, obtained in Step 2
The Application (Client) ID, obtained in Step 5
The Policy (User flow) Name, obtained in Step 7
Then in Authgear portal, do the following:
In the portal, go to Authentication > Social / Enterprise Login.
Enable Sign in with Microsoft Azure AD B2C.
Fill in Client ID with the Application (Client) ID above.
Fill in Client secret with the client secret you get when you create the app registration.
Fill in Tenant with the Azure AD B2C Tenant Name.
Fill in Policy with the Policy (User Flow) Name. Normally it starts with b2c_.
Save the changes
🎉 Done! You have just added Azure AD B2C Login to your apps!
Integrate Authgear with your product
Cut down on implementation time by utilizing integrations that have been developed by Authgear. The Authgear platform is designed to be flexible, allowing you to meet your specific needs by customizing identity processes with your own code and easily integrating with other external applications and tools.
This set of how-to guides provides you with detailed instructions, code snippets, and configuration examples for each type of integration.
Token-based
Cookie-based
Suitable for
mobile apps or single-page web applications
Websites in the same root domain (e.g. Server-side rendered applications)
Transport of session
Access Token in Authorization header
Session ID in Cookies
> GET /api_path HTTP/1.1
> Host: yourdomain.com
> Authorization: Bearer <AUTHGEAR_ACCESS_TOKEN>> GET /api_path HTTP/1.1
> Host: yourdomain.com
> cookie: session=<AUTHGEAR_SESSION_ID>> GET /api_path HTTP/1.1
> Host: yourdomain.com
> cookie: session=<AUTHGEAR_SESSION_ID>{
"terms-of-service-link": "https://mycompany.com/terms-of-service",
"privacy-policy-link": "https://mycompany.com/privacy-policy"
}{
"enter-recovery-code-instead-v1": "Having Trouble? <button class=\"btn secondary-btn\" type=\"submit\">Use recovery code</button>",
"enter-recovery-code-instead-with-customer-support-v1": "Having Trouble? <button class=\"btn secondary-btn\" type=\"submit\">Use recovery code</button> or <a class=\"link\" target=\"_blank\" href={customerSupportLink}>contact customer support</a>",
}Learn how to configure different options for password reset/account recovery.
The Forgot/Reset Password settings tab allows you to configure the behavior of the account recovery process for your Authgear project to meet your specific needs. For example, you can use this feature to determine whether to deliver recovery code to users via SMS, WhatsApp, or email.
In this post, you'll learn the various configurations available via the Password Settings tab and how to navigate to the page.
To access the Password Settings page, log in to your Authgear account, select your project, and then navigate to Authentication > Login Methods.
Next, select your current Login Method (Email, Mobile, Mobile/Email, or Custom). The login method you select affects the options available for you to customize.
Scroll down to just below the Select Login Methods section and click on the Password tab to reveal the Password settings screen.
Note: Make sure the login method you select has password enabled (you can not view the password settings screen if you only enable Passwordless login).
When you enable password reset by phone number for your project, users will receive an OTP code that they can enter in the AuthUI to finish the account recovery flow.
To able this feature, first in the Password Settings tab, select a Login Method that supports Mobile (E.g Mobile or Mobile/Email methods) and has the password option enabled.
Next, click on the "Reset password with phone by" dropdown then select how you want to send the OTP from the available options. The available options include SMS, WhatsApp, and WhatsApp or SMS.
Once you're done save your changes to enable the new configuration.
The next time your users try to reset their password using their phone number as the login ID, they should see a screen like this to enter the OTP sent to their phone:
If you prefer your users receive an OTP that they can enter in the AuthUI instead of a recovery link that they would normally click, you can use this password recovery settings to enable that.
To enable this setting, click on the "Reset password with email by" dropdown in the Password Settings tab. Then, select the One-time Password (OTP) option. Save your changes to enable the feature.
Optimize for email deliverability by using your own SMTP server to send Authgear Emails (such as forgot password, verifications) in your own domains.
To send Authgear emails to end-users with your own domain, e.g. [email protected]. You will need to configure the external SMTP provider.
Authgear currently supports SendGrid and other custom SMTP Providers.
The sender address can be configured by changing the value of theemail.default.sender key in the localization JSON. Go to Portal > Localization > Translations and add/change the value of email.default.sender to your own email address, for example [email protected], and Save the settings. The value can be set separately for each locale.
Before adding the email service provider to Authgear, make sure the sender domain is verified and authenticated on the email service. For example, your domain myapp.com should be configured in your SendGrid account so Authgear can use the account to send emails with [email protected].
Follow the instructions from the email service provider for setting up your domain:
The external SMTP provider can be set up in Portal > Custom Email Provider. Enable the Use my own provider toggle to see the fields.
Log in to your SendGrid account
Create API Key in Settings > API Keys
Set the API Key Name for your reference the choose Restricted Access under API Key Permissions
Under Access Details, expand Mail Send and give Full Access to the Mail Send permission
Click Create & View. Copy the API key created and save it somewhere safe
In Authgear Portal, navigate to Custom Email Provider
Enable Use my own provider.
Choose SendGrid and paste the API key you copied, and Save
You can send a test email to check the configuration
Other SMTP providers can be set manually by providing the Host, Port, Username, and Password. They can be obtained from the documentation or instructions from your email service provider.
Passwordless login with email links
Email Login Links, also known as "magic link", is a passwordless authentication method that allows users to log into a website or application without using a traditional password. Instead, it relies on a unique link sent to the user's email address.
Here's how it works:
User initiates the login process by entering their email address on the login page.
Authgear generates a unique, time-limited login link associated with the user's email address.
The link is sent to the user's email inbox, with a button prompting them to click on it to log in.
The user clicks on the link, and approve the login
The user is securely logged in to the app or website.
Magic link login offers several advantages. It eliminates the need for users to remember and manage passwords, reducing the risk of weak or reused passwords. It also simplifies the login process and reduces friction, as users only need to access their email to authenticate.
To enable Email Login Links:
In the Authgear Portal, go to "Authentication" > "Login Methods"
Select "Email" or "Mobile/Email" as login methods
Go to the "Verification and OTP" tab
Under "Email", in the "Verify email by" field, select "Login Link"
Provide a seamless user experience across multiple products with the single sign-on feature.
Single sign-on (SSO) is defined as login once, logged in all apps. If you have multiple mobile apps or websites that use the same Authgear project. You can configure your apps to turn on the SSO feature, so the end-users only have to enter their authentication credentials once.
If you are building cookie-based websites with the same root domain (e.g. app1.example.com / app2.example.com), you can skip this section. Sessions are shared among *.example.com automatically, see .
If you are building token-based websites or mobile apps, you can enable the SSO feature via the SDK.
When SSO-enabled is ON, the end-user will need to enter their authentication credentials when they login to the first app. Later on, when they login to the second app, they will see a continue screen so that they can log in with just a click, without authenticating themselves again.
When the end-user logout the SSO-enabled app, all the apps will be logged out at the same time.
You can turn on this feature when you configure the SDK by setting the is sso enabled option to true.
Add Facebook Sign in to your apps in less than 5 minutes.
If you are using Authgear in your existing Facebook Apps, you may skip to the next step to set up the OAuth client.
You will need a Facebook developer Account. Register as one by clicking Get Started in the website.
Click Create App in the panel and choose your app type.
In the app panel, click Add Product next to Products in the sidebar.
Click the Set Up button in Facebook Login.
Go to Settings of Facebook Login.
Make sure Client OAuth Login and Web OAuth Login are enabled.
Add https://<YOUR_AUTHGEAR_ENDPOINT>/sso/oauth2/callback/facebook to Valid OAuth Redirect URIs and save the changes.
After setting up the Facebook Login product, go to Settings -> Basic in the sidebar.
Your will need the App ID and App Secret to configure Facebook Login.
In the portal, go to Authentication > Social / Enterprise Login.
Enable Login with Facebook.
Fill in the Client ID with the App ID obtained from the previous step.
Fill in the Client Secret with the App Secret obtained from the previous step.
Save the settings.
🎉 Done! You have just added Facebook Login to your apps!
Your end-users can now sign in with Facebook on Authgear pre-built Log In and Sign Up page. Existing end-users can connect their account to Facebook in the page.
If your mobile app has security requirements similar to that of mobile banking applications, you may want the end-users to authenticate themselves every time they use your app.
By default, the SDK stores the refresh token in a persistent storage specific to your app. The end-user signs in once and their session lasts for a long period, even if they quit the app.
You can alter this behavior by switching to a transient storage by setting the tokenStorage option to TransientTokenStorage() when configuring the SDK. The refresh token will be removed after the app is cleared, therefore authentication will be required on every app launch.
Take a look at just a few of Authgear's use cases
Authgear is an easy-to-use authentication platform that you can add to your apps to manage user sign-ins and identities. It saves your team and company from spending money, time, and dealing with potential issues that can happen when you try to make your own user sign-in and identity system.
You've made a great app and now you want users to be able to sign in using either a username/password or their social media accounts like Facebook or Google. You also want to access their profile information after they've signed in so you can customize the user interface to them and apply your own rules about what they can do.
You've also created an API or backend service that you want to protect using .
You've got more than one app, and you're looking to set up Single Sign-on (SSO), so users only need to sign in once.
You've made a JavaScript web app and a mobile app, and you need them both to safely connect to your API.
You have a web app that needs to confirm users' identities using the centralized authentication system.
You think passwords aren't secure enough and want your users to log in with unique codes sent through email or text messages.
If a user's email address gets leaked in a data breach on some other site, you want to know about it. You also want to warn the users, or even stop them from logging into your app until they've changed their password.
If you notice a lot of failed login attempts from the same IP address, you want to be able to block it to prevent a DDoS attack.
If you're part of a big company, you want to link your current employee directory service so that employees can use their existing work credentials to sign in to different internal and outside apps.
You don't want to or don't know how to, build your own system for managing users. This includes resetting passwords, creating, giving access to, blocking, and deleting users, as well as a user interface for managing all this. You just want to focus on your app.
You want to add an extra layer of security, multi-factor authentication (MFA), when users try to access sensitive information.
You're looking for an identity solution to help you comply with the ever-increasing rules and regulations of standards like SOC2, GDPR, PCI DSS, HIPAA, and others.
You want to keep an eye on users' activities on your site or app. You want to use this information to improve the user journey, measure how well you keep users, and improve your sign-up process.
Authenticate incoming request by access token in the HTTP header.
By using Authgear, you can add the login feature to your mobile native app and single-page application easily. Authgear supports various authentication methods, that you can easily turn on and configure in the portal.
Your app server will receive a request with the access token
To verify the request in your app server, you can choose to Forward authentication to Authgear Resolver Endpoint or Verify JSON Web Token (JWT) in your app server.
The following tutorials show you how to add user login to your native mobile or single-page app using Authgear.
Choose your platform below:
Follow the to create a OAuth App.
In "Authorization callback URL", use https://<YOUR_AUTHGEAR_ENDPOINT>/sso/oauth2/callback/github.
After the creation, click "Generate a new client secret". Remember the client secret.
In the portal, go to Authentication > Social / Enterprise Login.
Enable Sign in with GitHub.
Fill in Client ID.
Fill in Client Secret.
Save the changes.
🎉 Done! You have just added GitHub integration to your apps!
Set up a custom domain to let your users to access the Authgear pages with your unique, brand-centric domain name. You can use a custom domain (e.g. auth.yourdomain.com) instead of the Authgear generated domain (e.g. <YOUR_APP>.authgear.cloud).
Go to Custom Domain in your project portal.
Enter the custom domain name that you would like to connect to Authgear, and click Add.
Your custom domain will appear on the list, click Verify to start the verification process.
Go to your domain provider's site, add DNS records based on the values shown on the portal page.
Click Verify after adding the DNS records, you may need to wait for the propagation of your updated DNS records.
You will return to the custom domain list after verifying your custom domain. Click Activate to use your custom domain.
Now you can access Authgear pages with your custom domain, your default Authgear generated domain (e.g. <YOUR_APP>.authgear.cloud) cannot be used anymore. Update your SDK endpoint to use the new custom domain.
The certificate of your custom domain is managed by Authgear, you may need to wait for a while for certificate provisioning.
If you are developing mobile or desktop applications, choose from one of these SDKs for your platform to get started.


Authgear provides a wide range of prebuilt frontend for the authentication related features of your apps
The end-user can perform the following actions on the setting page:
Change their password.
Add or change their email, phone number or username.
Connect or disconnect to identity providers.
Manage the signed in sessions.
Enable or disable 2-step verification.
and many more.
Use the open method to open the built-in settings page
import authgear, { Page } from "@authgear/web";
const openSettings = () = {
authgear.open(Page.Settings)
}If you are working on a mobile apps, you can open the settings page using the SDK. When the end-user has signed in, the SDK provides a method to open the settings page in a webview.
import React, { useCallback } from "react";
import authgear, { Page } from "@authgear/react-native";
import { View, Button } from "react-native";
function SettingsScreen() {
const onPressOpenSettingsPage = useCallback(() => {
authgear.open(Page.Settings).then(() => {
// When the promise resolves, the webview have been closed.
});
}, []);
return (
<View>
<Button
title="Open Settings Page"
onPress={onPressOpenSettingsPage}
/>
</View>
);
}Future<void> onPressOpenSettingsPage() async {
await authgear.open(SettingsPage.settings);
}async void OnOpenSettingsClicked(object sender, EventArgs args)
{
await authgear.OpenAsync(SettingsPage.Settings);
}func onPressOpenSettingsPage(sender: UIButton, forEvent event: UIEvent) {
authgear.open(.settings) {
// When the completion handler is called, the webview is closed.
}
}public void onClickOpenSettingsPage() {
authgear.open(Page.Settings, null, new OnOpenURLListener() {
@Override
public void onClosed() {
// The webview is closed.
}
@Override
public void onFailed(Throwable throwable) {
// Some error occured.
}
});
}In web-based application, you may want to add the "Back to my app" button to the settings page so the user can navigate back to your website after changing the settings.
Go to Portal > UI Settings
Provide the URL in Back to Your App Link and click Save
Webhooks is one of the supported hooks to receive events.
To use webhooks you need to:
Deploy a webhook on your server.
Configure Authgear to deliver events to your webhook.
In the portal, go to Advanced > Hooks.
Add your webhooks in Blocking Events and Non-Blocking Events, depending on which event you want to listen to.
Click Save.
hook:
blocking_handlers:
- event: "user.pre_create"
url: 'https://myapp.com/check_user_create'
non_blocking_handlers:
# listen to all events and filter events by type in request
- events: ["*"]
url: 'https://myapp.com/all_events'
- events: ["user.created"]
url: 'https://myapp.com/sync_user_creation'Events are delivered to your webhooks via HTTPS, so your server must support HTTPS.
Events are delivered to your webhooks with POST requests. You webhooks must return a HTTP status code within 2xx range. Other status codes are considered as a failed delivery.
The request to your webhooks is signed with a secret key shared between Authgear and your hooks. You are RECOMMENDED to verify the signature and reject any requests with invalid signatures. This ensures the request originates from Authgear.
The signature is calculated as the hex encoded value of HMAC-SHA256 of the request body and included in the HTTP header x-authgear-body-signature.
To obtain the secret key, visit the portal and go to Advanced -> Hooks -> Webhook Signature. You may need to reauthenticate yourselves before you can reveal the secret key.
Here is the sample code of how to calculate the signature and verify it.
package main
import (
"crypto/hmac"
"crypto/sha256"
"crypto/subtle"
"encoding/hex"
"fmt"
"io"
"net/http"
)
// Obtain the secret in the portal.
const Secret = "SECRET"
// HMACSHA256String returns the hex-encoded string of HMAC-SHA256 code of body using secret as key.
func HMACSHA256String(data []byte, secret []byte) (sig string) {
hasher := hmac.New(sha256.New, secret)
_, _ = hasher.Write(data)
signature := hasher.Sum(nil)
sig = hex.EncodeToString(signature)
return
}
func main() {
http.HandleFunc("/", func(w http.ResponseWriter, r *http.Request) {
b, err := io.ReadAll(r.Body)
if err != nil {
// Handle the error properly
panic(err)
}
defer r.Body.Close()
sigInHeader := []byte(r.Header.Get("X-Authgear-Body-Signature"))
sig := []byte(HMACSHA256String(b, []byte(Secret)))
// Prefer constant time comparison over == operator.
if subtle.ConstantTimeCompare(sigInHeader, sig) != 1 {
// The signature does not match
// Do NOT trust the content of this webhook!!!
panic(fmt.Errorf("%v != %v", string(sigInHeader), string(sig)))
}
// Continue your logic here.
})
http.ListenAndServe(":9999", nil)
}Add third-party identity providers to enable frictionless sign in for your users
Authgear supports the following social and enterprise identity providers. Please click the link below for setup instructions.
Authgear(
clientId: CLIENT_ID,
endpoint: ENDPOINT,
isSSOEnabled: true,
)new Authgear(
getApplication(),
CLIENT_ID,
ENDPOINT,
new PersistentTokenStorage(getApplication()),
true // isSsoEnabled = true
);authgear.configure({
clientID: CLIENT_ID,
endpoint: ENDPOINT,
sessionType: "refresh_token",
isSSOEnabled: true,
});authgear.configure({
clientID: CLIENT_ID,
endpoint: ENDPOINT,
isSSOEnabled: true,
});var authgearOptions = new AuthgearOptions
{
ClientId = CLIENT_ID,
AuthgearEndpoint = ENDPOINT,
IsSsoEnabled = true,
};
// Android
#if __ANDROID__
var authgear = new AuthgearSdk(GetActivity().ApplicationContext, authgearOptions);
#else
#if __IOS__
var authgear = new AuthgearSdk(UIKit.UIApplication.SharedApplication, authgearOptions);
#endif
#endifAuthgear(
clientId: CLIENT_ID,
endpoint: ENDPOINT,
tokenStorage: TransientTokenStorage()
)new Authgear(
application,
CLIENT_ID,
ENDPOINT,
new TransientTokenStorage() //tokenStorage
);import authgear, { TransientTokenStorage } from "@authgear/react-native";
authgear.configure({
clientID: CLIENT_ID,
endpoint: ENDPOINT,
tokenStorage: new TransientTokenStorage(),
});var authgearOptions = new AuthgearOptions
{
ClientId = CLIENT_ID,
AuthgearEndpoint = ENDPOINT,
TokenStorage: new TransientTokenStorage(),
};
#if __ANDROID__
var authgear = new AuthgearSdk(GetActivity().ApplicationContext, authgearOptions);
#else
#if __IOS__
var authgear = new AuthgearSdk(UIKit.UIApplication.SharedApplication, authgearOptions);
#endif
#endif> GET /api_path HTTP/1.1
> Host: yourdomain.com
> Authorization: Bearer <AUTHGEAR_ACCESS_TOKEN>Add Google Sign in to your apps in less than 5 minutes.
To configure Google OAuth client for Authgear, you will need to create an OAuth client on Google Cloud Platform first.
Create a project on Google Cloud Platform through console. If you are adding Authgear to your existing Google Cloud Platform projects, you may skip to the next step to create the OAuth client.
After creating a new project, you will need to configure the OAuth consent screen. Press the button on the top-left and go to APIs & Services -> OAuth consent screen and follow the instruction to create the consent screen.
Go to -> APIs & services -> Credentials
Click Create Credentials -> OAuth client ID
Choose Web application in Application type and assign a name as reference. You should always choose Web application here regardless of the platform of the app you are creating. It is because this OAuth Client ID is used by your Authgear services, which is a web application in Google’s classification.
Add https://<YOUR_AUTHGEAR_ENDPOINT>/sso/oauth2/callback/google to redirect URIs.
After creating a client ID, you will see the client ID under the OAuth 2.0 Client IDs section of the Credentials page.
You can find more details in official Google Cloud Platform doc
After creating an OAuth client, click the name of OAuth client to view the details.
You will need the values of Client ID, Client secret to configure Google Sign In.
In the portal, go to Authentication > Social / Enterprise Login.
Enable Sign in with Google.
Fill in the Client ID and Client Secret with the values obtained from the previous step.
Save the settings.
🎉Done! You have just added Google Sign In to your apps!
Your end-users can now sign in with Google on Authgear pre-built Log In and Sign Up page. Existing end-users can connect their account to Google in the User Settings page.
Learn how to update a User profile's custom attributes on sign-up using Hooks
Using Hooks you can put extra information into the user profile's custom attributes programmatically. This is useful for Profile Enrichment where making your current customer data better by adding more details from outside sources.
Here are easy steps to achieve this:
Step 1. Make sure that you have an Authgear account. If you don't have one, you can create it for free on the Authgear website. Start by logging into your Authgear dashboard.
Step 2. Go to User Profile → Custom Attributes page.
Step 3. Add 3 new attributes there, namely city, name, and timezone:
Step 4. Navigate to your Authgear Dashboard's Advanced->Hooks section.
Step 5. Add a new Blocking Event.
Step 6. Choose the Block Hook Type as the TypeSctipt and set the Event option to User pre-create. You will write a new Typescript function from scratch.
Step 7. Click on Edit Script under the Config option.
Step 8. Write a function logic for how you integrate any external API to populate custom attributes into the editor. For example.
export default async function(e: EventUserPreCreate): Promise
{
// API Key for IP Geolocation
const apiKey = 'MY_API_KEY';
// Any random IP address
const ipAddress = '8.8.8.8'
// Fetch data from the IP Geolocation API
const response = await fetch(`https://api.ipgeolocation.io/ipgeo?apiKey=${apiKey}&ip=${ipAddress}`);
const data = await response.json();
return {
is_allowed: true,
mutations:{
user: {
custom_attributes: {
"city": data.city,
"country": data.country_name,
"timezone": data.time_zone.name
}
}
},
};
}Step 9. Now if you navigate to User Management and Add a new user.
Step 10. After the user is created, you should able to see custom attributes values have been updated for the user:
Once you learned how to update user profiles, now you can discover different ways of accessing user profiles in Authgear.
Settings for requiring users to reset their password if they haven't logged in after specific number of days
You can set up your Authgear project such that a user's password expires after a specific number of days. When a user logs in after the password expiry date, they'll see a prompt to change their password before they're redirected back to your app.
In this post, you'll learn how to set the Password Expiry feature in the Authgear Portal.
To enable password expiry, first, log into the Authgear portal, select your project then navigate to Authentication > Login Methods. Next, select a Login method that supports password, then switch to the Passwords tab and scroll to the Password Expiry section. Toggle the "Force password change on next login if it has expired" button to enable password expiry.
You can use the text field labeled Force change since last update (days) to specify the number after which a user's password should expire. The value should be the number of days in the future from the last date the user set or updated their password. For example, setting the value to 90 means the user's password will expire 90 days later from the last date they set or updated their password.
Once you're done, click on the Save button at the top of the page to keep your changes.
Resources about setting up your own custom User Interface for Login, Signup, Account recovery and more.
You can build your own custom UI powered by the new Authentication Flow API. Here are some resources for getting started:
Login with NFTs help developers build Web3 apps without blockchain knowledge
Sign In With Ethereum(also known as SIWE) introduces a new way of authenticating and identification of a user using their crypto-wallet addresses. Authgear saves you from all the complex setups and brings you the technology of the future with just a simple click.
The Sign In With Ethereum standard is built on the specification, which is typically performed on Web3 providers.
To make this as simple as possible, the following mainstream consumer-facing web3 providers are selected to be the gateway connecting your application and users.
These providers are typically supported by browsers with WebExtensions API, namely Chrome, Firefox, Edge, and Brave.
To assist you in building the greatest NFT-gated application ever, Authgear adds extra information to the user info that indicates whether the user owns NFT/NFTs of your selected NFT collection.
At the current stage, the following token types are supported:
In the object of a user, the wallet address and the NFTs owned can be found.
Here is an example of such user:
To enable "Sign In With Ethereum" to your apps and websites:
In your project portal, go to "Authentication > Ethereum & NFT"
Turn on the "Login With Ethereum" toggle
Select your favourite blockchain network from the "Network" dropdown below
Press "Save" then "Confirm" and 🎉 now your app supports Sign in with Ethereum!
To prevent Web2 and Web3 identities being mixed together, Authgear has made it so that enabling "Sign In With Ethereum" would disable all your previously enabled identities and primary authenticators.
To go back to using Web2 authentication methods, you will have to disable "Sign In With Ethereum" and reconfigure your identities and authenticators.
To populate user info with NFT tokens from the collections of your choice:
In your project portal, go to "Authentication > Ethereum & NFT"
Ensure "Login With Ethereum" toggle is checked
Select the blockchain network from the "Network" for where your NFT collection is based on
In the "NFT Collections" section, press "Add Collection", this will add an extra text field to the section
Enter the contract address of the NFT collections in the "Contract Address" text field
Select the token type of the contract address
In the case of an ERC-1155 being selected, you will be prompted with a token tracking dialog
Enter the desire token IDs and press "Continue"
Press "Add" and you will see your collection is now in the pending collection list
Press "Save" then "Confirm" and 🎉 your app is now monitoring the NFT collection!
If an error is shown that states that your NFT collection is not supported, it is possible that the collection has an alternative implementation of the ERC-721 or ERC-1155 standard
Using Authgear as an OpenID Connect Provider for any OIDC compatible applications.
If your application supports logging in using an OpenID Connect provider, you can use Authgear as the provider.
Go to Applications on the left menu bar.
Click ⊕Add Application in the top tool bar.
Input the name and select the application type OIDC Client Application. Click "Save".
You will see a link to this guide that can help you for setting up, then click "Next".
In the URIs section, fill in the Authorized Redirect URIs with your application's redirect uri.
Obtain the OpenID Connect configuration:
You can obtain the Client ID and Client Secret from the Basic Info section.
You can obtain the OIDC Endpoints from the Endpoints section.
Provide the OpenID Connect configuration to your application.
🎉 Done! You should be able to use Authgear to log in to your application.
In this section, we are going to demonstrate how to use Authgear as the OIDC provider for WordPress login.
Follow the previous section () to setup an OIDC Client Application.
We are going to use plugin . Or you can use any other OIDC compatible plugin. Download and activate it in your WordPress site.
Go to Setting > OpenID Connect Client.
Fill in the form
Client ID: Obtain the Client ID from the Basic Info section.
Client Secret Key: Obtain the Client Secret from the Basic Info section.
OpenID Scope: Space separated list of scopes the plugin could access.
Example: openid offline_access https://authgear.com/scopes/full-userinfo.
https://authgear.com/scopes/full-userinfo is needed to obtain user's profile (e.g. email). Otherwise the plugin will be able to get the user id only.
Login Endpoint URL: Obtain Authorization Endpoint from the Endpoints section.
Example: https://{AUTHGEAR_APP_DOMAIN}/oauth2/authorize.
Userinfo Endpoint URL: Obtain Userinfo Endpoint from the Endpoints section.
Example: https://{AUTHGEAR_APP_DOMAIN}/oauth2/userinfo.
Token Validation Endpoint URL: Obtain Token Endpoint from the Endpoints section.
Example: https://{AUTHGEAR_APP_DOMAIN}/oauth2/token.
End Session Endpoint URL: Keep it empty.
Identity Key: Where in the user claim to find the user's identification data.
Suggest to use sub which is the user id in Authgear.
Setup the user claim keys based on your project login method setting.
If your project is using email to login
Nickname Key: Set it to email.
Email Formatting: Set it to {email}.
If your project is using phone to login
Nickname Key: Set it to phone_number.
Email Formatting: Clear it.
If your project is using username to login
Nickname Key: Set it to preferred_username.
Email Formatting: Clear it.
At the bottom of the plugin settings page, you will be able to obtain the Redirect URI. Go to Authgear portal, add the uri to the Authorized Redirect URIs.
Perform faster authentication flow via another app installed on the same device.
This may be familiar for users from UK, which many neobanks are using the app2app mechanism to authorize the money transfer from 1 bank app to another.
The App2App mechanism allows one app to authenticate the user using another apps connected to the auth server installed on the same device. This is achieved by universal links and the apps do not need to share the session via the system browser or the refresh tokens via the token storage.
Please note that this is not the Single Sign-on feature, if your are offering multiple apps under the same brand and wish the users to use a shared login session among their apps in the device, you may want to use instead. App2app should be used when:
The session cannot be shared via the browser cookies
The session cannot be shared via a common token storage
An app can start the authentication flow by opening a link to another app, instead of using the authorization endpoint. The app which handles the link should validate the authentication request, then could return a valid authorization code. The valid code is then transferred to the original app using universal link. The initiating app can use that authorization code to perform code exchange for tokens with Authgear.
A detailed explanation on the technology can be found in .
Go to the Application detail page of the authorizing app, i.e. the app which handles the app2app authentication requests.
Scroll to the bottom and you will see the App2App config panel.
Select Enable App2App login for this Application"
Migration mode offers a less secure mechanism which helps older user sessions to participate in App2App. DO NOT enable it unless there is migration problem.
Go to the Application detail page of the initiating app, i.e. the app which initiates the app2app authentication requests.
In the redirect URIs, a universal link that's capable of opening this app should be set.
Define and set up the universal links for both apps, for example:
https://a.example.com/authorize should open the authorizing app (App A)
https://b.example.com/redirect should open the initiating app (App B)
In App B, call startApp2AppAuthentication(options: App2AppAuthenticateOptions) to initiate the app2app login
App2AppAuthenticateOptions.authorizationEndpoint should be an url of an universal link pointing to App A, i.e. https://a.example.com/authorize
App2AppAuthenticateOptions.redirectUri should be an URI for the authorizing app to return the authentication result. It must be an universal link which opens the current app. i.e. https://b.example.com/redirect
In App A, upon receiving the app2app login request
Call parseApp2AppAuthenticationRequest(url: URL): App2AppAuthenticateRequest?
The result will be null if the url is not a valid app2app request.
You can approve or reject the app2app request in App A
Approve: approveApp2AppAuthenticationRequest(request: App2AppAuthenticateRequest)
Approves an app2app request returning the result through the redirect URI.
request should be the return value of parseApp2AppAuthenticationRequest.
This method must be called when then SDK session state is AUTHENTICATED, and the current session supported app2app authentication by providing a device_key, or else an error will be thrown.
Reject: rejectApp2AppAuthenticationRequest(request: App2AppAuthenticateRequest, error: Error)
Rejects an app2app request, returning an error through the redirect URI.
request should be the return value of parseApp2AppAuthenticationRequest.
error is the reason to reject the request.
When it's back to App B, call handleApp2AppAuthenticationResult(url: URL)
This method should be called by the app which initiate the app2app authentication flow, and when received the result through the universal link, url should be the URL of the universal link received.
Learn how to switch between ASWebAuthenticationSession/Custom Tabs to WebKitWebView using Authgear Mobile SDKs.
The default behavior of the Authgear Mobile SDKs is to launch AuthUI in in iOS and in Android. The latest versions of the mobile SDKs include WebKitWebViewUIImplementation a UIImplementation which makes it possible to customize the above behavior. For example, setting the uiImplementation attribute in the configure() method of the Authgear Capacitor SDK to WebKitWebViewUIImplementation() will open AuthUI using on iOS and on Android.
Omitting the uiImplementation attribute in the configure() method will fall back to the default behavior (launching AuthUI in ASWebAuthenticationSession/Custom Tabs). You can also explicitly choose the default behavior by setting uiImplementation to DeviceBrowserUIImplementation().
The following examples show how to set the uiImplementation attribute.
Setting uiImplementation to WebKitWebViewUIImplementation in the above example will change the behavior of your application from the default to using WKWebView on iOS and android.webkit.WebView on Android.
WebKitWebViewUIImplementation allows you to customize some parts of the UI. You can do this by passing your customization options as parameters in WebKitWebViewUIImplementation(). You can customize the following parts of the UI:
Android
actionBarBackgroundColor: Use this option to customize the color of the action bar on the WebView Activity screen. The value should be of type integer according to this encoding:
actionBarButtonTintColor: This option can be used to set the color of the icons and texts on the action bar. The value should also be of type integer and use the encoding here: .
iOS
navigationBarBackgroundColor: This option can be used to customize the color of the navigation bar on iOS. The value should be of type or an integer (React Native or Ionic SDKs) using the following encoding: .
navigationBarButtonTintColor: This option sets the color of icons and texts on the navigation bar. The value should also be UIColor or an integer (React Native or Ionic SDKs) using the same encoding as navigationBarBackgroundColor.
modalPresentationStyle: Sets the type of modal to be shown. The value can be any of the following: "automatic", "fullScreen", "pageSheet".
The following examples show how to set custom background color, tint color, and modal presentation style.
You can implement your own custom UIImplementation when the WebKitWebViewUIImplementation does not meet the requirements of your use case.
The WebKitWebViewUIImplementation class itself is basically a class that implements UIImplementation and overrides the openAuthorizationURL()method. Hence your custom implementation may look like this:
Then, you can use your custom implementation like this:
To get a deeper understanding of how to implement your UIImplementation, see the code for the implementation.
When you drop the default DeviceBrowserUIImplementation to use your own custom UI implementation that uses WebView, it is important to note that you'll be losing the following features and services:
Login with Google: Google prohibits the use of WebKitWebView with the Google SSO. Learn more here: . As a result WebKitWebViewUIImplementation and Google SSO cannot be used together.
Passkey: Passkey is not supported in WebKitWebView.
JavaScript / TypeScript Hooks is one of the supported hooks to receive events.
JavaScript / TypeScript Hooks are written as a . The module is executed by .
The module MUST have a of a function taking 1 argument. The argument is the . The function can either be synchronous or asynchronous.
If the Hook is registered for a blocking event, the function MUST return a value according to the .
The Hooks DO NOT have access to file, or environment. They only have access to external network.
The stdout and the stderr of the Hooks are both ignored. Your hooks MUST NOT assume anything on the arguments and the stdin of the module.
In the portal, go to Advanced > Hooks.
Add your Hooks in Blocking Events and Non-Blocking Events, depending on which event you want to listen to.
Click Save.
Here is an example of a Hook for a blocking event.
An example to mutate a JWT token
Here is an example of a Hook for a non-blocking event.
is a TypeScript definition that aids you in writing a Hook. You can see the full definition at
If you are a Visual Studio Code user, you can to take full advantage of the definition.
Alternatively, you can edit your hook and use the Deno CLI to typecheck.
This guide shows how to use Custom Login/Signup pages UI in Native Apps
Implementing custom login and signup screens in any native application (Flutter, React Native, Kotlin, or iOS) doesn't require much change to the code for your existing native apps that use Authgear.
At the moment, we don't support direct interaction between your native code and the Authentication Flow API that powers custom UIs. That means you'll need to use the platform-specific we already provide and call the authenticate method to start the authentication flow.
In this guide, we'll teach you how to implement custom authentication UIs in a Flutter app using the Flutter SDK and Authentication Flow API.
The main factor that enables custom UI in your Authgear application is specifying a custom UI URL in Authgear. Once this value is set, calling the authenticate method in any of the native SDKs will open the custom login/signup UI in a Web View instead of the default Auth UI.
If you do not already have an Authgear application, login to Authgear Portal and navigate to Application > Add Application to create an application.
Enter your application name and select Native App as Application Type then click the Save button to continue.
In this step, you'll add a URI that Authgear will use to return your application to the front of the screen when authentication is complete.
For our example Flutter app, this URI will start with the package name for our app followed by ://host/path.
To set the Redirect URI, scroll down to the Authorized Redirect URI under the URIs section of your application configuration page. Enter the correct URI for your application then click Save.
Note: You can find the package name for your Flutter app in android/app/build.gradle under android > namespace.
Setting a value for Custom UI URI in Authgear Portal will redirect users of your application to your custom authentication UI instead of the default Auth UI. Hence, this is the most important step in adding custom login and signup UIs to your native application.
To set the Custom UI URI, scroll down to the Custom UI section on your application configuration page in the Authgear Portal. Then, add the URL to your custom login/signup page in the Custom UI URI text field.
This URL is a publicly accessible link on the web that hosts the code that implements your custom UI and does the actual interaction with the Authentication Flow API. Check out our examples for implementing custom login and signup UI pages using and to learn more.
If you have an existing Flutter app that implements the default AuthUI, it may not require any change to make use of the Custom UI URI you've set in the previous step.
But if you're creating a new application, follow these steps:
Run the following command to create a new Flutter application:
Make sure you have your local machine set up for Flutter development before you run the above command. See the official guide for setting up Flutter . Once you're down, open the new project folder in your preferred code editor (VS Code or Android Studio).
Now install the Authgear Flutter SDK by running the following command from your project directory:
To implement Authgear in your Flutter app use the SDK, please follow these instructions on the .
You can also find similar guides for other native platforms below:
To test your application, run the following command:
Tap on the Authenticate button when your app runs on a physical device or emulator. You should see the custom UI instead of the default Auth UI.
A very important to remember from the above guide is that when using custom authentication UI with a native application you can set up your app as you usually would with the default Auth UI. However, the main difference is that you should provide a link to your custom UI in the Authgear portal.
To learn more about using Authgear in your Flutter app, check out this page about the .
Guide on the different ways you can modify the profiles of the users of your application.
Authgear offers multiple ways for you (the admin) and your users to update user profiles. As an admin, you can modify profile attributes for any of the users of your Authgear project. End users on the other hand can modify their own profile using the Profile settings UI provided by Authgear or using a custom logic you implement in your code.
In this guide, we'll walk through all the options for updating user profiles.
To follow along, you need to have the following:
An Authgear Account. You can create one for free .
At least one registered user on your Authgear Project.
At the end of this post you'll be able to do the following:
Update a user profile as an admin from the Authgear Portal or using Admin API.
Update a user profile as an end user via the profile settings page.
You can update the profiles for your users as an admin using either the Authgear Portal or the Admin API. Below are guides on how to use both options.
This option provides an easier way to manage your users within the Authgear Portal.
To update user profiles using this method, first, log in to the , then select your project.
Next, Navigate to User Management section to view all the users currently registered under your project.
Click on the ID (name, email, or phone number) for the user you wish to update their profile to open the edit user details page.
From the edit user details page, you can edit the selected user's standard attributes such as Given Name, Family Name, Birthday, etc. If you scroll down on the edit user details page, you'll find more fields like the custom attributes that you can also update.
Once you're done, click the Save button to keep your update.
The second option available for updating user profiles is the Admin API. The Admin API is a GraphQL API that you can use to manage your users. You can access Admin API from the or by making requests to the API from your code or a client like Postman.
To update a user profile via the Admin API, you need to create a mutation like the following:
First, create a variable with all the existing profile attributes for the user, then include new fields or update the value for the fields you wish to update. Note that omitting an existing attribute in your variable will cause Authgear to delete that attribute.
Variable
Mutation
For a detailed guide on making a GraphQL query to update user profiles, see our dedicated post on updating.
Also, see the to learn how to update custom attributes of a user profile.
Authgear provides a user settings page in addition to the default Auth UI for user registration and login.
Your users can update their profile from this settings page by following the steps below:
First, within your application, provide a link to the user settings page for your Authgear project. The URL should look like this: https://<YOUR_AUTHGEAR_ENDPOINT>/settings. Note that users can not access this link directly without logging in first.
After a user logs in and visits the settings page, they can view their profile photo and other details. To access the edit profile page, the user should click on the More link under the My profile card.
On the edit profile page, the user can set their profile photo and update other details for their profile.
To edit an attribute, the user should click on the edit icon beside that attribute.
{
"x_web3": {
"accounts": [
{
"account_identifier": {
"address": "0xec7f0e0c2b7a356b5271d13e75004705977fd010"
},
"network_identifier": {
"blockchain": "ethereum",
"network": "1"
},
"nfts": [
{
"contract": {
"name": "ExampleCollection",
"address": "0x57f1887a8bf19b14fc0df6fd9b2acc9af147ea85",
"type": "erc1155"
},
"tokens": [
{
"token_id": 1,
"transaction_identifier": {
"hash": "0x1a2bed0813d524955926eb190018d9d8738836265b352e1c43dc2d5762f9c20B"
},
"block_identifier": {
"index": 12961059,
"timestamp": "2022-09-01T08:17:50Z"
},
"balance": "200"
}
]
}
]
}
]
}
}import { HookEvent, HookResponse } from "https://deno.land/x/[email protected]/mod.ts";
export default async function(e: HookEvent): Promise<HookResponse> {
// This hook simply allows the operation, which is identical to no-op.
return { is_allowed: true };
}import {HookResponse, EventOIDCJWTPreCreate } from "https://deno.land/x/[email protected]/mod.ts";
export default async function(event: EventOIDCJWTPreCreate): Promise<HookResponse> {
return {
is_allowed: true,
mutations: {
jwt:{
payload:{
...event.payload.jwt.payload, //the original payload in the jwt
"https://myapp.com": {
"custom_field": "custom_value"
}
}
}
}
};
}import { HookEvent } from "https://deno.land/x/[email protected]/mod.ts";
export default async function(e: HookEvent): Promise<void> {
// This hook does nothing, which is identical to no-op.
}$ deno check YOUR_HOOK.tsflutter create myappflutter pub add flutter_authgearflutter run


{
"standardAttributes": {
"family_name": "John",
"given_name": "Doe",
"gender": "male"
}
}mutation ($standardAttributes: UserStandardAttributes) {
updateUser(input: {userID: "<ENCODED USER ID>", standardAttributes: $standardAttributes}) {
user {
id
standardAttributes
}
}
}


final authgear = Authgear(
clientID: CLIENT_ID,
endpoint: ENDPOINT,
isSsoEnabled: true,
);final authgear = Authgear(
clientID: CLIENT_ID,
endpoint: ENDPOINT,
tokenStorage: TransientTokenStorage(),
);Authgear(
clientId: "<CLIENT_ID>",
endpoint: "<AUTHGEAR_ENDPOINT>",
tokenStorage: tokenStorageInstance,
uiImplementation: WKWebViewUIImplementation(),
isSSOEnabled: isSSOEnabled,
app2AppOptions: app2AppOptions
)authgearCapacitor.configure({
clientID: "<CLIENT_ID>",
endpoint: "<AUTHGEAR_ENDPOINT>",
uiImplementation: new WebKitWebViewUIImplementation({
ios: {
modalPresentationStyle: "fullScreen"
},
android: {
actionBarBackgroundColor: 0xffffff00,
actionBarButtonTintColor: 0xff000000
}
}),
tokenStorage: new TransientTokenStorage()
});authgear
.configure({
clientID: "<CLIENT_ID>",
endpoint: "<AUTHGEAR_ENDPOINT>",
uiImplementation: new WebKitWebViewUIImplementation({
ios: {
modalPresentationStyle: "fullScreen"
},
android: {
actionBarBackgroundColor: 0xffffff00,
actionBarButtonTintColor: 0xff000000
}
})
})private int actionBarBackgroundColor = 0xffffff00;
private int actionBarButtonTintColor = 0xff000000;
private Authgear authgear = new Authgear(
getApplication(),
"<CLIENT_ID>",
"<AUTHGEAR_ENDPOINT>",
tokenStorage,
new WebKitWebViewUIImplementation(actionBarBackgroundColor, actionBarButtonTintColor),
isSsoEnabled,
null,
app2appOptions
);Authgear(
clientId: "<CLIENT_ID>",
endpoint: "<AUTHGEAR_ENDPOINT>",
tokenStorage: tokenStorageInstance,
uiImplementation: WKWebViewUIImplementation(
modalPresentationStyle: UIModalPresentationStyle.fullScreen,
navigationBarBackgroundColor: UIColor.yellow,
navigationBarButtonTintColor: UIColor.black
),
isSSOEnabled: isSSOEnabled,
app2AppOptions: app2AppOptions
)class MyUIImplementation implements UIImplementation {
async openAuthorizationURL(options: OpenAuthorizationURLOptions):
Promise<string> {
// Call your own plugin code to implement this.
}
}authgear.configure({
clientID: "my_client_id",
endpoint: "my_endpoint",
isSSOEnabled: true,
uiImplementation: new MyUIImplementation(),
})authgearCapacitor.configure({
clientID: "<CLIENT_ID>",
endpoint: "<AUTHGEAR_ENDPOINT>",
isSSOEnabled: true,
uiImplementation: new WebKitWebViewUIImplementation(),
tokenStorage: new TransientTokenStorage()
});authgear
.configure({
clientID: "<CLIENT_ID>",
endpoint: "<AUTHGEAR_ENDPOINT>",
uiImplementation: new WebKitWebViewUIImplementation()
})

Learn about what the Authentication Flow API is and how to use it to implement your own custom user interface (UI) for authentication.
Build your own custom UI for login, signup, and more powered by the Authentication Flow API.
By default, when you set up an Authgear project, it makes use of the regular AuthUI offered by Authgear. Although AuthUI offers many customization options such as the ability to change the theme and color or add your brand logo to authentication pages, you might have more needs. With the Authentication Flow API, you can build your own authentication UI from the ground up, and using your preferred programming language and tool.
The Authentication Flow API is an REST HTTP API that you can use to create and run an authentication flow. You can use this API to create your own custom UI for pages like login, signup, account recovery, 2FA, and more.
To use the API on its own you make an HTTP request to one of the valid endpoints as shown below:
Endpoint: {your-authgear-project-domain}/api/v1/authentication_flows
Request method: POST
Request header:
{
"Content-Type": "application/json",
"Accept": "application/json",
}All requests to the API should include the above header.
Request body:
{
"type": "login",
"name": "default"
}The following is a sample of the response you would get from the Authentication Flow API for the above request:
{
"result": {
"state_token": "authflowstate_VGHZ8SBCKGZK2KW84TCAKWGM8QZH0B69",
"type": "login",
"name": "default",
"action": {
"type": "identify",
"data": {
"options": [
{
"identification": "phone"
},
{
"identification": "email"
},
{
"identification": "oauth",
"provider_type": "google",
"alias": "google"
}
]
}
}
}
}The above response means you've successfully started a new login flow using the API.
To continue and finish the authentication flow, you can send the value for state_token from the above response in your next HTTP request to the api/v1/authentication_flows/states/input endpoint like the example shown below:
Endpoint: {your-authgear-project-domain}/api/v1/authentication_flows/states/input
Request method: POST
Request body:
{
"state_token": "authflowstate_VGHZ8SBCKGZK2KW84TCAKWGM8QZH0B69",
"batch_input": [
{
"identification": "email",
"login_id": "[email protected]"
},
{
"authentication": "primary_password",
"password": "12345678"
}
]
}In this second request (or second step of the authentication flow), we use the state_token to pass the user ID and password for the user we want to log in to our application.
You may send more requests just like this second request depending on the number of steps required for your specific authentication flow.
To use the Authentication Flow API to build your custom UI, you need to configure a Custom UI URI in the Authgear portal. This URI should point to your custom authentication page.
The following flowchart shows the steps in a simple Authentication Flow API implementation:
When you use the authentication flow API to power your custom UI, the authentication flow for your app will start with your app sending an authorization request to Authgear's authorization server as shown in step 1 in the figure above.
If you have Authentication Flow API enabled and a Custom UI URI set for your Authgear App, the authorization server will redirect your users to the custom UI as shown in step 2 above.
In your custom UI, implement the code that interacts with the Authentication Flow API (using HTTP requests) as demonstrated in step 3 of the above figure.
In an authentication flow with multiple steps, the custom UI and Authgear's authentication server may perform steps 3 and 4 in the above figure multiple times. In such cases, only the final response at the end of the authentication flow will include a finish_redirect_url.
You must redirect your user to the finish_redirect_url to complete the authentication flow.
To dive deeper into how to use the Authentication Flow API to power your custom UI, check out the following tutorials for your preferred programming languages and frameworks.
Allow end-users to initiate account deletion within the apps.
In Oct 2021, that all apps allowing users to create accounts should also provide ways for them to initiate account deletion within the apps, starting from January 31, 2022. It is also a good design to give your end-users more control over their data.
On Jan 22, 2022 to extend the deadline to June 30 2022.
In the pre-built page, you can show a button for the end-users to initiate account deletion.
Enable this button in the Advanced -> Account Deletion page in the Portal
Note that if you enable this feature, you have to prepare for encountering invalid session every time your users close User Settings in your mobile apps. If your users unfortunately decided to delete their account in User Settings, all their sessions will become invalid immediately.
You must verify the validity of the session every time the User Settings is closed. The open method in the SDK is blocking. You can verify if the user session is still valid when the method resolves. Here is an example with the React Native SDK:
When the end-user has initiated the account deletion. Their account will be deactivated and scheduled for deletion after the grace period.
Deactivated users are always disabled. They will not be able to complete the authentication process. The is_deactivated status signal that the is_disabled status was turned true by the end-user themselves rather than the admin.
You can set the grace period for how long the user account will be deactivated before deleted from the system. The default value is 30 days, you can choose between 1 to 180 days.
An end-user account can also be deleted using the Portal. In the User Management page, click the Remove User button to remove them immediately or schedule the deletion.
Alternatively, if you did not enable the "Delete Account" button in User Settings, you can implement the button in your app by yourself. You can schedule a deletion or delete immediately.
Your backend server can invoke the mutation scheduleAccountDeletion with the to initiate the account deletion.
Here is an example:
GraphQL
Your backend server can invoke the mutation scheduleAccountDeletion with the to initiate the account deletion.
Here is an example:
GraphQL
You may listen to the following events to integrate the deletion behavior to your apps.
Non-blocking events
user.disabled
user.reenabled
user.deletion_scheduled
user.deletion_unscheduled
user.deleted
Blocking event
user.pre_schedule_deletion
See the event details in .
Identity and Access Management (IAM) is a framework that manages digital identities and their access to various resources within a network or systems. IAM technologies and practices enable the right individuals to access the right resources at the right times and for the right reasons. For example, if a user wants to access a resource, IAM management verifies the user and controls their access to the resources.
Authgear acts as an IAM provider that is a gatekeeper to the resources you provide to customers as web and mobile applications, APIs, etc. The gatekeeper initiates authorization as outlined in . The addition of the layer adds authentication to secure your users’ digital identities and your product.
In the context of identity and access management, a "relying party" is a system or application that relies on a separate system such as Authgear client SDK or libraries to authenticate a user's identity. Essentially, the relying party trusts another system to tell it that a user is who they claim to be.
Here's an example to illustrate the concept:
A user wants to log into an online service (the relying party).
The relying party doesn't handle authentication directly but instead relies on a trusted third-party system like Authgear.
The user logs into the third-party system, which verifies their identity.
The third-party system tells the relying party that the user's identity has been verified.
The relying party then grants the user access based on this verification.
The authorization framework is a protocol that allows a user to grant a third-party website or application access to the user's protected resources, without necessarily revealing their long-term credentials or even their identity. It’s the standard that allows third-party developers to rely on large social platforms like Facebook, Google, and Twitter for login. Authgear generates access tokens for API authorization scenarios, in (JWT) format. The permissions are represented by .
A simple identity layer that sits on top of OAuth 2.0, makes it easy to verify a user’s identity and obtain basic profile information from the identity provider. OIDC is another open standard protocol. You can Authgear as an Identity Provider (IdP) that uses OIDC standards.
(JWTs) are an open standard that defines a compact and self-contained way for securely transmitting information between parties as a JSON object. JWTs can be verified and trusted because they’re digitally signed. They can be used to pass the identity of authenticated users between the identity provider and the service requesting the authentication. They also can be authenticated and encrypted.

// This method blocks until the user closes User Settings.
await authgear.open(Page.Settings);
// One way to verify the validity of the session is to get User Info once.
await authgear.fetchUserInfo();// This method blocks until the user closes User Settings.
await authgear.open(SettingsPage.settings);
// One way to verify the validity of the session is to get User Info once.
await authgear.getUserInfo();// This method blocks until the user closes User Settings.
await authgear.OpenAsync(SettingsPage.Settings);
// One way to verify the validity of the session is to get User Info once.
await authgear.FetchUserInfoAsync();mutation {
scheduleAccountDeletion(input: {
userID: "USER_ID"
}) {
user {
id
isDisabled
isDeactivated
disableReason
deleteAt
}
}
}mutation {
deleteUser(input: {
userID: "USER_ID"
}) {
deletedUserID
}
private Authgear authgear = new Authgear(
getApplication(),
"<CLIENT_ID>",
"<AUTHGEAR_ENDPOINT>",
tokenStorage,
new WebKitWebViewUIImplementation(),
isSsoEnabled,
null,
app2appOptions
);
Authentication for Express.JS apps with Authgear and OAuth2
Authgear makes it easy to add user authentication to a regular web app that is not powered by any framework. You can do this by implementing OAuth2 in your app with Authgear as the provider.
In this post, you'll learn how to add user authentication to an Express.js application using Authgear.
How to create an Authgear Application
How to sign in with Authgear from an Express app using an authorization code.
How to request user info from Authgear
You'll need the following to follow along with this tutorial:
Node.js Installed
A free Authgear account. Sign up for one here.
For this tutorial, we'll be building a simple Express app that has the following features:
A landing page with a login link that takes users to the login route.
A /login route that redirects users to the Authgear OAuth authorization page.
Logic that exchanges the authorization code from Authgear for an access token.
A page that uses that access token to fetch user info from Authgear.
In order to use Authgear as an OAuth identity provider in your application, you need to configure an Authgear project. This project gives you all the credentials that you'll be using to send requests from your application.
Now let's create a new application.
Log in to the Authgear portal, and select your project. From the project dashboard, navigate to the Applications section and enter your application details as shown below:
Once you're done, click on Save to reveal the OAuth configuration. The application configuration page is where you can find your OAuth credentials like client ID, client secret, and a list of supported endpoints. Note down the configuration details as you'll use them later in your Express app.
You need to provide one or more URLs within your app for Authgear to redirect to after user authorization.
To add a URL, scroll to the URIs and click on the Add button. Enter the full URL for the page you wish to redirect users to after login. For our example app for this post, we'll set this URL to http://localhost:3000.
It is now time to set up the Express app that will be interacting with Authgear. To do that, create a new folder with the name "express-auth-example", this will be your Express project folder. Next, run the following command from the project folder :
npm install express
We'll be using the Axios library to make HTTP requests in the example app. Install Axios to your project by running this command:
npm install axios
Once Express is installed, create a new app.js file in the root of your project folder and add the following code to the file:
const express = require('express');
const axios = require('axios');
const config = {
client: {
id: "",
secret: "",
redirect_url: "http://localhost:3000"
},
auth: {
tokenHost: 'https://your-project.authgear.cloud',
tokenPath: '/oauth2/token',
authorizePath: '/oauth2/authorize',
},
};
app.get("/", async (req, res) => {
res.send(`
<div style="max-width: 650px; margin: 16px auto; background-color: #EDEDED; padding: 16px;">
<p>Hi there!</p>
<p>This demo app shows you how to add user authentication to your Express app using Authgear</p>
<p>Checkout <a href="https://docs.authgear.com">docs.authgear.com</a> to learn more about adding Authgear to your apps.</p>
<a href="/login">Login</a>
</div>
`);
});
app.listen(3000, () => {
console.log("server started!");
});Note: Paste the correct values of client id, client secret, and redirect URL for your Authgear app inside the client object in the config variable. Also, set tokenHost to the hostname part of your Authgear app endpoint URL. That is the part before the first "/". For example, tokenHost for https://example.authgear.cloud/oauth2/token will be https://demo-1-ea.authgear.cloud.
Run your app.js file using the node app.js command. You should get a page like this on a web browser when you visit localhost:3000:
Here we'll be implementing a local login endpoint in our Express app. This endpoint will handle requests from the above login link.
Add a new route to your express app using the following code:
app.get("/login", (req, res) => {
res.redirect(`${config.auth.tokenHost}${config.auth.authorizePath}/?client_id=${config.client.id}&redirect_uri=${config.client.redirect_url}&response_type=code&scope=openid`);
});Now if you save your code and restart your app, clicking on the login link should redirect to the Authgear authorization page.
After the user logs in and grants authorization to your app on Authgear, they are redirected back to the redirect URL you specified earlier. In addition to this redirect, an authorization code is sent via a code URL query parameter.
In this step, we will be exchanging the authorization code for an access code that users can later use to access protected resources.
Update the code for the app.get("/") route to the following:
app.get("/", async (req, res) => {
if (req.query.code != null) {
const data = {
client_id: config.client.id,
client_secret: config.client.secret,
code: req.query.code,
grant_type: 'authorization_code',
response_type: 'code',
redirect_uri: config.client.redirect_url,
scope: "openid",
};
try {
const getToken = await axios.post(`${config.auth.tokenHost}${config.auth.tokenPath}`, data, {
headers: { "Content-Type": "application/x-www-form-urlencoded" }
});
const accessToken = getToken.data.access_token;
console.log(accessToken);
res.send("Welcome");
} catch (error) {
console.log(error);
res.send("An error occoured! Could not complete login. Error data: " + error);
}
}
else {
res.send(`
<div style="max-width: 650px; margin: 16px auto; background-color: #EDEDED; padding: 16px;">
<p>Hi there!</p>
<p>This demo app shows you how to add user authentication to your Express app using Authgear</p>
<p>Checkout <a href="https://docs.authgear.com">docs.authgear.com</a> to learn more about adding Authgear to your apps.</p>
<a href="/login">Login</a>
</div>
`);
}
});The above code sends an HTTP POST request to the token endpoint. The authorization code we got from the previous step is sent along with other client credentials in the HTTP request body. The header should contain "Content-Type": "application/x-www-form-urlencoded"
A valid access token is returned in the response to the Axios response in response.data.access_token.
We can now use this access token to make authenticated requests to protected resources in our app or from Authgear endpoint. In the next step, we'll attempt to get the current user's info from Authgear using the access token.
Authgear provides an endpoint where your application can request user info. This endpoint will return the user's details on Authgear like their email address, gender, full name, and more.
To get user info in our example app, in app.js, replace this line :
res.send("Welcome");with the following code:
//Now use access token to get user info.
const getUserInfo = await axios.get(`${config.auth.tokenHost}/oauth2/userinfo`, { headers: { "Authorization": "Bearer " + accessToken } });
const userInfo = getUserInfo.data;
res.send(`
<div style="max-width: 650px; margin: 16px auto; background-color: #EDEDED; padding: 16px;">
<p>Welcome ${userInfo.email}</p>
<p>This demo app shows you how to add user authentication to your Express app using Authgear</p>
<p>Checkout <a href="https://docs.authgear.com">docs.authgear.com</a> to learn more about adding Authgear to your apps.</p>
</div>
`);This code sends another HTTP request, but this time to the user info endpoint and the request type is GET. The access token is sent as a Bearer authorization header.
At this point, save all changes and restart the application. Try logging in all over again, at the end you should be greeted with "Welcome [your email address]".
And there you have it, you've successfully added user authentication to your Express app using Authgear as the OAuth provider.
You can add so much more to your app with the new Authgear authentication, like protecting your own app endpoint with the access code. You can also store the access token securely to persist the user session using express-session and cookies.
Here's a link to the complete code for our example code on Github.
Learn how to add custom attributes to a JWT Access Token using Authgear
JWTs (JSON Web Tokens) are a common method for securely transmitting information between parties as a JSON object. This information can be verified and trusted because it is digitally signed. With Authgear, it is straightforward to add custom fields to your JWT access tokens.
This how-to guide will walk you through the process of adding custom fields such as User Profiles attributes to a JWT access token payload using Authgear and Javascript Hooks.
Here's an example of the fields in the JWT Access Tokens by default and an explanation of their values.
An Authgear account: You need an Authgear account to follow this guide. If you don't have one, you can create it for free on the Authgear website.
A Registered App: You need a registered application (client) in Authgear.
Make sure the option Issue JWT as access token is enabled in your Application settings in the Portal.
Log into your Authgear account.
Navigate to the Applications tab and choose the existing App.
On the App Configuration dashboard, locate the "Access token" section.
Make the toggle Issue JWT as access token switch on.
With the use of Hooks, Authgear provides flexibility for adding custom logic to your authentication pipeline. You can create a Hook which is triggered any of these Events about to occur. For example, oidc.jwt.pre_create the event happens just before issuing the JWT access token and it can be used to put extra information into the token.
Navigate to your Authgear Dashboard's Advanced->Hooks section.
Add a new Blocking Event.
Choose the Block Hook Type as the TypeSctipt and set the Event option to JWT access token pre-create. You will write a new Typescript function from scratch.
Click on Edit Script under the Config option.
Copy and paste the following into the editor:
import { EventOIDCJWTPreCreate, HookResponse } from "https://deno.land/x/[email protected]/mod.ts";
export default async function(e: EventOIDCJWTPreCreate): Promise<HookResponse> {
return {
mutations:{
jwt: {
payload:{
...e.payload.jwt.payload,
standard_attributes: e.payload.user.standard_attributes,
custom_attributes: e.payload.user.custom_attributes
}
}
},
is_allowed: true
};
}Click on Finish Editing.
Back to the Hooks page from the navigation bar and click on the Save button at the top of the page.
In the above code, we are importing the necessary modules such as HookResponse and EventOIDCJWTPreCreate which are types from the Authgear Deno hook Typescript library. We modify the JWT payload by adding Standard Attributes(e.payload.user.standard_attributes) and Custom Attributes(e.payload.user.custom_attributes) of the user.
There are two ways to test it:
You can do this by decoding the JWT token on your application server side using a JWT decoder and inspecting the payload.
If you created the application type OIDC Client Application, you need to follow the steps below. Expand it to see instructions.
The Admin API & Portal tab in the Audit Log page allows you to analyze and monitor changes and activities that occur on Admin API and the Authgear Portal of your project.
The data under this tab can be handy for securing your Authgear project. For example, whenever an admin on your project downloads the Admin API key, the event is registered under the Admin API & Portal tab.
Activity logs for Admin API and Portal are part of the data the auditLogs query returns.
For example, the following query will return any recent events from Admin API and Portal that have been logged:
query {
auditLogs(first:5){
edges{
node{
activityType
clientID
createdAt
data
}
}
}
}Note: The above request will also include events triggered by users.
The following is a list of the activity types that are logged:
PROJECT_APP_SECRET_VIEWED
An admin downloaded the Admin API key
PROJECT_APP_UPDATED
Project configurations updated
PROJECT_BILLING_CHECKOUT_CREATED
An admin attempted to subscribe to one of the billing plans
PROJECT_BILLING_SUBSCRIPTION_CANCELLED
Billing subscription was canceled
PROJECT_BILLING_SUBSCRIPTION_STATUS_UPDATED
Account billing status is updated
PROJECT_BILLING_SUBSCRIPTION_UPDATED
Billing details updated
PROJECT_COLLABORATOR_DELETED
An admin is removed
PROJECT_COLLABORATOR_INVITATION_ACCEPTED
A user accepted an invitation to become an admin
PROJECT_COLLABORATOR_INVITATION_CREATED
Invitation to add new admin sent
PROJECT_COLLABORATOR_INVITATION_DELETED
A previously sent admin invitation was canceled
PROJECT_DOMAIN_CREATED
A new custom domain name added
PROJECT_DOMAIN_DELETED
A custom domain name was removed
PROJECT_DOMAIN_VERIFIED
A domain name was successfully verified
ADMIN_API_MUTATION_SET_DISABLED_STATUS_EXECUTED
Admin disabled/enabled a user account
ADMIN_API_MUTATION_CREATE_SESSION_EXECUTED
A new session is created
ADMIN_API_MUTATION_ANONYMIZE_USER_EXECUTED
An admin initiated the process to annonymize a normal user. This command will delete all user data like email, full name and phone number
ADMIN_API_MUTATION_CREATE_IDENTITY_EXECUTED
New Identity was created by an admin
ADMIN_API_MUTATION_CREATE_USER_EXECUTED
An admin created a new user
ADMIN_API_MUTATION_DELETE_AUTHENTICATOR_EXECUTED
An authenticator was removed
ADMIN_API_MUTATION_DELETE_AUTHORIZATION_EXECUTED
An athorization was removed
ADMIN_API_MUTATION_DELETE_IDENTITY_EXECUTED
Identity deleted
ADMIN_API_MUTATION_DELETE_USER_EXECUTED
An admin deleted a user
ADMIN_API_MUTATION_GENERATE_OOB_OTP_CODE_EXECUTED
New OTP code generated
ADMIN_API_MUTATION_RESET_PASSWORD_EXECUTED
Password was reset by an admin
ADMIN_API_MUTATION_REVOKE_ALL_SESSIONS_EXECUTED
All sessioned revoked
ADMIN_API_MUTATION_REVOKE_SESSION_EXECUTED
A users session is revoked
ADMIN_API_MUTATION_SCHEDULE_ACCOUNT_ANONYMIZATION_EXECUTED
An admin scheduled the anonymization of a user account
ADMIN_API_MUTATION_SCHEDULE_ACCOUNT_DELETION_EXECUTED
An admin scheduled the deletion of a user
ADMIN_API_MUTATION_SEND_RESET_PASSWORD_MESSAGE_EXECUTED
Password reset message was sent
ADMIN_API_MUTATION_SET_VERIFIED_STATUS_EXECUTED
Verified status for a user is updated
ADMIN_API_MUTATION_UNSCHEDULE_ACCOUNT_ANONYMIZATION_EXECUTED
A previously scheduled user anonymization request was canceled
ADMIN_API_MUTATION_UNSCHEDULE_ACCOUNT_DELETION_EXECUTED
A previously scheduled user deletion request was canceled
ADMIN_API_MUTATION_UPDATE_IDENTITY_EXECUTED
Identity updated by admin
ADMIN_API_MUTATION_UPDATE_USER_EXECUTED
An admin updated details like a user's name, gender and more
Learn how to integrate popular analytics and tracking tools into your Authgear project using Google Tag Manager
Authgear allows you to add third-party user analytics tools to your project using Google Tag Manager.
Google Tag Manager (GTM) is a tag management tool from Google that makes it easy to add marketing tags to your website without modifying the site's source code.
Tags can help you track traffic and user behavior on your website or application.
In this guide, we will show you how to add Google Tag Manager to your Authgear project and send data to Google Analytics. You can also configure Google Tag Manager to send data from your Authgear project to other marketing tags from providers like Facebook.
In order to setup Google Tag Manager and Google Analytics with Authgear, you need to have the following:
Authgear account
Google Tag Manager Account
Google Analytics Account
The process for connecting your GTM account to Authgear is simple and can be done in these two steps.
Google Tag Manager lets you create containers that hold marketing tags. Each container has a unique ID and you'll need this container ID to connect your GTM container to Authgear.
To get the container ID, log in to GTM and navigate to the dashboard's homepage. You should find a list of all your containers and their ID. Note down the ID for the container you wish to connect to Authgear.
If you don't have a container for your Authgear project yet, click on Create Account to create a new container. Enter your domain name for your Authgear project as the container name and select a target platform. For this example, we'll select Web as the target platform.
First, log in to the Authgear Portal, then select your project and navigate to Integrations.
Click on the Connect button next to the Google Tag Manager addon to open the configuration page.
Paste the GTM container ID you got from the previous step then click the Save button. And with that, you've successfully connected your GTM container to Authgear. In the next steps, we'll show you how to create tracking tags and send data to Google Analytics.
Google Analytics is one of the marketing tags we can manage from GTM. In this part of the guide, we'll set up some tags to track page views and user events like clicking on a link or button. The tags will send these data to Google Analytics.
In order to create tags that send data to Google Analytics, you need to have an active data stream on Google Analytics. GTM requires the details for this stream while creating new tags for Google Analytics.
To create a stream, log in to Google Analytics then navigate to the Admin settings page.
Create a new Google Analytics property for your Authgear project or select an existing one. Click on the Data Streams item under the property to view all streams and add a new web stream for your Authgear project.
Note down the Measurement ID for your stream as we'll be using it later to create new tags.
Before we start sending data to Google Analytics, let's create a new variable in Google Tag Manager.
Go back to GTM and select the correct container for your project.
Next, click on the Variables item on the left side navigation bar and create a new user variable with the following details:
Variable type: Data Layer Variable
Data Layer Variable Name: gtm.element.dataset.authgearEvent
Once you're done save the variable as "gtm.element.dataset.authgearEvent" and continue to the next step.
Navigate to Triggers from the sidebar and create a new trigger with the following details:
Trigger type: Click > All Elements
This trigger fires on: Some Clicks
Authgear's implementation of GTM is declarative. The primary button on each page has data-authgear-event attribute. We'll be setting a condition for the "Some Clicks" using that attribute. Configure Some "Click" as shown below:
Next, save the trigger as "Authgear-btn-click" and continue.
Navigate to Tags from the sidebar and create a new tag with the following configurations:
Tag type: Google Analytics > Google Tag
Tag ID: <Your Tag ID is the unique Measurement ID for your stream in Google Analytics (See part 2 step 1 for more details)>
Next, expand the Advanced Settings section and set Tag firing options to Once per page.
Now, scroll down to the Trigger section of the new tag and select All Pages (page view) as the trigger.
Save this new tag as "Auth-gear-pageview" and continue.
In this step, create another tag with the following configuration:
Tag type: Google Analytics > Google Analytics: GA4 Event
Measurement ID: <Your Google Analytics stream measurement ID>
Event Name: gtm.element.dataset.authgearEvent
Next, set the trigger for this tag to the "Authgear-btn-click" trigger we created earlier.
Save the tag as "Authgear-event-tag" and continue to preview the entire setup or publish to go live.
After you publish your changes in Google Tag Manager when users generate hits or click buttons with the data-authgear-event attribute on your project you should see data on Google Analytics.
The following is a list of values for the data-authgear-event attribute:
authgear.button.change_password
authgear.button.change_additional_password
authgear.button.create_password
authgear.button.change_login_id
authgear.button.remove_login_id
authgear.button.resend_oob_otp
authgear.button.enter_oob_otp
authgear.button.enter_password
authgear.button.enter_recovery_code
authgear.button.enter_totp
authgear.button.send_reset_password_code
authgear.button.sign_in
authgear.button.sign_up
authgear.button.sign_out
authgear.button.oauth
authgear.button.reset_password
authgear.button.continue_with_current_account
authgear.button.use_another_account
authgear.button.remove_biometric
authgear.button.schedule_account_deletion
authgear.button.connect_oauth
authgear.button.disconnect_oauth
authgear.button.resend_verification_code
authgear.button.update_profile
authgear.button.regenerate_recovery_code
authgear.button.download_recovery_code
authgear.button.remove_totp
authgear.button.remove_oob_otp
authgear.button.setup_oob_otp
authgear.button.setup_totp
authgear.button.enter_verification_code
authgear.button.revoke_session
authgear.button.revoke_session_group
authgear.button.revoke_all_sessions
Authenticate the incoming HTTP requests by forwarding Authentication to Authgear Resolver Endpoint
In this section, we will explain how to set up a reverse proxy in NGINX to protect your app server from unauthorized access with the Authgear resolver. You can forward the requests without the request body to the resolver endpoint. Authgear will look at the Authorization and Cookie in the HTTP header, verify the token, and respond to HTTP 200 with X-Authgear- headers for session validity, the user id...etc.
If you use a popular reverse proxy on your deployment, such as NGINX, Traefik, or API Gateways such as Apache APISIX, you can configure it with a few simple lines of forward auth config. Your backend should read the returned headers to determine the identity of the user of the HTTP request.
You can also use the forward authentication features of the other popular reverse proxy. e.g.
Authgear provides an endpoint for forward authentication. Subrequests should be made to the following endpoint for authentication.
https://<your_app_endpoint>/_resolver/resolve
After the user is logged in, send an application request to your server from the client app with access token/cookies.
Set up a reverse proxy in your infrastructure to authenticate HTTP requests. The reverse proxy will forward the incoming HTTP requests without the request body to the Authgear Resolver Endpoint.
Authgear resolver parses the access token and returns HTTP headers including the user login state. The headers are starting with x-authgear-.
You have to instruct your reverse proxy to include those extra headers, before forwarding the request to your backend server.
Your backend server looks at the headers and responds to the client app accordingly. e.g. Returns the user's content or HTTP 401 if the user is not logged in.
There are so many reverse proxies available in the wild. So here we are going to illustrate the idea of using Nginx as the reverse proxy.
We will use the module auth_request in NGINX. The module is not built by default, it should be enabled with the --with-http_auth_request_moduleconfiguration parameter.
Run this command and verify that the output includes --with-http_auth_request_module:
$ nginx -V 2>&1 | grep -- 'http_auth_request_module'The trick here is to declare an internal location and use auth_request to initiate a subrequest to the resolved endpoint.
server {
# Use variable in proxy_pass with resolver to respect DNS TTL.
# Note that /etc/hosts and /etc/resolv.conf are NOT consulted if resolver is used.
# See https://www.nginx.com/blog/dns-service-discovery-nginx-plus/
resolver 8.8.8.8;
# Location that requires request authentication
location / {
set $backend http://www.mycompany.com;
proxy_pass $backend;
proxy_set_header Host $host;
# Specify the auth_request directive to initiate subrequests to the to the internal location.
# This corresponds to the Step 2.
auth_request /_auth;
# Copy the `x-authgear-*` headers from the response of the subrequest to Nginx variables.
# This corresponds to the Step 3.
auth_request_set $x_authgear_session_valid $upstream_http_x_authgear_session_valid;
auth_request_set $x_authgear_user_id $upstream_http_x_authgear_user_id;
auth_request_set $x_authgear_user_anonymous $upstream_http_x_authgear_user_anonymous;
auth_request_set $x_authgear_user_verified $upstream_http_x_authgear_user_verified;
auth_request_set $x_authgear_session_acr $upstream_http_x_authgear_session_acr;
auth_request_set $x_authgear_session_amr $upstream_http_x_authgear_session_amr;
auth_request_set $x_authgear_session_authenticated_at $upstream_http_x_authgear_session_authenticated_at;
auth_request_set $x_authgear_user_can_reauthenticate $upstream_http_x_authgear_user_can_reauthenticate;
# Include the headers in the request that will be sent to your backend server.
# This corresponds to the Step 4.
proxy_set_header x-authgear-session-valid $x_authgear_session_valid;
proxy_set_header x-authgear-user-id $x_authgear_user_id;
proxy_set_header x-authgear-user-anonymous $x_authgear_user_anonymous;
proxy_set_header x-authgear-user-verified $x_authgear_user_verified;
proxy_set_header x-authgear-session-acr $x_authgear_session_acr;
proxy_set_header x-authgear-session-amr $x_authgear_session_amr;
proxy_set_header x-authgear-session-authenticated-at $x_authgear_session_authenticated_at;
proxy_set_header x-authgear-user-can-reauthenticate $x_authgear_user_can_reauthenticate;
# Your backend must inspect the request headers to determine whether the request is authenticated or not.
# This corresponds to the Step 5.
}
location = /_auth {
# Set this location for internal use only
internal;
# Replace <YOUR_AUTHGEAR_ENDPOINT> with your authgear endpoint.
# For example, https://example.authgear.cloud
set $resolver <YOUR_AUTHGEAR_ENDPOINT>/_resolver/resolve;
proxy_pass $resolver;
# Set the host so that authgear knows which app is calling the resolver endpoint
# Replace <YOUR_AUTHGEAR_ENDPOINT_HOST> with the host of your authgear endpoint.
# For example, example.authgear.cloud
proxy_set_header Host <YOUR_AUTHGEAR_ENDPOINT_HOST>;
# The body is supposed to be consumed by your backend server.
# Pass only the headers to the resolver
proxy_pass_request_body off;
proxy_set_header Content-Length "";
}
}If the reverse proxy, Authgear, and your backend server are in different regions, authenticating every request could result in a huge downgrade in the performance.
You may consider enabling caching.
http {
# ...
proxy_cache_path /tmp/cache keys_zone=auth_cache:10m;
# The server block.
server {
# ...
location = /_auth {
# ...
proxy_cache auth_cache;
proxy_cache_key "$cookie_session|$http_authorization";
proxy_cache_valid 200 10m; # Adjust cache duration as desired.
}
}
}See the list of x-authgear- headers in the specs: https://github.com/authgear/authgear-server/blob/master/docs/specs/api-resolver.md
Allow guest users to use your apps and website and promote to regular users later.
You can use create an Anonymous User account for the guests in your apps, so they can carry out interactions just like a normal user. For example, guests can post comments and save preferences in your social platform before setting email and password. The user session will persist even if the app has been closed.
This improves the app experience because the user does not need to set up authenticators until further down the user journey, while still enjoying most of the app features. For app developers, the ability to create and assign Anonymous User also makes it easier to link the activities of an individual before and after sign-up.
In the portal, go to Authentication > Anonymous Users.
Turn on Enable anonymous users.
Save the settings.
This will create an Anonymous User for the session. Subsequent requests from the end-user in the session can be identified by the same sub
authgear
.authenticateAnonymously()
.then(({userInfo}) => {
// Logged in as anonymous user successfully
})
.catch((err) => {
// Handle the error
});try {
final userInfo = await authgear.authenticateAnonymously();
// Logged in as anonymous user successfully
} catch (e) {
// Handle the error
}mAuthgear.authenticateAnonymously(new OnAuthenticateAnonymouslyListener() {
@Override
public void onAuthenticated(@NonNull UserInfo userInfo) {
// Logged in as anonymous user successfully
}
@Override
public void onAuthenticationFailed(@NonNull Throwable throwable) {
// Handle the error
}
});authgear
.authenticateAnonymously()
.then(({userInfo}) => {
// Logged in as anonymous user successfully
})
.catch((err) => {
// Handle the error
});After "signing up" as an anonymous user, you can retrieve the "UserInfo" object and see the sub of the end-user.
UserInfo
{
"sub": "...",
"isVerified": false,
"isAnonymous": true
}promoteAnonymousUser function can be called to promote an anonymous user to a regular user with login ID (e.g. email, phone number) and authenticators (e.g. password). The end-user will be prompted a sign up page to complete the promotion. The sub of an end-user will remain the same after promotion.
authgear
.promoteAnonymousUser({
redirectURI: THE_REDIRECT_URI,
})
.then(({userInfo}) => {
// Promote anonymous user successfully
})
.catch((e) => {
// Handle the error
});try {
final userInfo = await authgear.promoteAnonymousUser(redirectURI: THE_REDIRECT_URI);
// Promote anonymous user successfully
} catch (e) {
// Handle the error
}authgear.promoteAnonymousUser(
redirectURI: THE_REDIRECT_URI
) { result in
switch result {
case let .success(userInfo):
// Promote anonymous user successfully
case let .failure(error):
// Handle the error
}
}PromoteOptions options = new PromoteOptions(THE_REDIRECT_URI);
authgear.promoteAnonymousUser(options, new OnPromoteAnonymousUserListener() {
@Override
public void onPromoted(@NonNull UserInfo userInfo) {
// Promote anonymous user successfully
}
@Override
public void onPromotionFailed(@NonNull Throwable throwable) {
// Handle the error
}
});Step 1: Start the promotion flow
When the user clicks promote on your website, make a start promotion call to redirect them to the promotion page.
authgear
.startPromoteAnonymousUser({
// Configure redirectURI which users will be redirected to
// after they have promoted with Authgear.
// You can use any path in your website.
// Make sure it is in the "Redirect URIs" list of the Application.
// The redirect uri for anonymous user promotion should be
// different from the one for normal user authentication.
// e.g. "https://yourdomain.com/promote-redirect"
redirectURI: THE_REDIRECT_URI,
})
.then(({userInfo}) => {
// Started the promotion flow
})
.catch((err) => {
// Failed to start the promotion flow
});Step 2: Handle the promotion result
After the user promotes on the promotion page, the user will be redirected to the redirectURL with a code parameter in the URL query. In the redirectURI of your application, make a finish promotion call to handle the promotion result.
authgear
.finishPromoteAnonymousUser()
.then(({userInfo}) => {
// Promoted successfully
// You should redirect the user to another path
})
.catch((err) => {
// Failed to finish promotion
});
);On Mobile SDKs, creating an anonymous user will create a key-pair. The key-pair is stored in the native encrypted store on the mobile device. The end-user can always re-login to the same anonymous user with the key-pair. Such anonymous user will become inaccessible when the encrypted store is removed.
On the Web SDK, there will be no key-pair created. Therefore the end-user will not be able to login to the same Anonymous User after the their session become invalid. For cookie-based authentication, it is controlled by the "idle timeout" and "session lifetime" of the Cookie. For token-based authentication, it is controlled by the "idle timeout" and "token lifetime" of the Refresh Token.
In other words, The anonymous user account lifetime is the same as the logged-in session lifetime.
To adjust the lifetime settings, change the timeouts and lifetimes in Portal > Applications accordingly.
You should create anonymous users only when necessary in the user journey to prevent creating excessive orphan accounts in your tenant.
Decide how your backend application server authenticate the incoming HTTP requests.
For Mobile App or Single Page Web App or Website, each request from the client to your application server should contain an access token or a cookie. Your backend server should validate them for each HTTP request.
There are different approaches to verify the requests based on whether you validate JWT (JSON Web Tokens) in your server, or forward authentication to Authgear Resolver Endpoint.
Authgear uses for secure data transmission, authentication, and authorization. Tokens should be parsed and validated in regular web, native, and single-page applications to make sure the token isn’t compromised and the signature is authentic.
Read more on guide.
This approach is only available for and involves passing the JWT token within the HTTP Authorization header. This approach is widely used in OAuth 2.0 and OIDC implementations, providing a standardized way to authenticate users.
JWT tokens can be stored in HTTP cookies and sent with each request. It is suitable for . Storing JWTs in cookies as a way to persist the user's session across requests. The server then uses JWKS to validate the token. This approach is useful in scenarios where you want to maintain user sessions across different services in a more traditional web application setup.
Forward Authentication is a process where an intermediate reverse proxy or API Gateway is responsible for authenticating a request before it reaches the intended application or service. This can add an extra layer of security and centralize the authentication logic. An intermediate service forwards each incoming HTTP request to the Authgear Resolver Endpoint to verify the access token or cookie in the HTTP header.
Read more on guide.
Before processing the request, your server or a reverse proxy forwards the request to an . This endpoint resolves and verifies the authentication information (such as an Access Token) from the request Authorization Header.
In this pattern, Access Token (JWT) is stored in a cookie, and your server or a reverse proxy may contact the to obtain more information or validate certain aspects of the request.
Validate JSON Web Token (JWT) in your application server
Forward authentication with Authgear Resolver Endpoint


Event are generated and delivered to your hooks. You will be notified when important events such as new user signup happen.
Events are divided into two kinds, Blocking and Non-blocking.
Each event can have multiple hooks. The delivery order of non-blocking events is unspecified. Blocking events are delivered in the order as in the configuration.
Blocking events are triggered before the operation is performed, such as before user creation. The operation can be aborted by your hooks.
They are delivered to your hooks synchronously, right before changes are persisted to the database.
Your hooks must return a JSON document to indicate whether the operation should continue.
To let the operation proceed, return a JSON document with is_allowed set to true.
{
"is_allowed": true
}To abort the operation, return a JSON document with is_allowed set to false, and a non-empty reason and title.
{
"is_allowed": false,
"reason": "some reason",
"title": "some title"
}If any of your hooks aborts the operation, the operation is aborted. The reason and title will be shown to the end-user as an error message.
Each of your hooks must respond within 5 seconds. All of your hooks must complete within 10 seconds. Otherwise, the delivery will fail to due timeout.
Your hooks can optionally apply mutation for certain blocking events. The supported mutation is specific for each type of blocking events. Refer to the Event List to see what mutation is supported.
Mutations by a hook is applied only when the operation is allowed to proceed. Mutations take effect only when all hooks allow the operation to proceed.
The mutations are specified in the hook response. Objects not appearing in mutations are left intact. The mutated objects are NOT merged with the original ones.
The mutated objects are NOT validated, and are propagated along the hook chain. The mutated objects are validated after traversing the hook chain.
Mutations do NOT generate extra events to avoid infinite loops.
When a blocking event supports mutations on the user object, your hooks can respond a JSON document to allow the operation, and specify the mutations you want to apply on the user object.
{
"is_allowed": true,
"mutations": {
"user": {
"standard_attributes": {
"name": "John"
},
"custom_attributes": {
"age": 30
}
}
}
}To mutate the user object, include user inside mutations. Only standard_attributes and custom_attributes of the user object are mutable.
You must include the WHOLE
standard_attributesorcustom_attributeswhen you specify the mutations. Otherwise, missing attributes WILL BE deleted.
When a blocking event supports mutations on the JWT payload, your hooks can respond a JSON document to allow the operation, and specify additional fields that you want to include in the JWT payload. However, you MUST NOT change or remove any existing fields in the JWT payload, as they are essential to the validity of the JWT.
{
"is_allowed": true,
"mutations": {
"jwt": {
"payload": {
// The original payload you get from the event object.
"iss": "https://myapp.authgear.cloud",
"aud": ["YOUR_CLIENT_ID"],
"sub": "THE_USER_ID",
// Other essential JWT fields that you MUST retain.
// Additional fields that you want to add.
"https://myapp.com": {
"custom_field": "custom_value"
}
}
}
}
}To add additional fields to the JWT payload, include jwt.payload inside mutations. You MUST add your own fields only.
You must include the WHOLE
jwt.payloadfrom the event object when you specify the mutations.
Non-blocking events are triggered after the operation is performed.
They are delivered to your hooks asynchronously after the operation is performed.
Your hooks must finish within 60 seconds. Otherwise, the delivery will fail to due timeout.
The response of your hooks is ignored.
Events have the following shape:
{
"id": "0E1E9537-DF4F-4AF6-8B48-3DB4574D4F24",
"seq": 435,
"type": "user.pre_create",
"payload": { /* ... */ },
"context": {
"timestamp": 1670570552,
"user_id": "f333b70b-4436-4efb-a40b-d9ed7a74d319",
"preferred_languages": ["en-US", "zh-HK"],
"language": "en-US",
"triggered_by": "user"
}
}id: The ID of the event.
seq: A monotonically increasing signed 64-bit integer.
type: The type of the event.
payload: The payload of the event, varies with type.
context: The context of the event.
context.timestamp: signed 64-bit UNIX timestamp of when this event is generated. Retried deliveries do not affect this field.
context.user_id: The ID of the user associated with the event. It may be absent. For example, the user has not been authenticated yet.
context.preferred_languages: User preferred languages, which are inferred from the request. Return values of the ui_locales query if it is provided in the Auth UI, otherwise return languages in the Accept-Language request header.
context.language: User locale which is derived based on user's preferred languages and app's languages config.
context.triggered_by: Triggered by indicates who triggered the events, values can be user or admin_api. user means it is triggered by the end-user. admin_api means it is triggered by Admin API or admin portal.
Validate JSON Web Token (JWT) in your application server
Forward Authentication to Authgear Resolver Endpoint
Reliability
Medium JWT only updates when expire. That means before the token expiry, your application may see the user is valid even they has been disabled
High Update near real-time, based on your reserve proxy cache setting
Integration difficulties
Easy You only need to add code in your application to validate and decode JWT
Medium Need to setup extra reverse proxy to resolve authentication information


Integrate your iOS application with Authgear iOS SDK
This guide provides instructions on integrating Authgear with an iOS app. Supported platforms include:
iOS 11.0 or higher
Signup for an Authgear Portal account in . Or you can use your self-deployed Authgear.
From the Project listing, create a new Project or select an existing Project. After that, we will need to create an application in the project.
Step 1: Create an application in the Portal
Go to Applications on the left menu bar.
Click ⊕Add Application in the top tool bar.
Input the name of your application and select Native App as the application type. Click "Save".
You will see a list of guides that can help you for setting up, then click "Next".
Step 2: Configure the application
In your IDE (e.g. XCode), define a custom URI scheme that the users will be redirected back to your app after they have authenticated with Authgear, e.g. com.myapp.example://host/path.[^1]
Head back to Authgear Portal, fill in the Redirect URI that you have defined in the previous steps.
Click "Save" in the top tool bar and keep the Client ID. You can also obtain it again from the Applications list later.
In your application's Info.plist , register your custom URL scheme, (e.g. com.myapp).
SDK must be properly configured before use.
When the user clicks login/signup on your app, you can use the following code to start authorization.
Your user is now logged in!
When you start launching the application. You may want to know if the user has logged in. (e.g. Show users the login page if they haven't logged in). The sessionState reflects the user logged in state in the SDK local state. That means even the sessionState is .authenticated, the session may be invalid if it is revoked remotely. After initializing the Authgear SDK, call fetchUserInfo to update the sessionState as soon as it is proper to do so.
The value of sessionState can be .unknown, .noSession or .authenticated. Initially, the sessionState is .unknown. After a call to authgear.configure, the session state would become .authenticated if a previous session was found, or .noSession if such session was not found.
In some cases, you may need to obtain current user info through the SDK. (e.g. Display email address in the UI). Use the fetchUserInfo function to obtain the user info, see .
Call refreshAccessTokenIfNeeded every time before using the access token, the function will check and make the network call only if the access token has expired. Include the access token into the Authorization header of your application request.
To log out the user from the current app session, you need to invoke thelogoutfunction.
To protect your application server from unauthorized access. You will need to integrate your backend with Authgear.
For detailed documentation on the iOS SDK, visit .
[^1]: For futher instruction on setting up custom URI scheme in iOS, see [^2]: For more explaination on JWT, see


Setting up the local development environment for websites that use cookie-based authentication.
Running a local Authgear server is not trivial. This guide provides a simple way to bootstrap your local application that communicates with the production Authgear server.
This guide is only for cookie-based authentication in local development setups. A typical scenario is developing websites. If you are developing mobile applications which use token-based authentication, you can just skip this guide and continue with it as usual.
Authgear sets a cookie in the browser inside the project domain. When running your application on localhost, the browser will not see the cookies because the website is not in the subdomain of the domain in which the cookies are set. Therefore, the browser will not be able to authenticate itself.
You can learn more here.
For local development, it is highly recommended to create a new application on Authgear before continuing to the rest of the guide.
Log in and create a new project on https://portal.authgear.com/
Go to the Application tab in your dashboard
Add your local application domain {SUBDOMAIN}.{PROJECT_NAME}.authgear.cloud under the Allowed Origins list
Add an application, name it whatever you want. DO NOT check the Issue JWT as access token box because we are using cookie-based authorization.
Put your redirect URI for login and logout under the Redirect URIs list and Post Logout Redirect URIs list respectively.
hostsTo make the cookies visible to the browser, the local website domain has to be inside the domain where the cookies are set.
By adding the following line to the /etc/hosts file on the local machine, we can point the application domain name to localhost.
127.0.0.1 {SUBDOMAIN}.{PROJECT_NAME}.authgear.cloudThe browser will be able to see the auth cookies if visiting the website via this domain.
Although you can see the cookies now, the cookies have the Secure attribute set. To include them in an HTTP request, the request has to be transmitted over a secure channel (HTTPS in most browsers). Therefore, we also need to establish HTTPS connections for our browser with the server.
One quick simple way to do this is to use mkcert, you may follow the installation steps here. After installing mkcert, generate a certificate with the following command:
mkcert *.{PROJECT_NAME}.authgear.cloudA key file and a cert file will be generated. They will be used in the next part of the guide.
We will need an nginx server to serve the certificate and enable SSL.
Add the following config file to your nginx/conf.d directory, or mount it to a volume together with the cert and key if you are using nginx in docker.
The examples below show the nginx config files for nginx in host and nginx in docker.
server {
listen 443 ssl;
server_name {SUBDOMAIN}.{PROJECT_NAME}.authgear.cloud;
ssl_certificate /path/to/your/cert;
ssl_certificate_key /path/to/your/key;
location / {
# Change it to your service endpoint
proxy_pass http://127.0.0.1:3000;
proxy_set_header Host $host;
auth_request /_auth;
auth_request_set $x_authgear_session_valid $upstream_http_x_authgear_session_valid;
auth_request_set $x_authgear_user_id $upstream_http_x_authgear_user_id;
auth_request_set $x_authgear_user_anonymous $upstream_http_x_authgear_user_anonymous;
auth_request_set $x_authgear_user_verified $upstream_http_x_authgear_user_verified;
auth_request_set $x_authgear_session_acr $upstream_http_x_authgear_session_acr;
auth_request_set $x_authgear_session_amr $upstream_http_x_authgear_session_amr;
auth_request_set $x_authgear_session_authenticated_at $upstream_http_x_authgear_session_authenticated_at;
auth_request_set $x_authgear_user_can_reauthenticate $upstream_http_x_authgear_user_can_reauthenticate;
proxy_set_header x-authgear-session-valid $x_authgear_session_valid;
proxy_set_header x-authgear-user-id $x_authgear_user_id;
proxy_set_header x-authgear-user-anonymous $x_authgear_user_anonymous;
proxy_set_header x-authgear-user-verified $x_authgear_user_verified;
proxy_set_header x-authgear-session-acr $x_authgear_session_acr;
proxy_set_header x-authgear-session-amr $x_authgear_session_amr;
proxy_set_header x-authgear-session-authenticated-at $x_authgear_session_authenticated_at;
proxy_set_header x-authgear-user-can-reauthenticate $x_authgear_user_can_reauthenticate;
}
location /_auth {
internal;
resolver 8.8.8.8;
set $resolver https://{PROJECT_NAME}.authgear.cloud/_resolver/resolve;
proxy_pass $resolver;
proxy_pass_request_body off;
proxy_set_header Content-Length "";
}
}server {
listen 443 ssl;
server_name {SUBDOMAIN}.{PROJECT_NAME}.authgear.cloud;
ssl_certificate /path/to/your/cert;
ssl_certificate_key /path/to/your/key;
location / {
resolver 127.0.0.11;
# change {CONTAINER_NAME} to host.docker.internal if accessing host
proxy_pass http://{CONTAINER_NAME}:{PORT};
proxy_set_header Host $host;
auth_request /_auth;
auth_request_set $x_authgear_session_valid $upstream_http_x_authgear_session_valid;
auth_request_set $x_authgear_user_id $upstream_http_x_authgear_user_id;
auth_request_set $x_authgear_user_anonymous $upstream_http_x_authgear_user_anonymous;
auth_request_set $x_authgear_user_verified $upstream_http_x_authgear_user_verified;
auth_request_set $x_authgear_session_acr $upstream_http_x_authgear_session_acr;
auth_request_set $x_authgear_session_amr $upstream_http_x_authgear_session_amr;
auth_request_set $x_authgear_session_authenticated_at $upstream_http_x_authgear_session_authenticated_at;
auth_request_set $x_authgear_user_can_reauthenticate $upstream_http_x_authgear_user_can_reauthenticate;
proxy_set_header x-authgear-session-valid $x_authgear_session_valid;
proxy_set_header x-authgear-user-id $x_authgear_user_id;
proxy_set_header x-authgear-user-anonymous $x_authgear_user_anonymous;
proxy_set_header x-authgear-user-verified $x_authgear_user_verified;
proxy_set_header x-authgear-session-acr $x_authgear_session_acr;
proxy_set_header x-authgear-session-amr $x_authgear_session_amr;
proxy_set_header x-authgear-session-authenticated-at $x_authgear_session_authenticated_at;
proxy_set_header x-authgear-user-can-reauthenticate $x_authgear_user_can_reauthenticate;
}
location /_auth {
internal;
resolver 8.8.8.8;
set $resolver https://{PROJECT_NAME}.authgear.cloud/_resolver/resolve;
proxy_pass $resolver;
proxy_pass_request_body off;
proxy_set_header Content-Length "";
}
}In the above examples, nginx will also authenticate requests by creating sub-requests to the Authgear internal endpoint. You can learn more here.
Now visit the website through https://<yourapp>.authgear.cloud, and the browser will be able to send requests with the authorization cookies.
For implementing login and logout logic in your website, please refer to Web SDK.
authgear.authenticateAnonymously { result in
switch result {
case let .success(userInfo):
// Logged in as anonymous user successfully
case let .failure(error):
// Handle the error
}
}oauth:
clients:
- name: your_app_name
client_id: a_random_generated_string
redirect_uris:
- "com.myapp://host/path"
grant_types:
- authorization_code
- refresh_token
response_types:
- code
- nonepod 'Authgear', :git => 'https://github.com/authgear/authgear-sdk-ios.git'dependencies: [
.package(url: "https://github.com/authgear/authgear-sdk-ios.git")
]<?xml version="1.0" encoding="UTF-8"?>
<!DOCTYPE plist PUBLIC "-//Apple//DTD PLIST 1.0//EN" "http://www.apple.com/DTDs/PropertyList-1.0.dtd">
<plist version="1.0">
<dict>
<!-- Other entries -->
<key>CFBundleURLTypes</key>
<array>
<dict>
<key>CFBundleTypeRole</key>
<string>Editor</string>
<key>CFBundleURLSchemes</key>
<array>
<string>{YOUR_CUSTOM_URL_SCHEME}</string>
</array>
</dict>
</array>
</dict>
</plist>// your_app_endpoint should looks like this https://<yourapp>.authgear.cloud
let authgear = Authgear(clientId: "{your_clien_id}", endpoint: "{your_app_endpoint}")
authgear.configure() { result in
switch result {
case .success():
// configured successfully
case let .failure(error):
// failed to configured
}
}// your_redirect_uri is redirect uri registered on the applications page
// e.g. com.myapp://host/path
authgear.authenticate(redirectURI: "{your_redirect_uri}", handler: { result in
switch result {
case let .success(userInfo):
// login successfully
case let .failure(error):
if let authgearError = error as? AuthgearError, case .cancel = authgearError {
// user cancel
} else {
// Something went wrong
}
}
})// After authgear.configure, it only reflect SDK local state.
// value can be .noSession or .authenticated
var sessionState = authgear.sessionState
authgear.fetchUserInfo { userInfoResult in
// sessionState is now up to date
// it will change to .noSession if the session is invalid
sessionState = authgear.sessionState
switch userInfoResult {
case let .success(userInfo):
// read the userInfo if needed
case let .failure(error):
// failed to fetch user info
// the refresh token maybe expired or revoked
}authgear.refreshAccessTokenIfNeeded() { result in
switch result {
case .success():
// access token is ready to use
// accessToken can be empty
// it will be empty if user is not logged in or session is invalid
// include Authorization header in your application request
if let accessToken = authgear.accessToken {
// example only, you can use your own networking library
var urlRequest = URLRequest(url: "YOUR_SERVER_URL")
urlRequest.setValue(
"Bearer \(accessToken)", forHTTPHeaderField: "authorization")
// ... continue making your request
} else {
// The user is not logged in, or the token is expired.
}
case let .failure(error):
// Something went wrong
}
}authgear.logout { result in
switch result {
case .success():
// logout successfully
case let .failure(error):
// failed to login
}
}


Learn how to add authentication to any web page without using Authgear's SDKs with IIFE(Immediately-invoked Function Expression) bundle
In this guide, you'll make a simple website server to host the SPA app using ExpressJS. We'll also use it to serve our HTML page and any assets it needs, like JavaScript, CSS, and so on. You can also view a full-source code on the GitHub repo.
Before we start, ensure you have Node.js installed in your system. If not, download and install it from the official website.
An Authgear account: You need an Authgear account to follow this guide. If you don't have one, you can create it for free on the Authgear website.
A Registered App: You need a registered application type (Single Page Application) in Authgear. Follow the setup application guide and skip installing the Authgear Web SDK part. You will retrieve the Authgear Web SDK from Authgear's CDN using IIFE(Immediately-invoked Function Expression) bundle and reference a script in our HTML directly.
Start with making a new folder on your computer to keep the app’s source code (In the example, we call it authgear-spa-js-login). Then, initialize a new NPM project by running the following command:
npm init -yNext, we install two required packages:
npm install expressAlso, install nodemon so that our server can be restarted automatically on any code changes in dev mode:
npm install -D nodemonNext, open the package.json file and edit scripts entry to have start and dev commands like the below:
{
// ...
"scripts": {
"start": "node server.js",
"dev": "nodemon server.js"
},
// ...
}Now you can run the app in two modes: prod and dev.
For example, npm run dev will run the application using nodemon, monitoring for changes as we modify files.
Create a new file server.js in the root of the project and populate it with the following code:
const express = require("express");
const { join } = require("path");
const app = express();
// Serve static assets from the /public folder
app.use(express.static(join(__dirname, "public")));
// Endpoint to serve the configuration file
app.get("/authgear_config.json", (req, res) => {
res.sendFile(join(__dirname, "authgear_config.json"));
});
// Serve the index page for all other requests
app.get("/*", (_, res) => {
res.sendFile(join(__dirname, "index.html"));
});
// Listen on port 3000
app.listen(3000, () => console.log("Application running on port 3000"));Create a index.html file in the root of the project and add the following content to the created file:
<!DOCTYPE html>
<html>
<head>
<meta charset="UTF-8" />
<title>Authgear SPA SDK Sample</title>
<link rel="stylesheet" type="text/css" href="/css/main.css" />
</head>
<body>
<h2>SPA Authentication Sample</h2>
<p>Welcome to our page!</p>
<button id="btn-login" disabled="true" onclick="login()">Log in</button>
<button id="btn-logout" disabled="true" onclick="logout()">Log out</button>
<script src="js/app.js"></script>
<script src="<https://unpkg.com/@authgear/[email protected]/dist/authgear-web.iife.js>"></script>
</body>
</html>We do not use a package manager such as Webpack, we will retrieve the Authgear Web SDK from Authgear's CDN using IIFE(Immediately-invoked Function Expression) bundle. We can reference a script in our HTML directly:
<script src="<https://unpkg.com/@authgear/[email protected]/dist/authgear-web.iife.js>"></script>You can install the Authgear Web SDK as a dependency of your application, it is useful if you are building React or React Native apps. See how to install the package.
Create a new folder called public folder in the project root folder and create another folder called css inside the public folder. Add a new file in there called main.css. This will be used to determine how the log-in and log-out button elements will be hidden on the main page depending on whether a user is authenticated or not.
Open the newly-created public/css/main.css file and add the following CSS:
.hidden {
display: none;
}
label {
margin-bottom: 10px;
display: block;
}After creating an HTML file and applying CSS styles, see now how our page looks like by running npm run dev and accessing it at http://localhost:3000.
To add some action to the page, we create a new directory in the public folder called js, and add a new file there called app.js. Copy and paste the following JS code that reads authgear_config.json file Authgear app-specific values (endpoint and clientId) from the endpoint using fetchAuthConfig function. Also, it configures a new Authgear client, and defines login and logout logic:
let authgearClient = null;
const fetchAuthConfig = () => fetch("/authgear_config.json");
const configureClient = async () => {
const response = await fetchAuthConfig();
const config = await response.json();
authgearClient = window.authgear.default;
await authgearClient.configure({
endpoint: config.endpoint,
clientID: config.clientID,
sessionType: "refresh_token",
}).then(
() => {
console.log("Authgear client successfully configured!");
},
(err) => {
console.log("Failed to configure Authgear");
}
);
};
const login = async () => {
await authgearClient
.startAuthentication({
redirectURI: window.location.origin,
prompt: "login",
})
.then(
() => {
console.log("Logged in!");
},
(err) => {
console.log("Log in failed", err);
}
);
};
const logout = () => {
authgearClient
.logout({
redirectURI: window.location.origin,
})
.then(
() => {
console.log("Logged out successfully");
},
(err) => {
console.log("Failed to logout");
}
);
};
window.onload = async () => {
await configureClient();
updateUI();
const query = window.location.search;
if (query.includes("code=")) {
updateUI();
window.history.replaceState({}, document.title, "/");
}
}
const updateUI = async () => {
const isAuthenticated = authgearClient.sessionState === "AUTHENTICATED";
document.getElementById("btn-logout").disabled = !isAuthenticated;
document.getElementById("btn-login").disabled = isAuthenticated;
};Let’s breakdown down app.js code in the previous section and understand how authentication is achieved with Authgear:
Configure the Authgear client
fetchAuthConfig: Firstly, this function makes a request to the /authgear_config.json the endpoint we exposed in server.js to fetch Authgear app setting values from authgear_config.jsonfile.
configureClient: Once we retrieve the configuration information for the Authgear client from the authgear_config.json file and we set up the Authgear client with these settings. It also logs a message to the console, informing whether the configuration was successful or not.
Login flow
login: The function is called by the Login button previously defined on the HTML page. It performs the login action by calling authgearClient.startAuthentication Authgear’s function. It redirects the user to the Auhthgear login page. After the user logs in successfully, they will be redirected back to the same page we set in redirectURI. Run the project and click the Login button. You should be taken to the Authgear Login Page configured for your application.
Go ahead and create a new user or log in using an email (we specified the Passwordless Email login method in the first part). When you try to log in with your email, you should receive a magic link to your email box to confirm login operation.
After authenticating successfully, you will be redirected to the page you were before.
Logout flow
logout: This function logs the user out and redirects them back to the original page (athttp://localhost:3000). It uses Authgear’s logout function and logs a message to the console indicating the result of the operation.
Update the UI
window.onload: This is a function that runs when the page loads. It configures the Authgear client and updates the UI. If the page's URL contains a "code=" it means the user is authenticated (code the query will be received from the Authgear server), it updates the UI again and removes the "code=" from the URL.
Evaluate the authentication state
updateUI: This function updates the status of the login and logout buttons based on whether the user is authenticated or not. In Authgear, you can check if the user has logged in or not with sessionState the attribute. If the user is authenticated, we disable the login button and enable the logout button, and vice versa if the user is not authenticated.
Authgear provides the event logs for you to analyze security issues and monitor the business.
You can view the audit log in the Portal, or retrieve logs using the Admin API.
The portal provides an interface for you to look up the log by event and date range.
The Users Activities tab on the Audit Log page filters the log to only show activities performed by a normal user or by an admin on a user's profile.
The API schema can be found in the Admin API QraphiQL Explorer. For example:
query {
auditLogs(first:5){
edges{
node{
activityType
clientID
createdAt
data
}
}
}
}When using the Admin API, you can filter the Audit Log by an attribute like activityTypes to omit records you're not interested in.
The following is an example that includes filters.
query {
auditLogs(first:5, activityTypes:[USER_AUTHENTICATED,USER_DELETED]){
edges{
node{
activityType
clientID
createdAt
data
}
}
}
}The above query will only return events with activity types USER_AUTHENTICATED and USER_DELETED.
Here is the list of activity types that are logged:
AUTHENTICATION_IDENTITY_ANONYMOUS_FAILED
Anonymous user authentication failed
AUTHENTICATION_IDENTITY_BIOMETRIC_FAILED
Authentication with biometric failed
AUTHENTICATION_IDENTITY_LOGIN_ID_FAILED
A user's login attempt failed because the email or user ID provided is not found
AUTHENTICATION_PRIMARY_OOB_OTP_EMAIL_FAILED
Authentication using the OTP sent via email failed
AUTHENTICATION_PRIMARY_OOB_OTP_SMS_FAILED
Authentication using the OTP sent via SMS failed
AUTHENTICATION_PRIMARY_PASSWORD_FAILED
A user entered an invalid password during a login attempt
AUTHENTICATION_SECONDARY_OOB_OTP_EMAIL_FAILED
2FA via email failed
AUTHENTICATION_SECONDARY_OOB_OTP_SMS_FAILED
2FA via SMS failed
AUTHENTICATION_SECONDARY_PASSWORD_FAILED
Secondary authentication using password failed
AUTHENTICATION_SECONDARY_RECOVERY_CODE_FAILED
Recovery code verification failed
AUTHENTICATION_SECONDARY_TOTP_FAILED
A 2FA attempt failed
IDENTITY_BIOMETRIC_DISABLED
Biometric login is disabled by a user or an admin
IDENTITY_BIOMETRIC_ENABLED
User enabled biometric login
IDENTITY_EMAIL_ADDED
A user or admin added a new email to an exisiting user
IDENTITY_EMAIL_REMOVED
An email address was removed from an exisiting user's profile
IDENTITY_EMAIL_UPDATED
A user updated their email address
IDENTITY_OAUTH_CONNECTED
A profle is linked to OAuth
IDENTITY_OAUTH_DISCONNECTED
A profile is unlinked from OAuth
IDENTITY_PHONE_ADDED
A user or admin added a new phone number to an exisiting user
IDENTITY_PHONE_REMOVED
A phone number was removed from an exisiting user's profile
IDENTITY_PHONE_UPDATED
A user updated their phone number
IDENTITY_USERNAME_ADDED
A user or admin added a new username to an exisiting user
IDENTITY_USERNAME_REMOVED
A user or admin removed the username for a user
IDENTITY_USERNAME_UPDATED
The username for a user was updated
USER_ANONYMOUS_PROMOTED
This event is triggered when an anonymous user is promoted to a normal user
USER_AUTHENTICATED
Successful user sign-in
USER_CREATED
A new user successfully registered
USER_DELETED
A user account is deleted
USER_DELETION_SCHEDULED
A user account deletion is scheduled
USER_DELETION_UNSCHEDULED
A previously scheduled user deletion is unscheduled
USER_DISABLED
User account disabled. An admin disabling a users account can trigger this event
USER_PROFILE_UPDATED
A user updated details like their profile name, gender and more
USER_REENABLED
A user account that was prviously disabled is enabled
USER_SESSION_TERMINATED
An active user session is terminated
USER_SIGNED_OUT
A user that was signed in logged out
WHATSAPP_OTP_VERIFIED
User completed a verification process using WhatsApp to receive OTP
SMS_SENT
An SMS notification like OTP was sent to a user
EMAIL_SENT
An email notice like verfiication code was sent to a user
Each audit log event contains the following attributes in their data
id
Unique identifier of the event
seq
Sequence number of the event
type
Activity type
context
The who, when and where of the event triggered. e.g. IP address, user agent, user ID, timestamp
payload
Relevant data according to the event type:
Messaging (SMS, Email OTP): the phone number/email address of the receiver
Authentication/Identity/User actions: a snapshot of the related session and user attributes
The user profiles contain information about your end-users such as name, email, addresses, and unique identifier. You can manage the profiles via the Portal & Admin API. The end-users can also manage their own profile through the Profile section in the User Setting page provided by the AuthUI.
Th e UserInfo endpoint returns the Claims about the authenticated end-user, including the standard profile and custom attributes.
The userInfo object is returned from calling fetch user info function which contains a unique identifier of the user.
isAnonymous
boolean
Indicate if the user is anonymous, i.e. no or is provided
isVerified
boolean
Indicate if the user completed the verification requirement
sub
string
Unique identifier of the user in your Authgear project
try{
const userInfo = await authgear.fetchUserInfo()
} catch(e) {
// failed to fetch user info
// the refresh token maybe expired or revoked
}authgear.fetchUserInfo { userInfoResult in
// sessionState is now up to date
// it will change to .noSession if the session is invalid
let sessionState = authgear.sessionState
switch userInfoResult {
case let .success(userInfo):
// read the userInfo if needed
case let .failure(error):
// failed to fetch user info
// the refresh token maybe expired or revoked
}try {
UserInfo userInfo = await authgear.getUserInfo();
// read the userInfo if needed
} catch (e) {
// failed to fetch user info
// the refresh token maybe expired or revoked
}
// sessionState is now up to date
SessionState state = authgear.sessionState;try
{
var userInfo = await authgear.FetchUserInfoAsync()
}
catch
{
// failed to fetch user info
// the refresh token maybe expired or revoked
}The following attributes are built-in supported by Authgear. They are the set of Standard Claims defined by the OIDC specifications. Some of them are default hidden from the Admin Portal and end-users. Their visibility and mutability can be configured through the Admin Portal.
Name
Hidden
String
Given Name
Editable
String
Family Name
Editable
String
Middle Name
Hidden
String
Nickname
Hidden
String
Profile
Hidden
URL String
Picture
Editable
URL String
Website
Hidden
URL String
Gender
Editable
male, female or Custom String
Birthdate
Editable
Date in YYYY-MM-DD
Timezone
Editable
Language
Editable
BCP47 language tag enabled by the project
Address
Hidden
JSON Object
The following attributes are coupled with the identities owned by the end-user. The represents the email addresses, phone numbers, or usernames the end-users are using to authenticate themselves on Authgear. If the end-user uses a third-party identity provider for authentication, these attributes will be coupled with the corresponding attributes returned by the provider.
email
email_verified
phone_number
phone_number_verified
preferred_username
You can define a set of custom attributes in the user profile. They are returned as a JSON object in under the custom_attributes key in userInfo.
{
"sub": "...",
"isAnonymous": false,
"isVerified": true,
"custom_attributes": {
...
}
}Go to Portal > User Profile > Custom Attributes and click Add New Attribute
The attribute name consist of lowercase letters (a-z), digits (0-9) and underscore (_) only. It must start with lowercase letters (a-z), and NOT ended with an underscore (_). The default display name will be the attribute name split with underscore and in title case. e.g. my_string will render as My String in the AuthUI Settings page.
Authgear supports the following attribute types:
String
Number
Integer
Dropdown
Phone Number
Email Address
URL
Country Code
You can change the attribute name and validation settings such as min and max value. The attribute type cannot be changed once it's set. To migrate the attribute into a new type, create a new attribute, migrate the values from the old to the new one, and then change the name and access right of the old attribute to make it obsolete.
Deleting attribute is not supported. You can change the name and access rights to make an attribute obsolete.
You can arrange the attribute order by drag-and-drop the handle in the custom attribute configuration in the Portal. This will control the order of how the attributes are shown to the end-users in the AuthUI User Settings page.
The access rights for different parties on individual attributes can be configured through the Authgear Portal. Under the hood, all the attributes are available, however, they can be configured to be hidden or read-only according to the needs of your projects to avoid confusion.
These are the parties that have access to the user profile:
Through the Admin API, developers ALWAYS have full access to ALL the standard attributes and custom attributes. The Admin API allows the developer to view or edit the standard attributes and the custom attributes.
The admin user can view or edit the standard attributes via the Authgear Portal.
The session bearer is someone who has a valid session cookie or a valid access token. The standard attributes of the end-user whom the session represents can be viewed by accessing the UserInfo endpoint and the resolver endpoint. The session bearer can be the end-user, the client mobile app, or the client website.
The end-user can view or edit the standard attributes through the Profile section in the User Setting page provided by the AuthUI.
Authgear supports various social and enterprise identity providers. End-users can sign up and log in to your apps via these connections. Upon signup, these providers will return a set of user attributes about the end-user. Authgear will copy those attributes and populate the profile of the end-user.
More info about the population logic can be found in the specification.
Authgear Webhook is a feature that sends notifications in the form of HTTP requests to an external URL that you specify when certain events occur. For example, Webhook can send the user.pre_create event just before a new user is created.
Webhooks also listen for response from your external services. For blocking events, this response determines if the process that triggered the event should continue to completion or be terminated. In this post, we'll use a blocking event and a custom webhook endpoint to restrict user signup to only devices from inside a corporate network.
Configuring a webhook for the user.pre-created event will prevent Authgear from creating new users if your webhook endpoint returns is_allowed: false in its response. In contrast, a new user will be created successfully when the endpoint returns is_allowed: true in its response.
We will be using this behavior to prevent users from outside a corporate network from signing up by checking their IP address (which is provided in the payload of the webhook HTTP request from Authgear). When the IP address matches a specified allowed IP address, we set the value for is_allowed to true. Otherwise, we return false.
The following tutorial shows detailed steps for allowing signups from inside a corporate network only.
In this step, we'll create a webhook for the User pre-create event in the Authgear Portal. To do that, login to the Authgear Portal and navigate to Advance > Hooks. Next, under Blocking Events section, click on Add, then select Webhook as the type and User pre-create as the Event.
Enter the full URL that points to the page that will be receiving and processing the webhook requests in the Endpoint text field.
Once you're done, click on the Save button at the top.
You'll need to create an endpoint in your preferred programming language or framework and host it online. For this tutorial, we'll be creating a basic Express.js endpoint.
Create a new Express.js project and add the following code to app.js:
const express = require("express");
const app = express();
const bodyParser = require('body-parser');
const port = process.env.PORT || 3002;
app.use(bodyParser.json());
app.post('/', (request, response) => {
response.status(200).send(
{
"is_allowed": false,
"reason": "some reason",
"title": "some title"
}
);
});
app.listen(port, () => {
console.log("server started!");
});Let's walk through what the above code will do:
Express creates an endpoint that accepts POST requests. (Note that the Authgear webhook only sends POST HTTP requests and your endpoint must support HTTPS).
Deploying the above code and pointing your Authgear webhook endpoint to it should prevent any user from signing up.
This is because the code returns is_allowed: false as a response to the Webhook. Hence terminating the signup process.
You can also state a more descriptive reason for termination in the endpoint response using the reason field.
Authgear webhooks send data to the endpoint URL to enable developers to build custom features and more. In this step, we'll read the data from the User pre-created event call and get the IP address for the user trying to register.
To read the request body and output the value to the console add the following code to app.js on a new line just above response.status(200)...
const requestPayload = request.body;
console.log(requestPayload)Attempting to register a new user again should print JSON data similar to this to your endpoints console:
{
id: '0000000000022b55',
seq: 142165,
type: 'user.pre_create',
payload: {
user: {
id: '413fe869-dba2-43a8-b671-95fd471b7950',
created_at: '2023-08-14T03:44:36.383367Z',
updated_at: '2023-08-14T03:44:36.473456Z',
is_anonymous: false,
is_verified: true,
is_disabled: false,
is_deactivated: false,
is_anonymized: false,
can_reauthenticate: true,
standard_attributes: [Object],
x_web3: [Object]
},
identities: [ [Object] ]
},
context: {
timestamp: 1691984676,
user_id: '413fe869-dba2-43a8-b671-95fd471b7950',
triggered_by: 'user',
audit_context: null,
preferred_languages: [ 'en-US', 'en' ],
language: 'en',
ip_address: '123.456.78.009',
user_agent: 'Mozilla/5.0 (Windows NT 10.0; Win64; x64; rv:109.0) Gecko/20100101 Firefox/116.0',
app_id: 'my_test_app'
}
}The data we're interested in for this example is ip_address in the context object (context.ip_address). We'll use this IP address to determine whether a user is inside the corporate network.
Now, update app.js so that it returns is_allowed: true when the user's IP address is within the corporate network's IP address.
The code for app.js should look like this after the modification:
app.post('/', (request, response) => {
const requestPayload = request.body;
console.log(requestPayload)
const allowedIp = '123.456.78.009'; //replace the value with the corporate network IP address
if (requestPayload.context.ip_address == $orgIp) {
//this user is from the organisation network, continue with sign up.
response.status(200).type('json').send(
{
"is_allowed": true
}
);
} else {
//user has an IP address outside of the organisation network so disallow sign up.
response.status(200).type('json').send(
{
"is_allowed": false,
"reason": "You are not allow to sign up to this organisation",
"title": "Sign-up not allowed!"
}
)
}
});You should replace the value for allowedIp with the IP address you wish to allow.
At this point, if you deploy your endpoint and try signing up from the allowed IP the process should complete without issue, and you've successfully implemented signups only from a corporate network.
Authgear offers an alternative for regular webhooks called the JavaScript/TypeScript hooks. This kind of hook makes it possible to implement our earlier solution without hosting an external endpoint. In the following section, we'll walk through the steps for allowing signups from inside a corporate network only using the Typescript hook.
Navigate to Advance > Hooks in the Authgear portal. Next, click on Add under the Blocking Events section. Or, modify the previous webhook.
Select TypeScript as the type and User pre-create as the Event.
The third field in a TypeScript hook is different from a regular webhook. The field allows you to enter JavaScript code that the hook can execute when an event is triggered.
You can click on the Edit Script button near the Script field to open the hook script editor.
Modify the code in the script editor to the following:
export default async function (e: EventUserPreCreate): Promise<HookResponse> {
// Write your hook with the help of the type definition.
const allowedIp = "123.456.78.009";
if (e.context.ip_address == allowedIp) {
return {
is_allowed: true,
};
} else {
return {
is_allowed: false,
reason: "You are not allow to sign up to this organisation",
title: "Sign-up not allowed!",
};
}
}Make sure to update the value for allowedIp to the IP address you wish to allow.
Once you're done, click on Finish Editing to return to the Hooks configuration page. Save your new hook by clicking on the Save button at the top of the configuration page.
To test that your TypeScript hook is working properly, try signing up a new user from the IP address you specified earlier. Also, try signing up outside that IP address to see if everything works as expected.
Authentication for a Python web application
This guide demonstrates how to add authentication with Authgear to a Python web application built with the Flask framework using the Authlib OAuth library. The full source code for this sample project can be found on the GitHub repo.
You will learn the following:
How to create an app on Authgear.
How to enable Email-based login.
Add sign-up and login features to the Flask app.
Before you begin, you'll need the following:
A free Authgear account. Sign up if you don't have one already.
Make sure that Python 3.10 or above is installed on your machine.
Download and Install Pip to manage project packages.
To use Authgear services, you’ll need to have an application set up in the Authgear Dashboard. This setup allows users in Authgear to sign in to the Flask application automatically once they are authenticated by Authgear.
To set up the application, navigate to the Authgear Portal UI and select Applications on the left-hand navigation bar. Use the interactive selector to create a new Authgear OIDC Client application or select an existing application that represents the project you want to integrate with.
Every application in Authgear is assigned an alphanumeric, unique client ID that your application code will use to call Authgear APIs through the Authlib client library in the Flask app. Record the generated Authgear Issuer Domain (for example, example-auth.authgear-apps.com), CLIENT ID, CLIENT SECRET from the output. You will use these values in Part 2 for the Flask app config.
An Authorized Redirect URI of your application is the URL that Authgear will redirect to after the user has authenticated in the Authgear to complete the authentication process. In our case, it will be a home page for our Flask and it will run at http://localhost:3000.
Set the following http://localhost:3000/callback to the Authorized Redirect URIs field. If not set, users will not be returned to your application after they log in.
After you create the Authgear app, you choose how users need to authenticate on the login page. From the Authentication tab, navigate to Login Methods, you can choose a login method from various options including, by email, mobile, or social, just using a username or the custom method you specify. For this demo, we choose the Email+Passwordless approach where our users are asked to register an account and log in by using their emails. They will receive a One-time password (OTP) to their emails and verify the code to use the app.
Next, create a Flask application with a single page and routes for home, callback, login, and logout flows.
Start with creating a requirements.txt file in your project directory:
flask>=2.0.3
python-dotenv>=0.19.2
authlib>=1.0
requests>=2.27.1Run pip install -r requirements.txt from your command-line interface to make these dependencies available to the Python project.
Create a server.py file in the project directory that contains application logic. Add the necessary libraries the application uses.
import json
from os import environ as env
from urllib.parse import quote_plus, urlencode
from authlib.integrations.flask_client import OAuth
from dotenv import find_dotenv, load_dotenv
from flask import Flask, redirect, render_template, session, url_forLoad the configuration .env file to use values such as AUTHGEAR_CLIENT_ID AUTHGEAR_CLIENT_SECRET, AUTHGEAR_DOMAIN and APP_SECRET_KEY in the app.
Configure Authlib to handle the application's authentication with Authgear based on OIDC:
oauth = OAuth(app)
oauth.register(
"authgear",
client_id=env.get("AUTHGEAR_CLIENT_ID"),
client_secret=env.get("AUTHGEAR_CLIENT_SECRET"),
client_kwargs={
"scope": "openid offline_access",
},
server_metadata_url=f'https://{env.get("AUTHGEAR_DOMAIN")}/.well-known/openid-configuration',
)When visitors to the app visit the /login route, they'll be redirected to Authgear to begin the authentication flow.
@app.route("/login")
def login():
return oauth.authgear.authorize_redirect(
redirect_uri=url_for("callback", _external=True)
)Once users complete the login process using Authgear, they will be redirected back to the application's /callback route. This route ensures that the user's session is saved, so they won't need to log in again during subsequent visits.
@app.route("/callback", methods=["GET", "POST"])
def callback():
token = oauth.authgear.authorize_access_token()
session["user"] = token
return redirect("/")Refresh Token
Calling the authorize_access_token() method of the Flask Authlib package will include a refresh token in the token response, provided your Flask application has offline_access as one of the OAuth 2.0 scopes.
Authlib will also use the refresh token to obtain a new access token automatically when the current access token has expired.
Logout
The route /logout manages the user's logout process from the application. It clears the user's session within the app and momentarily redirects to Authgear's logout endpoint to guarantee a thorough session clearance. After this, users are navigated back to your home route (which we'll discuss shortly).
@app.route("/logout")
def logout():
session.clear()
return redirect(
"https://"
+ env.get("AUTHGEAR_DOMAIN")
+ "/oauth2/end_session"
)The home route will either display the details of a logged-in user or provide an option for visitors to sign in.
@app.route("/")
def home():
return render_template(
"home.html",
session=session.get("user"),
pretty=json.dumps(session.get("user"), indent=4),
)Create a new sub-directory in the project folder named templates, and create a file home.html.
<html>
<head>
<meta charset="utf-8" />
<title>Authgear Flak Login Example</title>
</head>
<body>
<div data-gb-custom-block data-tag="if">
<h1>Welcome {{session.userinfo.name}}!</h1>
<p><a href="/logout" id="qsLogoutBtn">Logout</a></p>
<div><pre>{{pretty}}</pre></div>
<div data-gb-custom-block data-tag="else"></div>
<h1 id="profileDropDown">Welcome Guest</h1>
<p><a href="/login" id="qsLoginBtn">Login</a></p>
</div>
</body>
</html>Run the application from the project root directory:
python server.py
The application should now be accessible to open from a browser at http://localhost:3000.
There is so much more you can do with Authgear. Explore other means of login methods such as using Magic links in an email, social logins, or WhatsApp OTP. For the current application, you can also add more users from the Authgear portal.
Learn how to access User Profiles
To access any of the applications in your Authgear account, each user must have a profile in the account. contain information about your users such as name, contact information, and and you define. You can retrieve and manage user profiles in the following ways:
.
.
.
.
An Authgear account: You need an Authgear account to follow this guide. If you don't have one, you can on the Authgear website.
A Registered App: You need a (client) in Authgear.
It is the fastest and easiest way to view user profiles and manage them.
Once Authgear completes authentication and returns control to your application, it provides the user profile to the application. Most developers prefer to use the Authgear SDKs to get the UserInfo object using the fetch user info function. To start using this function read relevant to the SDK of your choice. Here are some code snippets for different SDKs:
Authgear provides an GraphQL endpoint that allows applications and services to access and manipulate the User Profile object. The lets users interactively explore the Admin API. With the API Explorer, you can search for users' profiles or update their standard or custom attributes. See the example steps of how to achieve this below:
The OpenID Connect (OIDC) endpoint is a protected resource that provides information about a user when a service provider presents an access token that has been issued by your Authgear Token endpoint. The scopes in the access token specify the user attributes that are returned in the response of the user info endpoint. It is important to note that the openid scope must be one of the access token claims.
To access a user's profile using the UserInfo endpoint of OpenID Connect, you need to follow these steps:
See a detailed explanation of the structure and fields included in the response of the UserInfo endpoint .
Authgear WebHooks makes it possible to embed the standard attributes and custom attributes for a user's profile into the OIDC JSON Web Token (JWT). Hence, you access both profile attributes in the JWT returned to your OIDC client without making another call to the UserInfo endpoint.
See our post about how to to learn more.
Authentication for Spring Boot App with Authgear and OAuth2
In this guide, you will learn how to add authentication to your Java Spring Boot application using with Authgear as the Identity Provider (IdP).
You will learn the following:
How to create an app on Authgear.
How to enable Email based login.
Add sign-up and login features to Spring Boot App.
Before you get started, you will need the following:
Java 17 or higher.
A free Authgear account. if you don't have one already.
To use Authgear services, you’ll need to have an application set up in the Authgear . The Authgear application is where you will configure how you want authentication to work for the project you are developing.
Use the interactive selector to create a new Authgear OIDC Client application or select an existing application that represents the project you want to integrate with.
Every application in Authgear is assigned an alphanumeric, unique client ID that your application code will use to call Authgear APIs through the Spring Boot . Note down the Authgear issuer (for example, https://example-auth.authgear.cloud/), CLIENT ID, CLIENT SECRET, and OpenID endpoints from the output. You will use these values in the next step for the client app config.
A Redirect URI is a URL in your application that you would like Authgear to redirect users to after they have authenticated. In our case, it will be a home page for our Spring Boot App. If not set, users will not be returned to your application after they log in.
To follow the example in this post, add the following URL as a redirect URI:
After you create the Authgear app, you choose how users need to authenticate on the login page. From the “Authentication” tab, navigate to “Login Methods”, you can choose a login method from various options including by email, mobile, or social, just using a username or the custom method you specify. For this demo, we choose the Email+Passwordless approach where our users are asked to register an account and log in by using their emails. They will receive a One-time password (OTP) to their emails and verify the code to use the app.
To create a new Spring Boot application you use the . Then you add dependencies to pom.xml file such as starter provides all the Spring Security dependencies needed to add authentication to your web application and Thymeleaf is used just to build a single page UI.
Spring Security makes it easy to configure your application for authentication with OIDC providers such as Authgear. We need to add the client credentials to the application.properties file with your Auhgear provider configuration. You can use the sample below and replace properties with the values from your Authgear app:
To enable user login with Authgear, create a class that will provide an instance of SecurityFilterChain, add the @EnableMethodSecurity annotation, and override the necessary method:
We create a simple home.html page using Thymeleaf templates. When a user opens the page running on http://localhost:8080/, we show the page with buttons for login or logout:
Next, we create a controller class to handle the incoming request. This controller renders the home.html page. When the user authenticates, the application retrieves the user's profile information attributes to render the page.
To run the application, you can execute the mvn spring-boot:run goal. Or run from your editor the main ExampleApplication.java file. The sample application will be available at http://localhost:8080/.
Click on the Login button to be redirected to the Authgear login page.
You can also customize the login page UI view from the Authgear Portal. After you sign up, you will receive an OTP code in your email to verify your identity.
And log into your new account, you will be redirected back to the home page:
You have successfully configured a Spring Boot application to use Authgear for authentication. Now users can sign up for a new account, log in, and log out. The full source code of the examples can be found .
There is so much more you can do with Authgear. Explore other means of login methods such as using in an email, , or . For the current application, you can also from the Authgear portal.
try{
const userInfo = await authgear.fetchUserInfo()
} catch(e) {
// failed to fetch user info
}authgear.fetchUserInfo { userInfoResult in
// sessionState is now up to date
// it will change to .noSession if the session is invalid
let sessionState = authgear.sessionState
switch userInfoResult {
case let .success(userInfo):
// read the userInfo if needed
case let .failure(error):
// failed to fetch user info
// the refresh token maybe expired or revoked
}authgear.fetchUserInfo(new OnFetchUserInfoListener() {
@Override
public void onFetchedUserInfo(@NonNull UserInfo userInfo) {
// sessionState is now up to date
// read the userInfo if needed
}
@Override
public void onFetchingUserInfoFailed(@NonNull Throwable throwable) {
// sessionState is now up to date
// it will change to NO_SESSION if the session is invalid
}
});try {
UserInfo userInfo = await authgear.getUserInfo();
// read the userInfo if needed
} catch (e) {
// failed to fetch user info
// the refresh token maybe expired or revoked
}
// sessionState is now up to date
SessionState state = authgear.sessionState;try
{
var userInfo = await authgear.FetchUserInfoAsync()
}
catch
{
// failed to fetch user info
// the refresh token maybe expired or revoked
}query {
users(
searchKeyword: "[email protected]"
) {
edges {e
node {
standardAttributes
customAttributes
}
}
}
}https://<YOUR_AUTHGEAR_ENDPOINT>/oauth2/authorize?client_id={YOUR_CLIENT_ID}&response_type=code&scope=openidcurl --request POST \
--url 'https://<YOUR_AUTHGEAR_ENDPOINT>/oauth2/token' \
--header 'content-type: application/x-www-form-urlencoded' \
--data grant_type=authorization_code \
--data code={YOUR_AUTHORIZATION_CODE} \
--data redirect_uri={YOUR_REDIRECT_URI} \
--data 'client_id={YOUR_CLIENT_ID}' \
--data client_secret={YOUR_CLIENT_SECRET} \
--data scope=openidcurl -X GET \
-H "Authorization: Bearer ACCESS_TOKEN" \
https://<YOUR_AUTHGEAR_ENDPOINT>/userinfo


http://localhost:8080/login/oauth2/code/authgear
<dependencies>
<dependency>
<groupId>org.springframework.boot</groupId>
<artifactId>spring-boot-starter-web</artifactId>
</dependency>
<dependency>
<groupId>org.springframework.boot</groupId>
<artifactId>spring-boot-starter-oauth2-client</artifactId>
</dependency>
<dependency>
<groupId>org.springframework.boot</groupId>
<artifactId>spring-boot-starter-thymeleaf</artifactId>
</dependency>
<dependency>
<groupId>org.thymeleaf.extras</groupId>
<artifactId>thymeleaf-extras-springsecurity6</artifactId>
<version>3.1.1.RELEASE</version>
</dependency>
</dependencies>
spring.security.oauth2.client.registration.authgear.client-id={your-client-id}
spring.security.oauth2.client.registration.authgear.client-secret={your-client-secret}
spring.security.oauth2.client.registration.authgear.authorization-grant-type=authorization_code
spring.security.oauth2.client.registration.authgear.scope=openid,offline_access
spring.security.oauth2.client.registration.authgear.redirect-uri=http://localhost:8080/login/oauth2/code/authgear/
spring.security.oauth2.client.provider.authgear.token-uri=https://{DOMAIN}/oauth2/token
spring.security.oauth2.client.provider.authgear.authorization-uri=https://{DOMAIN}/oauth2/authorize
# To logout from the app
authgear.oauth2.end-session-endpoint=https://{DOMAIN}/oauth2/end_session
@Configuration
@EnableMethodSecurity(securedEnabled = true)
public class SecurityConfig {
@Value("${authgear.oauth2.end-session-endpoint}")
private String endSessionEndpoint;
@Bean
public SecurityFilterChain configure(HttpSecurity http) throws Exception {
http.authorizeHttpRequests((requests) -> requests
// allow anonymous access to the root page
.requestMatchers("/").permitAll()
// authenticate all other requests
.anyRequest().authenticated())
// enable OAuth2/OIDC
.oauth2Login(withDefaults())
// configure logout handler
.logout(logout -> logout.logoutRequestMatcher(new AntPathRequestMatcher("/logout"))
.logoutSuccessUrl("/")
.addLogoutHandler(oidcLogoutHandler()));
return http.build();
}
LogoutHandler oidcLogoutHandler() {
return (request, response, authentication) -> {
try {
response.sendRedirect(endSessionEndpoint);
} catch (IOException e) {
throw new RuntimeException(e);
}
};
}
}
@Controller
public class HomeController {
@GetMapping("/")
String home() {
return "home";
}
}
Authentication for Next.js app with Authgear
In this guide, you'll learn how to implement authentication for the Next.js application, a popular React-based framework for JavaScript, and Authgear as the OIDC provider. The source code can be found on GitHub.
You will learn the following throughout the article:
How to add user login, sign-up, and logout to Next.js Applications.
How to create a middleware to protect Next.js application pages.
In the demo application, the Next.js app is integrated with Authgear, and the NextAuth.js client library is used for sending authentication requests as an OpenID Connect middleware from the app to Authgear.
Before you begin, you'll need the following:
A free Authgear account. Sign up if you don't have one already.
Experience with Next.js framework and application development.
To use Authgear services, you’ll need to have an application set up in the Authgear Dashboard. This setup allows users in Authgear to sign in to the Next.js application automatically once they are authenticated by Authgear.
To set up the application, navigate to the Authgear Portal UI and select Applications on the left-hand navigation bar. Use the interactive selector to create a new Authgear OIDC Client application or select an existing application that represents the project you want to integrate with.
Every application in Authgear is assigned an alphanumeric, unique client ID that your application code will use to call Authgear APIs through the NextAuth.js Client in the Next.js app. Record the generated Authgear ISSUER (for example, https://example-auth.authgear.cloud), CLIENT ID, CLIENT SECRET from the output. You will use these values in the next step for the client app config.
An Authorized Redirect URI of your application is the URL that Authgear will redirect to after the user has authenticated for the OpenID Connect middleware to complete the authentication process. In our case, it will be a home page for our Next.js and it will run at http://localhost:3000.
Set the following http://localhost:3000/api/auth/callback/authgear to the Authorized Redirect URIs field. If not set, users will not be returned to your application after they log in.
After you created the Authgear app, you choose how users need to authenticate on the login page. From the Authentication tab, navigate to Login Methods, you can choose a login method from various options including, by email, mobile, or social, just using a username or the custom method you specify. For this demo, we choose the Email+Passwordless approach where our users are asked to register an account and log in by using their emails. They will receive a One-time password (OTP) to their emails and verify the code to use the app.
You have two options here. You can either clone a working example or build the app from scratch.
If you want to run an already working application, you can clone the demo project from this GitHub repository using the following command.
git clone https://github.com/authgear/authgear-example-nextjs.gitSince you've cloned a working repo, you don't need to follow the next section. If you'd like to understand more about what was done in the demo application, feel free to read them.
Either way, continue configuring the Environment variables to proceed with this tutorial.
If you want to create your own application instead of using our demo project, you can create a new Next.js application by running the command below.
npx create-next-app authgear-example-nextjsThe create-next-app wizard will ask you a few questions on how to set up your application. Answer them accordingly.
Now that you have the application running, let's implement the authentication process by using NextAuth.js. We recommend you look also at the NextAuth.js Getting Start guide for the most up-to-date instructions. First, install NextAuth.js:
npm install next-authNow, you need to create a file named exactly like [...nextauth].js in src/pages/api/auth. First, make the directory and then create a file named [...nextauth].js in that directory.
Next, you'll configure a custom provider for Authgear. Doing so ensures every request to the /api/auth/* path is handled by NextAuth.js.
In the following code, we made a few config:
We've added https://authgear.com/scopes/full-userinfoas the scope to make Authgear return all user profiles
We have made id and name in the Next Auth session (under callbacks). You can also add other attributes such as email, phone_number, and preferred_username to the session as well.
import NextAuth from "next-auth"
export const authOptions = {
providers: [
{
id: "authgear",
name: "Authgear",
type: "oauth",
issuer: process.env.AUTHGEAR_ISSUER,
clientId: process.env.AUTHGEAR_CLIENT_ID,
clientSecret: process.env.AUTHGEAR_CLIENT_SECRET,
wellKnown: `${process.env.AUTHGEAR_ISSUER}/.well-known/openid-configuration`,
authorization: { params: { scope: "openid offline_access https://authgear.com/scopes/full-userinfo" } },
client: {
token_endpoint_auth_method: "client_secret_post",
},
profile(profile) {
return {
id: profile.sub,
}
},
}
],
callbacks: {
async jwt({ token, account, profile }) {
if (account) {
token.accessToken = account.access_token
token.id = profile.sub
token.name = profile.name
}
return token
},
async session({ session, token, user }) {
session.accessToken = token.accessToken
session.user.id = token.id
session.user.name = token.name
return session
}
},
}
export default NextAuth(authOptions)To allow components to check whether the current user is logged in, change src/pages/_app.js to have your application rendered inside a <SessionProvider> context, as shown below.
import '@/styles/globals.css'
import { SessionProvider } from "next-auth/react"
export default function App({
Component,
pageProps: {session, ...pageProps},
}) {
return (
<SessionProvider session={session}>
<Component {...pageProps} />
</SessionProvider>
);
}This will make the useSession() React Hook accessible to your entire application. Now, create a component that will either render a "Log in" or "Log out" button, depending on the session state, in a src/components/login-button.jsx file.
import { useSession, signIn, signOut } from "next-auth/react"
export default function Component() {
const { data: session } = useSession()
if (session) {
return (
<>
Status: Logged in as {session.user.id} <br />
<button onClick={() => signOut()}>Log out</button>
</>
)
}
return (
<>
Status: Not logged in <br />
<button onClick={() => signIn()}>Log in</button>
</>
)
}Then, you change your home component located at src/pages/index.js to include the <LoginButton /> component inside <main>.
import { useSession, signIn, signOut } from "next-auth/react"
export default function Component() {
const { data: session } = useSession()
if (session) {
return (
<>
Status: Logged in as {session.user.id} <br />
<button onClick={() => signOut()}>Log out</button>
</>
)
}
return (
<>
Status: Not logged in <br />
<button onClick={() => signIn()}>Log in</button>
</>
)
}In the root directory of your project, add the file .env.local with the following environment variables:
AUTHGEAR_ISSUER={your-authgear-app-endpoint}
AUTHGEAR_CLIENT_ID={your-client-id}
AUTHGEAR_CLIENT_SECRET={your-client-secret}replace with Authgear app settings values from Part1 such as Issuer, ClientId, ClientSecret.
Start the HTTP server by running the following command.
npm run devBrowse to localhost:3000. If the installation went successful, you should see the Login page.
Click the "Log in" button to be taken to a page with a "Sign in with Authgear" button.
After clicking it, you should be redirected to your Authgear login screen.
Your users can sign-up and login to your application through a page hosted by Authgear, which provides them with a secure, standards-based login experience that you can customize with your own branding and various authentication methods, such as social logins, passwordless, biometrics logins, one-time-password (OTP) with SMS/WhatsApp, and multi-factor authentication (MFA).
After you have authenticated with a one-time password sent to your email, you'll arrive back at your Next.js application home screen, with your email address displayed and a "Log out" button.
This tutorial showed how to quickly implement an end-to-end OpenID Connect flow in Next.js with Authgear. Only simple code is needed, after which protected views are secured with built-in UI login pages.
Authentication for PHP websites with Authgear and OAuth2
Using OAuth, you can use Authgear to add user authentication in a vanilla PHP application.
In this guide, we'll cover how to implement OAuth 2.0 login in a regular PHP web application with Authgear as the Identity Provider.
At the end of this post, you'll learn the following:
How to create an Authgear Application
How to enable email and password sign-in
How to sign in with Authgear from a PHP app
How to request user info from Authgear
How to use a refresh token
And finally how to log users out and revoke access tokens.
To follow along, you'll need the following:
PHP runtime (E.g XAMPP for testing offline on Windows devices)
An Authgear account. Sign up for free if you don't have an account yet.
Composer (PHP package manager) installation
Your preffered code editor (e.g VS Code).
In this guide, we'll build a basic PHP application that lets a user sign in with their registered email and password.
The application will welcome the user with their email address after they sign in successfully. If the user is not signed in, the application will display links to Register or Login.
The following screenshot shows what the User Interface for the app will look like:
Now let's dive into the actual steps of how to add Authgear to a PHP application.
Under this section, we will cover the steps for configuring the Authgear application our PHP website will be connecting to. We'll do all these configurations in the Authgear Portal.
The first step you need to take is to create a new application or configure an existing application on the Authgear Portal.
To do that, log in to the Authgear Portal, and select your project (or create a new one if you don't have any yet). From your project dashboard navigate to the Applications section and enter the details for your new application as shown below:
Once you're done, click on the Save button to continue. Then, click on Next to see the configuration page for your application.
The application configuration page contains basic information like Client ID and Client Secret that we'll use later in this tutorial. Hence, try to note the values down.
In addition to basic information, you can find other configuration information including endpoints and Authorized Redirect URIs.
The Authorized Redirect URIs section contains a link to the page you want Authgear to redirect users to after login.
Update the value for Authorized Redirect URIs to a page on your application. For our example PHP application the value will be http://localhost because we plan to test run it offline using XAMPP. Also, try to note this value down as we'll be using it in later steps.
Here we will cover the steps for implementing a PHP website that interacts with Authgear using the Open ID Connect (OIDC) standard.
Create a new PHP project on your computer and add an index.php file to the root of the project folder.
Add the following code to index.php to create the User Interface of the example app.
<?php
$appUrl = "REPLACE WITH YOUR AUTHGEAR PROJECT URL";
?>
<!DOCTYPE html>
<html lang="en">
<head>
<meta charset="UTF-8">
<meta name="viewport" content="width=device-width, initial-scale=1.0">
<title>PHP Demo - Home</title>
</head>
<body style="background-color: #DEDEDE">
<div style="max-width: 650px; margin: 16px auto; background-color: #FFFFFF; padding: 16px;">
<h3>Hello world!</h3>
<p>This demo app shows you how to add user authentication to your app using Authgear</p>
<p>Checkout <a href="https://docs.authgear.com">docs.authgear.com</a> to learn more about adding Authgear to your apps.</p>
<p><a href="login.php">Login</a></p>
<p><a href="logout.php">Logout</a></p>
</div>
</body>
</html>Note: The Login and Logout links in the above code currently point to login.php and logout.php respectively, we'll create both files later.
In this step, we'll add our Authgear application configuration to the PHP project.
We'll use the OAuth 2.0 Client PHP package for the configuration.
Install the package manually from Github or via Composer by running the following command from your PHP project's root directory:
composer require league/oauth2-clientNext, after the package is installed, create a new config.php file in the PHP project folder. Add the following code to the file:
<?php
require 'vendor/autoload.php';
$appUrl = "PLACE_YOUR_PROJECT_URL_HERE";
$clientID = "PLACE_YOUR_CLIENT_ID_HERE";
$clientSecret = "PLACE_YOUR_CLIENT_SECRET_HERE";
$redirectUri = "PLACE_YOUR_REDIRECT_URI_HERE";
$provider = new \League\OAuth2\Client\Provider\GenericProvider([
'clientId' => $clientID, // The client ID assigned to you by the provider (authgear).
'clientSecret' => $clientSecret, // The client secret is assigned to you by the provider.
'redirectUri' => $redirectUri, // The authorized Redirect URI you specified in your authgear app.
'urlAuthorize' => $appUrl.'/oauth2/authorize',
'urlAccessToken' => $appUrl.'/oauth2/token',
'urlResourceOwnerDetails' => $appUrl.'/oauth2/userInfo',
'scopes' => 'openid offline_access'
]);
?>Note: Replace the values for clientId, clientSecret, redirectUri with corresponding values from the Authgear application you created in Step 1.
Including the offline_access scope is required to get a refresh token from Authgear.
The flow for Login on our app is as follows:
The user clicks on the Login button
User is redirected to the Authgear authorization page where they can sign in using email and password or any other sign-in methods you have enabled for your Authgear project.
The user is redirected back to your website with an authorization code.
In order to implement the above, you need to create a login.php file in your project's root directory. Add the following code to the login.php file:
<?php
include "config.php";
if (!isset($_GET['code'])) {
// Fetch the authorization URL from the provider; this returns the
// urlAuthorize option and generates and applies any necessary parameters
// (e.g. state).
$authorizationUrl = $provider->getAuthorizationUrl();
// Redirect the user to the authorization URL.
header('Location: ' . $authorizationUrl);
exit;
}
?>At this point, if you try running the example app in a browser and click the Login link in index.php, your app should redirect to the Authgear login page. If you sign in successfully, you should be redirected back to the redirect URL you specified earlier in your project configuration.
Authgear will redirect to your Authorized Redirect URI with extra parameters like code or an error message in the URL. The value for the code parameter is your authorization code. In the next step, we'll use the authorization code to generate an access token.
Usually, after successful sign-in, you'll want to start using the current user's info to offer custom experience in your app.
In this step, we'll use the PHP OAuth 2.0 Client once more to interact with our Authgear app.
First, open index.php and search for the line with the following code:
$appUrl = "REPLACE WITH YOUR AUTHGEAR PROJECT URL";Replace the above line with this code:
include "config.php";
session_start();
// if code is set, get access token
if (isset($_GET['code'])) {
$code = $_GET['code'];
try {
$accessToken = $provider->getAccessToken('authorization_code', [
'code' => $code
]);
$_SESSION['accessToken'] = $accessToken;
$_SESSION['refreshToken'] = $accessToken->getRefreshToken(); //store refresh token so that you can use it later
} catch (\League\OAuth2\Client\Provider\Exception\IdentityProviderException $e) {
// Failed to get the access token or user details.
exit($e->getMessage());
}
}The above code exchanges the authorization code returned in the redirect for an access token. It then stores the access token in the PHP session so that we can use this token in future requests to protected resources.
Now that we have the access token, let's try to get the current user's details. To do that, update the HTML part in index.php like this:
<div style="max-width: 650px; margin: 16px auto; background-color: #FFFFFF; padding: 16px;">
<h3>Hello world!</h3>
<p>This demo app shows you how to add user authentication to your app using Authgear</p>
<p>Checkout <a href="https://docs.authgear.com">docs.authgear.com</a> to learn more about adding Authgear to your apps.</p>
<?php
if (isset($_SESSION['accessToken'])) {
//if access token exists in session, attempt to fetch user info
$storedAccessToken = $_SESSION['accessToken'];
$resourceOwner = $provider->getResourceOwner($storedAccessToken);
$userInfo = $resourceOwner->toArray();
echo "Welcome back " . $userInfo['email'];
echo "<br/>";
echo '<a href="">Logout</a>';
} else { ?>
<p><a href="login.php">Login</a></p>
<?php
}
?>
</div>Now test the app on your browser again and you should get the following page after login:
We've successfully added user authentication to our PHP app using Authgear as the identity provider. The above page displays a welcome message with the email address the user registered with on your Authgear project. You can display other info about the user from the value of $userInfo variable.
In OAuth 2.0, a refresh token is a key that's usually included in the response from the token endpoint when a client application exchanges the authorization code for an access token.
Access tokens expire after some time. Hence, we can use this refresh token to request a new access token without requiring our application users to log in again. In this step, we'll show you how to use the refresh token.
In the last step, we stored the value for the refresh token in the $_SESSION['refreshToken'] variable. So, to get the refresh token, simply read the value from that variable.
Now, add the following code to index.php to read and use the refresh token to get a new access token:
First, find the line with the following code:
$resourceOwner = $provider->getResourceOwner($storedAccessToken);Replace that line with the following blocks of code:
if ($storedAccessToken->hasExpired()) {
$newAccesstoken = $provider->getAccessToken('refresh_token', [
'refresh_token' => $_SESSION['refreshToken']
]);
$_SESSION['accessToken'] = $newAccesstoken;
$resourceOwner = $provider->getResourceOwner($newAccesstoken);
} else {
$resourceOwner = $provider->getResourceOwner($storedAccessToken);
}Note: It is required to include offline_access in your OAuth 2.0 scopes to get a refresh token from Authgear.
Authgear provides a token revoke endpoint that you can use to revoke a refresh token and all the access associated with it.
To use the token revoke endpoint to log users out of your application, create a new logout.php file in your project directory then add the following code to the file:
<?php
include "config.php";
session_start();
if (isset($_SESSION['accessToken'])) {
$options = [];
$options['headers']['content-type'] = 'application/x-www-form-urlencoded';
$options['body'] = http_build_query(['token'=>$_SESSION['refreshToken']]);
$request = $provider->getRequest(
'POST',
$appUrl. '/oauth2/revoke',
$options
);
$provider->getResponse($request);
$_SESSION['accessToken'] = null;
$_SESSION['refreshToken'] = null;
}The above code will revoke your refresh token and delete all the session variables.
In this post, we covered how to get started with adding Authgear to a regular web app built with PHP and no framework.
We also tried out an example of using the Authgear authorization code to retrieve an access token, then we used the token to access the user info endpoint.
Here's a link complete source code for our example app on Github.
There's so much more you can do with Authgear and you can continue learning by checking out more topics on the documentation page.
How to integrate with a Flutter app
This guide provides instructions on integrating Authgear with a Flutter app. Supported platforms include:
Flutter 2.5.0 or higher
Signup for an Authgear Portal account in . Or you can use your self-deployed Authgear.
From the Project listing, create a new Project or select an existing Project. After that, we will need to create an application in the project.
Step 1: Create an application in the Portal
Go to Applications on the left menu bar.
You will see the "New Application" page or Click ⊕Add Application in the top tool bar.
Input the name of your application and select Native App as the application type. Click "Save".
You will see a list of guides that can help you for setting up, then click "Next".
Step 2: Configure the application
In your IDE, define a custom URI scheme that the users will be redirected back to your app after they have authenticated with Authgear, e.g. com.myapp.example://host/path.[^1]
Head back to Authgear Portal, fill in the Redirect URI that you have defined in the previous steps.
Click "Save" in the top tool bar and keep the Client ID. You can also obtain it again from the Applications list later.
Follow the documentation of Flutter to see how you can create a new Flutter app.
To finish the integration, setup the app to handle the redirectURI specified in the application. This part requires platform specific integration.
This declares the URL schemes supported by your app, so the device can redirect the user to the app after authentication using the redirect URI.
Add the following <activity> entry to the AndroidManifest.xml of your app. The intent system would dispatch the redirect URI to OAuthRedirectActivity and the SDK would handle the rest.
If your Android app is targeting API level 30 or above (Android 11 or above), you need to add a queries section to AndroidManifest.xml.
In Info.plist, add the matching redirect URI by adding the key CFBundleURLTypes and the values inside <dict> as shown as the following example.
Add this code to your app. This snippet configures authgear to connect to an authgear server deployed at endpoint with the client you have just setup via clientID, opens a browser for authentication, and then upon success redirects to the app via the redirectURI specified.
Now, your user is logged in!
When you start launching the application. You may want to know if the user has logged in. (e.g. Show users the login page if they haven't logged in). The sessionState reflects the user logged in state in the SDK local state. That means even the sessionState is SessionState.authenticated, the session may be invalid if it is revoked remotely. After initializing the Authgear SDK, call fetchUserInfo to update the sessionState as soon as it is proper to do so.
The value of sessionState can be SessionState.unknown, SessionState.noSession or SessionState.authenticated. Initially, the sessionState is SessionState.unknown. After a call to authgear.configure, the session state would become SessionState.authenticated if a previous session was found, or SessionState.noSession if such session was not found.
In some cases, you may need to obtain current user info through the SDK. (e.g. Display email address in the UI). Use the fetchUserInfo function to obtain the user info, see .
To include the access token to the HTTP requests to your application server, use wrapHttpClient.
The wrapped client will include the Authorization header in every HTTP request, and refresh access token automatically.
To log out the user from the current app session, you need to invoke thelogoutfunction.
To protect your application server from unauthorized access. You will need to integrate your backend with Authgear.
For detailed documentation on the Flutter SDK, visit
[^1]: For futher instruction on setting up custom URI scheme in Flutter, see
[^2]: For more explaination on JWT, see


How to make authorized request to your application server after login with Authgear
In this section, we are going to explain how to make an authorized request to your application server by using Authgear SDK. If you are using Cookie-based authentication in your web application, you can skip this section as session cookies are handled by the browser automatically.
To determine which user is calling your server, you will need to include the Authorization header in every request that send to your application server.
You will need to set up Backend integration, Authgear will help you to resolve the Authorization header to determine whether the incoming HTTP request is authenticated or not.
In the below section, we will explain how to set up SDK to include Authorization header to your application requests.
Configure the Authgear SDK with the Authgear endpoint and client id. The SDK must be properly configured before use, you can call configure multiple times but you should only need to call it once. No network call will be triggered during configure.
authgear
.configure({
clientID: "<YOUR_APPLICATION_CLIENT_ID>",
endpoint: "<YOUR_AUTHGEAR_ENDPOINT>",
})
.then(() => {
// configured successfully
})
.catch((e) => {
// failed to configured
});let authgear = Authgear(clientId: clientId, endpoint: endpoint)
authgear.configure() { result in
switch result {
case .success():
// configured successfully
case let .failure(error):
// failed to configured
}
}ConfigureOptions configureOptions = new ConfigureOptions();
Authgear authgear = new Authgear(getApplication(), clientID, endpoint);
authgear.configure(configureOptions, new OnConfigureListener() {
@Override
public void onConfigured() {
// configured successfully
}
@Override
public void onConfigurationFailed(@NonNull Throwable throwable) {
// failed to configured
}
});var authgearOptions = new AuthgearOptions
{
ClientId = "<YOUR_APPLICATION_CLIENT_ID>",
AuthgearEndpoint: "<YOUR_AUTHGEAR_ENDPOINT>",
};
#if __ANDROID__
var authgear = new AuthgearSdk(GetActivity().ApplicationContext, authgearOptions);
#else
#if __IOS__
var authgear = new AuthgearSdk(UIKit.UIApplication.SharedApplication, authgearOptions);
#endif
#endif
await authgear.ConfigureAsync();sessionState reflect the user logged in state. Right after configure, the session state only reflects the SDK local state. That means even sessionState is AUTHENTICATED, the session may be invalid if it is revoked remotely. You will only know that after calling the server, call fetchUserInfo as soon as it is proper to do so, e.g. when the device goes online.
// value can be NO_SESSION or AUTHENTICATED
// After authgear.configure, it only reflect SDK local state.
let sessionState = authgear.sessionState;
if (sessionState === "AUTHENTICATED") {
authgear
.fetchUserInfo()
.then((userInfo) => {
// sessionState is now up to date
// read the userInfo if needed
})
.catch((e) => {
// sessionState is now up to date
// it will change to NO_SESSION if the session is invalid
});
}// value can be .noSession or .authenticated.
// After authgear.configure, it only reflect SDK local state.
let sessionState = authgear.sessionState
// call fetchUserInfo to see if the session is valid
if authgear.sessionState == .authenticated {
authgear.fetchUserInfo { userInfoResult in
// sessionState is now up to date
// it will change to .noSession if the session is invalid
let sessionState = authgear.sessionState
switch userInfoResult {
case let .success(userInfo):
// read the userInfo if needed
case let .failure(error):
// failed to fetch user info
// the refresh token maybe expired or revoked
}
}// value can be NO_SESSION or AUTHENTICATED
// After authgear.configure, it only reflect SDK local state.
SessionState sessionState = authgear.getSessionState();
if (sessionState == SessionState.AUTHENTICATED) {
authgear.fetchUserInfo(new OnFetchUserInfoListener() {
@Override
public void onFetchedUserInfo(@NonNull UserInfo userInfo) {
// sessionState is now up to date
// read the userInfo if needed
}
@Override
public void onFetchingUserInfoFailed(@NonNull Throwable throwable) {
// sessionState is now up to date
// it will change to NO_SESSION if the session is invalid
}
});
}// value can be NoSession or Authenticated
// After Authgear.ConfigureAsync, it only reflects local state.
var sessionState = authgear.SessionState;
if (sessionState == SessionState.Authenticated)
{
try
{
var userInfo = await authgear.FetchUserInfoAsync();
// sessionState is now up to date
}
catch (Exception ex)
{
// sessionState is now up to date
// it will change to NoSession if the session is invalid
}
}fetch function from the SDK (JavaScript Only)Javascript Only. Authgear SDK provides fetch function for you to call your application server. The fetch function will include Authorization header in your application request, and handle refresh access token automatically. authgear.fetch implement fetch. If you are using another networking library and want to include the Authorization header yourself. You can skip this and go to the next step.
authgear
.fetch("YOUR_SERVER_URL")
.then(response => response.json())
.then(data => console.log(data));You will need to include the Authorization header in your application request. Call refreshAccessTokenIfNeeded every time before using the access token, the function will check and make the network call only if the access token has expired. Include the access token into the Authorization header of your application request.
authgear
.refreshAccessTokenIfNeeded()
.then(() => {
// access token is ready to use
// accessToken can be string or undefined
// it will be empty if user is not logged in or session is invalid
const accessToken = authgear.accessToken;
// include Authorization header in your application request
const headers = {
Authorization: `Bearer ${accessToken}`
};
});authgear.refreshAccessTokenIfNeeded() { result in
switch result {
case .success():
// access token is ready to use
// accessToken can be empty
// it will be empty if user is not logged in or session is invalid
// include Authorization header in your application request
if let accessToken = authgear.accessToken {
// example only, you can use your own networking library
var urlRequest = URLRequest(url: "YOUR_SERVER_URL")
urlRequest.setValue(
"Bearer \(accessToken)", forHTTPHeaderField: "authorization")
// ... continue making your request
}
case let .failure(error):
// failed to refresh access token
// the refresh token maybe expired or revoked
}
}// Suppose we are preparing an http request in a background thread.
// Setting up the request, e.g. preparing a URLConnection
try {
authgear.refreshAccessTokenIfNeededSync();
} catch (OauthException e) {
// failed to refresh access token
// the refresh token maybe expired or revoked
}
// access token is ready to use
// accessToken can be string or undefined
// it will be empty if user is not logged in or session is invalid
String accessToken = authgear.getAccessToken();
HashMap<String, String> headers = new HashMap<>();
headers.put("authorization", "Bearer " + accessToken);
// Submit the request with the headers...try
{
await authgear.RefreshAccessTokenIfNeededAsync();
}
catch (OauthException ex)
{
// failed to refresh access token
// the refresh token maybe expired or revoked
}
// access token is ready to use
// accessToken can be string or undefined
// it will be empty if user is not logged in or session is invalid
var accessToken = authgear.AccessToken;
var client = GetHttpClient(); // Get the re-used http client of your app, as per recommendation.
var httpRequestMessage = new HttpRequestMessage(myHttpMethod, myUrl);
httpRequestMessage.Headers.Authorization = new AuthenticationHeaderValue("Bearer", accessToken);
// Send the request with the headers...If the session is revoked from the management portal, the client will call your application server with an invalid access token. Your application server can check that by looking at the resolver headers.
For example, you application may return HTTP status code 401 for unauthorized requests. Depending on your application flow, you may want to show your user login page again or reset the SDK sessionState to NO_SESSION locally. To clear the sessionState, you can use clearSessionState function.
// example only
// if your application server return HTTP status code 401 for unauthorized request
async function fetchAppServer() {
var response = await authgear.fetch("YOUR_SERVER_URL");
if (response.status === 401) {
// if you want to clear the session state locally, call clearSessionState
// `authgear.sessionState` will become `NO_SESSION` after calling
await authgear.clearSessionState();
throw new Error("user session invalid");
}
// ...
}// example only
// if your application server return HTTP status code 401 for unauthorized request
if let response = response as? HTTPURLResponse {
if response.statusCode == 401 {
// if you want to clear the session state locally, call clearSessionState
// `authgear.sessionState` will become `.noSession` after calling
authgear.clearSessionState { result in
switch result {
case .success():
// clear SDK session state locally
// `authgear.sessionState` becomes `.noSession`
case let .failure(error):
// failed to clear session state
}
}
}
}// example only
// if your application server return HTTP status code 401 for unauthorized request
responseCode = httpConn.getResponseCode();
if (responseCode == HttpURLConnection.Unauthorized) {
// if you want to clear the session state locally, call clearSessionState
// `authgear.getSessionState()` will become `NO_SESSION` after calling
authgear.clearSessionState();
}// example only
// if your application server return HTTP status code 401 for unauthorized request
statusCode = httpResponseMessage.StatusCode;
if (statusCode == HttpStatusCode.Unauthorized)
{
// if you want to clear the session state locally, call ClearSessionState
// `authgear.SessionState` will become `NoSession` after calling
authgear.ClearSessionState();
}authgear.fetchUserInfo(new OnFetchUserInfoListener() {
@Override
public void onFetchedUserInfo(@NonNull UserInfo userInfo) {
// sessionState is now up to date
// read the userInfo if needed
}
@Override
public void onFetchingUserInfoFailed(@NonNull Throwable throwable) {
// sessionState is now up to date
// it will change to NO_SESSION if the session is invalid
}
});oauth:
clients:
- name: your_app_name
client_id: a_random_generated_string
redirect_uris:
- "com.myapp.example://host/path"
grant_types:
- authorization_code
- refresh_token
response_types:
- code
- noneflutter create myapp
cd myappflutter pub add flutter_authgear<!-- Your application configuration. Omitted here for brevity -->
<application>
<!-- Other activities or entries -->
<!-- Add the following activity -->
<!-- android:exported="true" is required -->
<!-- See https://developer.android.com/about/versions/12/behavior-changes-12#exported -->
<activity android:name="com.authgear.flutter.OAuthRedirectActivity"
android:exported="true"
android:launchMode="singleTask">
<intent-filter>
<action android:name="android.intent.action.VIEW" />
<category android:name="android.intent.category.DEFAULT" />
<category android:name="android.intent.category.BROWSABLE" />
<!-- Configure data to be the exact redirect URI your app uses. -->
<!-- Here, we are using com.authgear.example://host/path as configured in authgear.yaml. -->
<!-- NOTE: The redirectURI supplied in AuthenticateOptions *has* to match as well -->
<data android:scheme="com.myapp.example"
android:host="host"
android:pathPrefix="/path"/>
</intent-filter>
</activity>
</application><?xml version="1.0" encoding="utf-8"?>
<manifest xmlns:android="http://schemas.android.com/apk/res/android">
<!-- Other elements such <application> -->
<queries>
<intent>
<action android:name="android.support.customtabs.action.CustomTabsService" />
</intent>
</queries>
</manifest><?xml version="1.0" encoding="UTF-8"?>
<!DOCTYPE plist PUBLIC "-//Apple//DTD PLIST 1.0//EN" "http://www.apple.com/DTDs/PropertyList-1.0.dtd">
<plist version="1.0">
<dict>
<!-- Other entries -->
<key>CFBundleURLTypes</key>
<array>
<dict>
<key>CFBundleTypeRole</key>
<string>Editor</string>
<key>CFBundleURLSchemes</key>
<array>
<string>com.myapp.example</string>
<!-- Put the redirect URI your app uses here. -->
</array>
</dict>
</array>
</dict>
</plist>import 'package:flutter/material.dart';
import 'package:flutter_authgear/flutter_authgear.dart';
void main() {
runApp(const MyApp());
}
class MyApp extends StatefulWidget {
const MyApp({Key? key}) : super(key: key);
@override
State<MyApp> createState() => _MyAppState();
}
class _MyAppState extends State<MyApp> {
late Authgear _authgear;
@override
void initState() {
super.initState();
_init();
}
Future<void> _init() async {
_authgear = Authgear(endpoint: "ENDPOINT", clientID: "CLIENT_ID");
await _authgear.configure();
}
@override
Widget build(BuildContext context) {
return MaterialApp(
title: "MyApp",
home: Scaffold(
appBar: AppBar(title: const Text("MyApp")),
body: TextButton(
child: Text("Authenticate"),
onPressed: _onPressedAuthenticate,
),
),
);
}
Future<void> _onPressedAuthenticate() async {
try {
await _authgear.authenticate(redirectURI: "REDIRECT_URI");
} on CancelException {
}
}
}// After authgear.configure, it only reflect SDK local state.
// value can be SessionState.noSession or SessionState.authenticated
SessionState state = authgear.sessionState;
UserInfo? userInfo;
try {
userInfo = await authgear.getUserInfo();
// read the userInfo if needed
} catch (e) {
// failed to fetch user info
// the refresh token maybe expired or revoked
}
// sessionState is now up to date
// it will change to SessionState.noSession if the session is invalid
state = authgear.sessionState;final originalClient = ...
final client = authgear.wrapHttpClient(originalClient);await authgear.logout();
How to use authgear android SDK
This guide provides instructions on integrating Authgear with an Android app. Supported platforms include:
Android 5.0 (API 21) or higher
Signup for an Authgear Portal account in https://portal.authgear.com. Or you can use your self-deployed Authgear.
From the Project listing, create a new Project or select an existing Project. After that, we will need to create an application in the project.
Step 1: Create an application in the Portal
Go to Applications on the left menu bar.
Click ⊕Add Application in the top tool bar.
Input the name of your application and select Native App as the application type. Click "Save".
You will see a list of guides that can help you for setting up, then click "Next".
Step 2: Configure the application
In your IDE (e.g. Android Studio), define a custom URI scheme that the users will be redirected back to your app after they have authenticated with Authgear, e.g. com.myapp.example://host/path.[^1]
Head back to Authgear Portal, fill in the Redirect URI that you have defined in the previous steps.
Click "Save" in the top tool bar and keep the Client ID. You can also obtain it again from the Applications list later.
oauth:
clients:
- name: your_app_name
client_id: a_random_generated_string
redirect_uris:
- "com.myapp://host/path"
grant_types:
- authorization_code
- refresh_token
response_types:
- code
- noneAdd jitpack repository to gradle
allprojects {
repositories {
// Other repository
maven { url 'https://jitpack.io' }
}
}Add authgear in dependencies. Use $branch-SNAPSHOT (e.g. main-SNAPSHOT) for the latest version in a branch or a release tag/git commit hash of the desired version.
dependencies {
// Other implementations
implementation 'com.github.authgear:authgear-sdk-android:SNAPSHOT'
}Add the following activity entry to the AndroidManifest.xml of your app. The intent system would dispatch the redirect URI to OauthRedirectActivity and the SDK would handle the rest.
<!-- Your application configuration. Omitted here for brevity -->
<application>
<!-- Other activities or entries -->
<!-- Add the following activity -->
<!-- android:exported="true" is required -->
<!-- See https://developer.android.com/about/versions/12/behavior-changes-12#exported -->
<activity android:name="com.oursky.authgear.OauthRedirectActivity"
android:exported="true"
android:launchMode="singleTask">
<intent-filter>
<action android:name="android.intent.action.VIEW" />
<category android:name="android.intent.category.DEFAULT" />
<category android:name="android.intent.category.BROWSABLE" />
<!-- Configure data to be the exact redirect URI your app uses. -->
<!-- Here, we are using com.myapp://host/path as configured in authgear.yaml. -->
<!-- NOTE: The redirectURI supplied in AuthenticateOptions *has* to match as well -->
<data android:scheme="com.myapp"
android:host="host"
android:pathPrefix="/path"/>
</intent-filter>
</activity>
</application>If your Android app is targeting API level 30 or above (Android 11 or above), you need to add a queries section to AndroidManifest.xml.
<?xml version="1.0" encoding="utf-8"?>
<manifest xmlns:android="http://schemas.android.com/apk/res/android">
<!-- Other elements such <application> -->
<queries>
<intent>
<action android:name="android.support.customtabs.action.CustomTabsService" />
</intent>
</queries>
</manifest>Add the following code to your app's Application class. If there is none, add a class that extends Application. Make sure it is declared in AndroidManifest.xml's application tag with the name attribute as described here.
public class MyAwesomeApplication extends Application {
// The client ID of the oauth client.
private static final String CLIENT_ID = "a_random_generated_string"
// Deployed authgear's endpoint
private static final String AUTHGEAR_ENDPOINT = "http://<myapp>.authgear.cloud/"
private Authgear mAuthgear;
public void onCreate() {
super.onCreate();
mAuthgear = new Authgear(this, CLIENT_ID, AUTHGEAR_ENDPOINT);
mAuthgear.configure(new OnConfigureListener() {
@Override
public void onConfigured() {
// Authgear can be used.
}
@Override
public void onConfigurationFailed(@NonNull Throwable throwable) {
Log.d(TAG, throwable.toString());
// Something went wrong, check the client ID or endpoint.
}
});
}
public Authgear getAuthgear() {
return mAuthgear;
}
}Add the following code to your view model. Do NOT call these codes in activity as this can lead to memory leak when your activity instance is destroyed. You can read more on the view model in the official documentation here.
class MyAwesomeViewModel extends AndroidViewModel {
// Other methods
// This is called when login button is clicked.
public void login() {
MyAwesomeApplication app = getApplication();
AuthenticateOptions options = new AuthenticateOptions("com.myapp://host/path");
app.getAuthgear().authenticate(options, new OnAuthenticateListener() {
@Override
public void onAuthenticated(@Nullable UserInfo userInfo) {
// The user is logged in!
}
@Override
public void onAuthenticationFailed(@NonNull Throwable throwable) {
if (throwable instanceof CancelException) {
// User cancel
} else {
// Something went wrong.
}
}
});
}
}The above call of authorize passes in the exact redirect URI as configured in the applications and manifest, the callback then indicates authorization success or failure. By default, the callback is called on the main thread.
Now, your user is logged in!
When you start launching the application. You may want to know if the user has logged in. (e.g. Show users the login page if they haven't logged in). The SessionState reflects the user logged in state in the SDK local state. That means even the SessionState is AUTHENTICATED, the session may be invalid if it is revoked remotely. After initializing the Authgear SDK, call fetchUserInfo to update the SessionState as soon as it is proper to do so.
// After authgear.configure, it only reflect SDK local state.
// value can be NO_SESSION or AUTHENTICATED
SessionState state = mAuthgear.getSessionState();
mAuthgear.fetchUserInfo(new OnFetchUserInfoListener() {
@Override
public void onFetchedUserInfo(@NonNull UserInfo userInfo) {
// sessionState is now up to date
// read the userInfo if needed
}
@Override
public void onFetchingUserInfoFailed(@NonNull Throwable throwable) {
// sessionState is now up to date
// it will change to NO_SESSION if the session is invalid
}
});The value of SessionState can be UNKNOWN, NO_SESSION or AUTHENTICATED. Initially, the sessionState is UNKNOWN. After a call to authgear.configure, the session state would become AUTHENTICATED if a previous session was found, or NO_SESSION if such session was not found.
In some cases, you may need to obtain current user info through the SDK. (e.g. Display email address in the UI). Use the fetchUserInfo function to obtain the user info, see example.
Call refreshAccessTokenIfNeeded every time before using the access token, the function will check and make the network call only if the access token has expired. Include the access token into the Authorization header of your application request. If you are using OKHttp in your project, you can also use the interceptor extension provided by the SDK, see detail.
// Suppose we are preparing an http request in a background thread.
// Setting up the request, e.g. preparing a URLConnection
try {
authgear.refreshAccessTokenIfNeededSync();
} catch (OAuthException e) {
// Something went wrong
}
String accessToken = authgear.getAccessToken();
if (accessToken == null) {
// The user is not logged in, or the token is expired.
// It is up to the caller to decide how to handle this situation.
// Typically, the request could be aborted
// immediately as the response would be 401 anyways.
return;
}
HashMap<String, String> headers = new HashMap<>();
headers.put("authorization", "Bearer " + accessToken);
// Submit the request with the headers...To log out the user from the current app session, you need to invoke thelogoutfunction.
class MyAwesomeViewModel extends AndroidViewModel {
// Other methods
// This is called when logout button is clicked.
public void logout() {
MyAwesomeApplication app = getApplication();
app.getAuthgear().logout(new OnLogoutListener() {
@Override
public void onLogout() {
// Logout successfully
}
@Override
public void onLogoutFailed(@NonNull Throwable throwable) {
// Failed to logout
}
});
}
}To protect your application server from unauthorized access. You will need to integrate your backend with Authgear.
For detailed documentation on the Flutter SDK, visit Android SDK Reference
[^1]: For futher instruction on setting up custom URI scheme in Android, see https://developer.android.com/training/app-links/deep-linking [^2]: For more explaination on JWT, see https://en.wikipedia.org/wiki/JSON_Web_Token
How to integrate with a React Native app
This guide provides instructions on integrating Authgear with a React Native app. Supported platforms include:
React Native 0.60.0 or higher
Signup for an Authgear Portal account in https://portal.authgear.com/. Or you can use your self-deployed Authgear.
From the Project listing, create a new Project or select an existing Project. After that, we will need to create an application in the project.
Step 1: Create an application in the Portal
Go to Applications on the left menu bar.
Click ⊕Add Application in the top tool bar.
Input the name of your application and select Native App as the application type. Click "Save".
You will see a list of guides that can help you for setting up, then click "Next".
Step 2: Configure the application
In your IDE, define a custom URI scheme that the users will be redirected back to your app after they have authenticated with Authgear, e.g. com.myapp.example://host/path. For futher instruction on setting up custom URI scheme in React Native, see https://reactnative.dev/docs/linking
Head back to Authgear Portal, fill in the URI that you have defined in the previous steps.
Click "Save" in the top tool bar and keep the Client ID. You can also obtain it again from the Applications list later.
oauth:
clients:
- name: your_app_name
client_id: a_random_generated_string
redirect_uris:
- "com.myapp://host/path"
grant_types:
- authorization_code
- refresh_token
response_types:
- code
- noneFollow the documentation of React Native to see how you can create a new React Native app.
npx react-native init myapp
cd myappyarn add --exact @authgear/react-native
(cd ios && pod install)To finish the integration, setup the app to handle the redirectURI specified in the application. This part requires platform specific integration.
Add the following activity entry to the AndroidManifest.xml of your app. The intent system would dispatch the redirect URI to OAuthRedirectActivity and the sdk would handle the rest.
<!-- Your application configuration. Omitted here for brevity -->
<application>
<!-- Other activities or entries -->
<!-- Add the following activity -->
<!-- android:exported="true" is required -->
<!-- See https://developer.android.com/about/versions/12/behavior-changes-12#exported -->
<activity android:name="com.authgear.reactnative.OAuthRedirectActivity"
android:exported="true"
android:launchMode="singleTask">
<intent-filter>
<action android:name="android.intent.action.VIEW" />
<category android:name="android.intent.category.DEFAULT" />
<category android:name="android.intent.category.BROWSABLE" />
<!-- Configure data to be the exact redirect URI your app uses. -->
<!-- Here, we are using com.authgear.example://host/path as configured in authgear.yaml. -->
<!-- NOTE: The redirectURI supplied in AuthenticateOptions *has* to match as well -->
<data android:scheme="com.myapp.example"
android:host="host"
android:pathPrefix="/path"/>
</intent-filter>
</activity>
</application>If your Android app is targeting API level 30 or above (Android 11 or above), you need to add a queries section to AndroidManifest.xml.
<?xml version="1.0" encoding="utf-8"?>
<manifest xmlns:android="http://schemas.android.com/apk/res/android">
<!-- Other elements such <application> -->
<queries>
<intent>
<action android:name="android.support.customtabs.action.CustomTabsService" />
</intent>
</queries>
</manifest>In Info.plist, add the matching redirect URI.
<?xml version="1.0" encoding="UTF-8"?>
<!DOCTYPE plist PUBLIC "-//Apple//DTD PLIST 1.0//EN" "http://www.apple.com/DTDs/PropertyList-1.0.dtd">
<plist version="1.0">
<dict>
<!-- Other entries -->
<key>CFBundleURLTypes</key>
<array>
<dict>
<key>CFBundleTypeRole</key>
<string>Editor</string>
<key>CFBundleURLSchemes</key>
<array>
<string>com.myapp.example</string>
</array>
</dict>
</array>
</dict>
</plist>In AppDelegate.m, add the following code snippet.
// Other imports...
#import <authgear-react-native/AGAuthgearReactNative.h>
// Other methods...
// For handling deeplink
- (BOOL)application:(UIApplication *)app
openURL:(NSURL *)url
options:
(NSDictionary<UIApplicationOpenURLOptionsKey, id> *)options {
return [AGAuthgearReactNative application:app openURL:url options:options];
}
// For handling deeplink
// deprecated, for supporting older devices (iOS < 9.0)
- (BOOL)application:(UIApplication *)application
openURL:(NSURL *)url
sourceApplication:(NSString *)sourceApplication
annotation:(id)annotation {
return [AGAuthgearReactNative application:application
openURL:url
sourceApplication:sourceApplication
annotation:annotation];
}
// for handling universal link
- (BOOL)application:(UIApplication *)application
continueUserActivity:(NSUserActivity *)userActivity
restorationHandler:
(void (^)(NSArray<id<UIUserActivityRestoring>> *_Nullable))
restorationHandler {
return [AGAuthgearReactNative application:application
continueUserActivity:userActivity
restorationHandler:restorationHandler];
}Add this code to your react native app. This snippet configures authgear to connect to an authgear server deployed at endpoint with the client you have just setup via clientID, opens a browser for authentication, and then upon success redirects to the app via the redirectURI specified.
import React, { useCallback } from "react";
import { View, Button } from "react-native";
import authgear from "@authgear/react-native";
function LoginScreen() {
const onPress = useCallback(() => {
// Normally you should only configure once when the app launches.
authgear
.configure({
clientID: "client_id",
endpoint: "http://<myapp>.authgear.cloud",
})
.then(() => {
authgear
.authenticate({
redirectURI: "com.myapp.example://host/path",
})
.then(({ userInfo }) => {
console.log(userInfo);
});
});
}, []);
return (
<View>
<Button onPress={onPress} title="Authenticate" />
</View>
);
}Now, your user is logged in!
When you start launching the application. You may want to know if the user has logged in. (e.g. Show users the login page if they haven't logged in). The sessionState reflects the user logged in state in the SDK local state. That means even the sessionState is AUTHENTICATED, the session may be invalid if it is revoked remotely. After initializing the Authgear SDK, call fetchUserInfo to update the sessionState as soon as it is proper to do so.
// After authgear.configure, it only reflect SDK local state.
// value can be NO_SESSION or AUTHENTICATED
let sessionState = authgear.sessionState;
if (sessionState === "AUTHENTICATED") {
authgear
.fetchUserInfo()
.then((userInfo) => {
// sessionState is now up to date
})
.catch((e) => {
// sessionState is now up to date
// it will change to NO_SESSION if the session is invalid
});
}The value of sessionState can be UNKNOWN, NO_SESSION or AUTHENTICATED. Initially the sessionState is UNKNOWN. After a call to authgear.configure, the session state would become AUTHENTICATED if a previous session was found, or NO_SESSION if such session was not found.
In some cases, you may need to obtain current user info through the SDK. (e.g. Display email address in the UI). Use the fetchUserInfo function to obtain the user info, see example.
To include the access token to the HTTP requests to your application server, there are two ways to achieve this.
Authgear SDK provides the fetch function for you to call your application server. The fetch function will include the Authorization header in your application request, and handle refresh access token automatically. authgear.fetch implement fetch.
authgear
.fetch("YOUR_SERVER_URL")
.then(response => response.json())
.then(data => console.log(data));You can access the access token through authgear.accessToken. Call refreshAccessTokenIfNeeded every time before using the access token, the function will check and make the network call only if the access token has expired. Include the access token into the Authorization header of your application request.
authgear
.refreshAccessTokenIfNeeded()
.then(() => {
// access token is ready to use
// accessToken can be string or undefined
// it will be empty if user is not logged in or session is invalid
const accessToken = authgear.accessToken;
// include Authorization header in your application request
const headers = {
Authorization: `Bearer ${accessToken}`
};
});To log out the user from the current app session, you need to invoke the logout function.
authgear
.logout()
.then(() => {
// logout successfully
});To protect your application server from unauthorized access. You will need to integrate your backend with Authgear.
For detailed documentation on the JavaScript React Native SDK, visit @authgear/react-native Reference
Integrate Authgear to your website with the Web SDK
In this guide, you'll learn how to integrate Authgear into your website using the . In the token approach, the Authgear server returns an access token and refresh token to your SPA application after successful user authentication. Your application can send this access token in subsequent HTTP requests to access protected resources. The alternative to the token approach is the which involves Authgear setting cookies after successful authentication. Your application will send the cookies in subsequent requests to access protected resources.
This guide uses the Authgear Web SDK for integrating Authgear with a Web app. Supported browsers include:
Last 2 Firefox major versions
Last 2 Chrome major versions
Last 2 Edge major versions
Last 3 Safari major versions
Signup for an Authgear Portal account in . Or you can use your self-deployed Authgear.
From the Project listing, create a new Project or select an existing Project. After that, we will need to create an application in the project.
Step 1: Create an application in the Portal
Go to Applications on the left menu bar.
Click ⊕Add Application in the top tool bar.
Input the name of your application and select the application type Single Page Application or Traditional Web Application. Click "Save".
You will see a list of guides that can help you for setting up, then click "Next".
Step 2: Configure the application
Decide the paths in your website that users will be redirected to after they have authenticated or logged out with Authgear.
For after authentication (Authorized Redirect URIs). e.g.https://yourdomain.com/after-authentication , or http://localhost:4000/after-authentication for local development.
For after logging out (Post Logout Redirect URIs). e.g.https://yourdomain.com/after-logout , or http://localhost:4000/after-logout for local development.
Fill in the Authorized Redirect URIs and Post Logout Redirect URIs that you have defined in the previous steps.
Click "Save" in the top tool bar and keep the Client ID. You can also obtain it again from the applications list later.
Step 3: Setup a custom domain (Required for )
Go to Custom Domains
Add your custom domain in Input New Domain
Follow the instructions to verify and configure the custom domain.
Click "Activate" to change the domain status to "Active". The custom domain will be your new Authgear endpoint.
The Web JS SDK is available as . Install the package in your project directory
The SDK must be properly configured before use. Call the configure method every time your page loads up.
The SDK should be according to the authentication approach of your choice
Token-based authentication
sessionType should be set to refresh_token
Cookie-based authentication
endpoint must be a custom domain endpoint
sessionType should be set to cookie
When the user clicks login/signup on your website, make a start authorization call to redirect them to the login/signup page.
By default, Authgear will not ask user to login again if user has already logged in. You can optionally set prompt to login if you want the user always reach the login page and login again.
After the user authenticates on the login page, the user will be redirected to the redirectURI with a code parameter in the URL query. In the redirectURI of your application, make a finish authorization call to handle the authentication result. This will attempt to exchange the code for the access token and user info.
Once authorization succeed, the application should navigate the user to other URL such as the user's home page and remove the code query parameters.
Now, your user is logged in!
When you start launching the application. You may want to know if the user has logged in. (e.g. Redirect users to log in if they haven't logged in). The sessionState reflects the user logged in state in the SDK local state. That means even thesessionState is AUTHENTICATED, the session may be invalid if it is revoked remotely. After initializing the Authgear SDK, call fetchUserInfo to update the sessionState as soon as it is proper to do so.
The value of sessionState can be UNKNOWN, NO_SESSION or AUTHENTICATED. Initially the sessionState is UNKNOWN. After a call to authgear.configure, the session state would become AUTHENTICATED if a previous session was found, or NO_SESSION if such session was not found.
In some cases, you may need to obtain current user info through the SDK. (e.g. Display email address in the UI). Use the fetchUserInfo function to obtain the user info, see .
Use the logout function to log out the user. The user will be redirected to your Authgear endpoint to log out their session. You should provide the redirectURI for the user to return to your app.
To include the access token to the HTTP requests to your application server, there are two ways to achieve this.
Authgear SDK provides the fetch function for you to call your application server. This fetch function will include the Authorization header in your application request, and handle refresh access token automatically. The authgear.fetch implements .
You can get the access token through authgear.accessToken. Call refreshAccessTokenIfNeeded every time before using the access token, the function will check and make the network call only if the access token has expired. Include the access token into the Authorization header of the application request.
To protect your application server from unauthorized access. You will need to .
For detailed documentation on the JavaScript Web SDK, visit
oauth:
clients:
- name: mywebsite
client_id: a_random_generated_string
redirect_uris:
- "https://yourdomain.com/auth-redirect"
post_logout_redirect_uris:
- "https://yourdomain.com/after-logout"
grant_types:
- authorization_code
- refresh_token
response_types:
- code
- nonenpm install --save --save-exact @authgear/webyarn add @authgear/web --exactimport authgear from "@authgear/web";
authgear
.configure({
// custom domain endpoint or default endpoint
// default domain should be something like: https://<yourapp>.authgear.cloud
endpoint: "<your_app_endpoint>",
// Client ID of your application
clientID: "<your_client_id>",
// sessionType can be "refresh_token" or "cookie", default "refresh_token"
sessionType: "refresh_token",
})
.then(
() => {
// configure successfully.
},
(err) => {
// failed to configure.
}
);
import authgear from "@authgear/web";
authgear
.startAuthentication({
// configure redirectURI which users will be redirected to
// after they have authenticated with Authgear
// you can use any path in your website
// make sure it is in the "Redirect URIs" list of the Application
redirectURI: "https://yourdomain.com/auth-redirect",
prompt: "login",
})
.then(
() => {
// started authorization, user should be redirected to Authgear
},
(err) => {
// failed to start authorization
}
);
import authgear from "@authgear/web";
authgear.finishAuthentication().then(
(userInfo) => {
// authorized successfully
// you should navigate the user to another path
},
(err) => {
// failed to finish authorization
},
);// After authgear.configure, it only reflect SDK local state.
// value can be NO_SESSION or AUTHENTICATED
let sessionState = authgear.sessionState;
if (sessionState === "AUTHENTICATED") {
authgear
.fetchUserInfo()
.then((userInfo) => {
// sessionState is now up to date
})
.catch((e) => {
// sessionState is now up to date
// it will change to NO_SESSION if the session is invalid
});
}import authgear from "@authgear/web";
authgear
.logout({
// user will navigate to the redirectURI after logged out
// make sure it is in the "Post Logout Redirect URIs" in the application portal
redirectURI: "https://yourdomain.com",
})
.then(
() => {
// logged out successfully
},
(err) => {
// failed to logout
}
);authgear
.fetch("YOUR_SERVER_URL")
.then(response => response.json())
.then(data => console.log(data));authgear
.refreshAccessTokenIfNeeded()
.then(() => {
// access token is ready to use
// accessToken can be string or undefined
// it will be empty if user is not logged in or session is invalid
const accessToken = authgear.accessToken;
// include Authorization header in your application request
const headers = {
Authorization: `Bearer ${accessToken}`
};
});

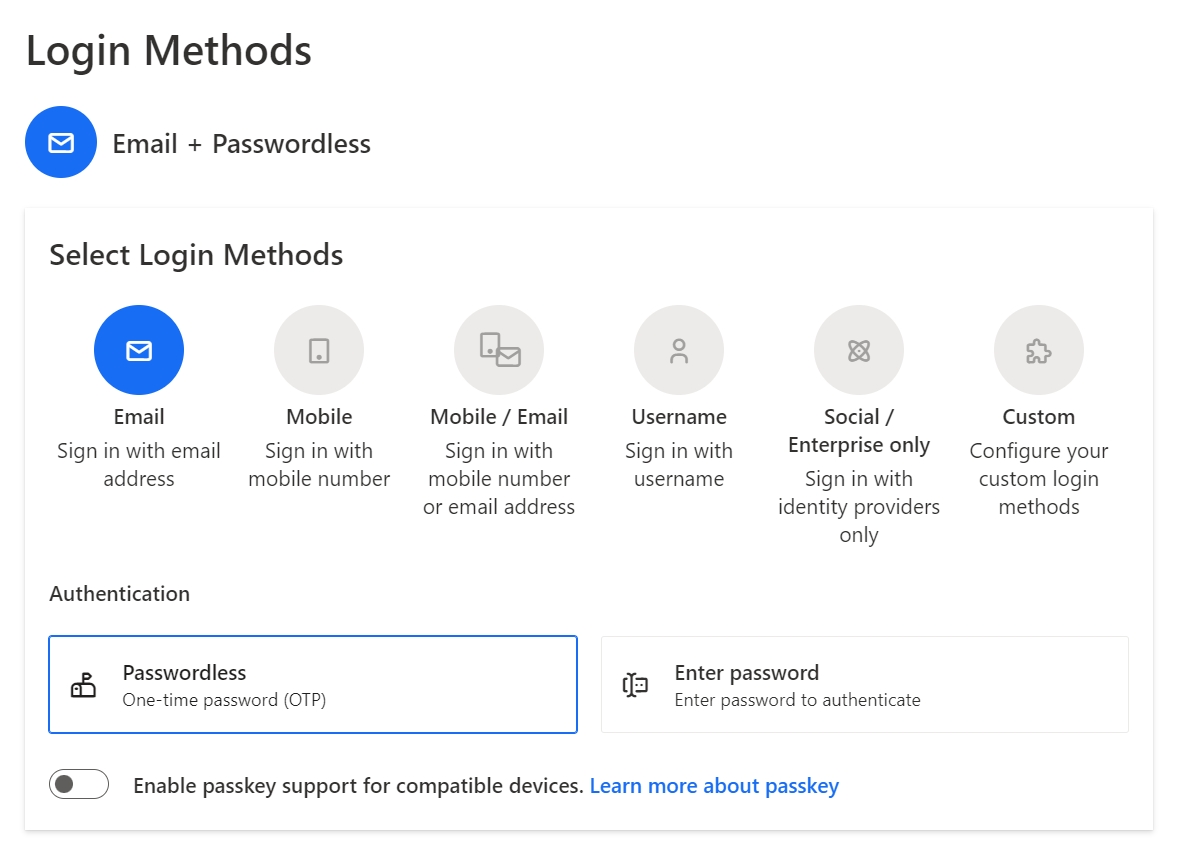
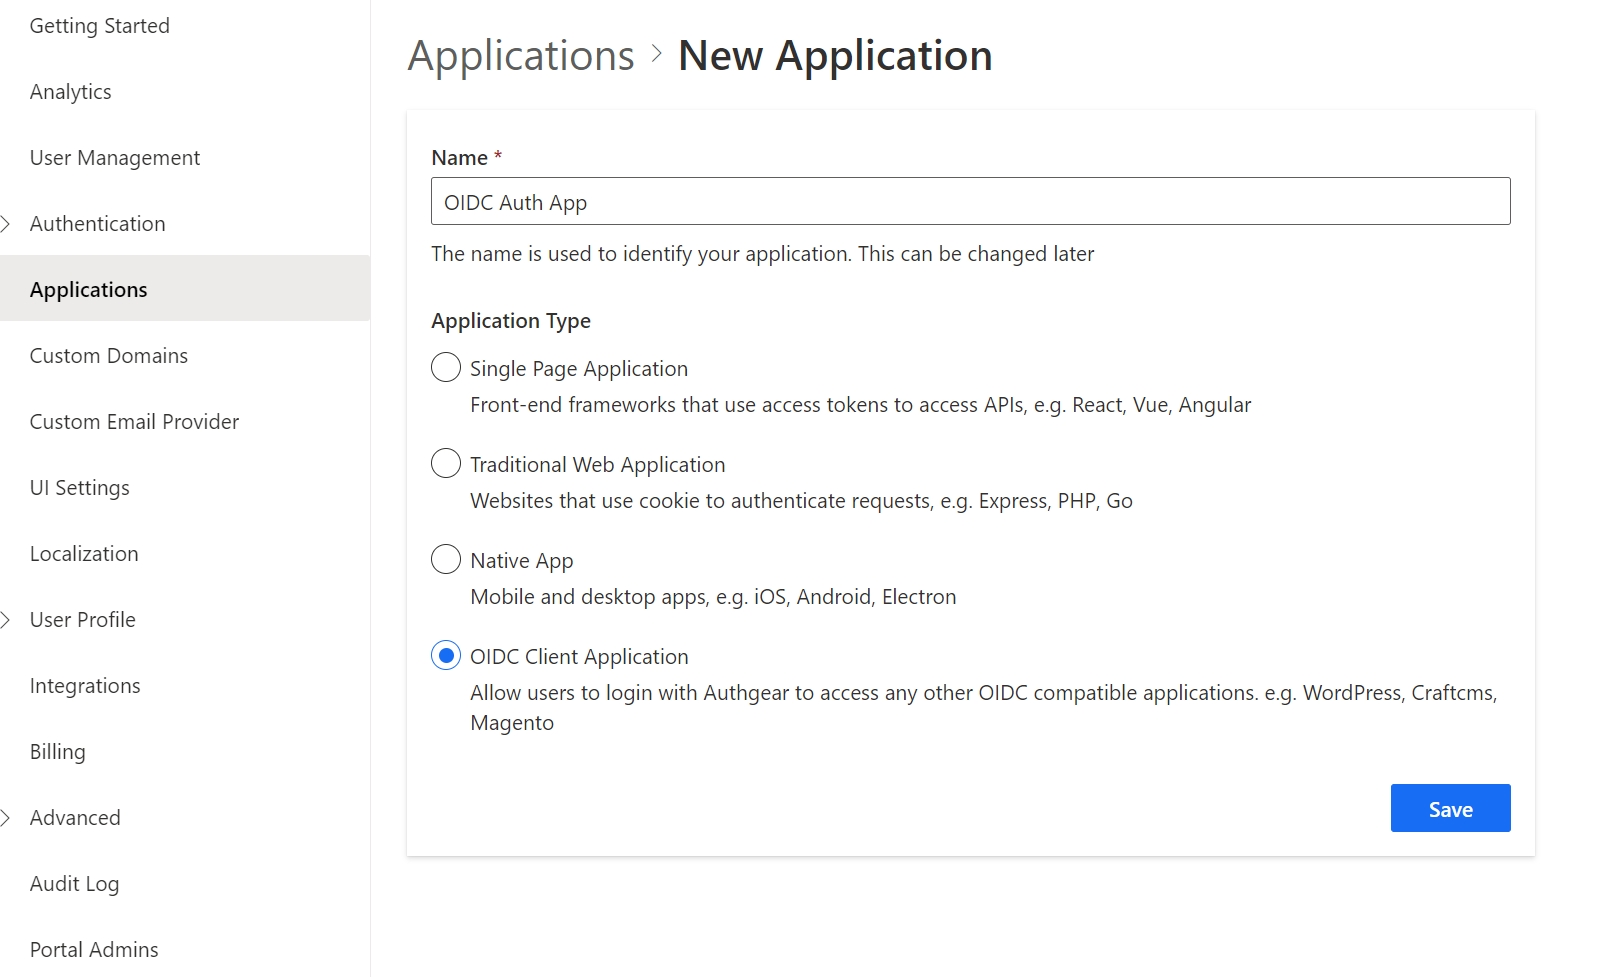
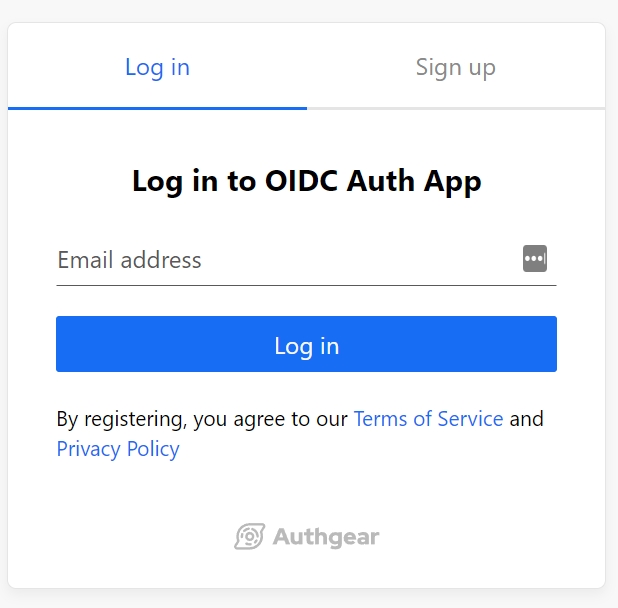
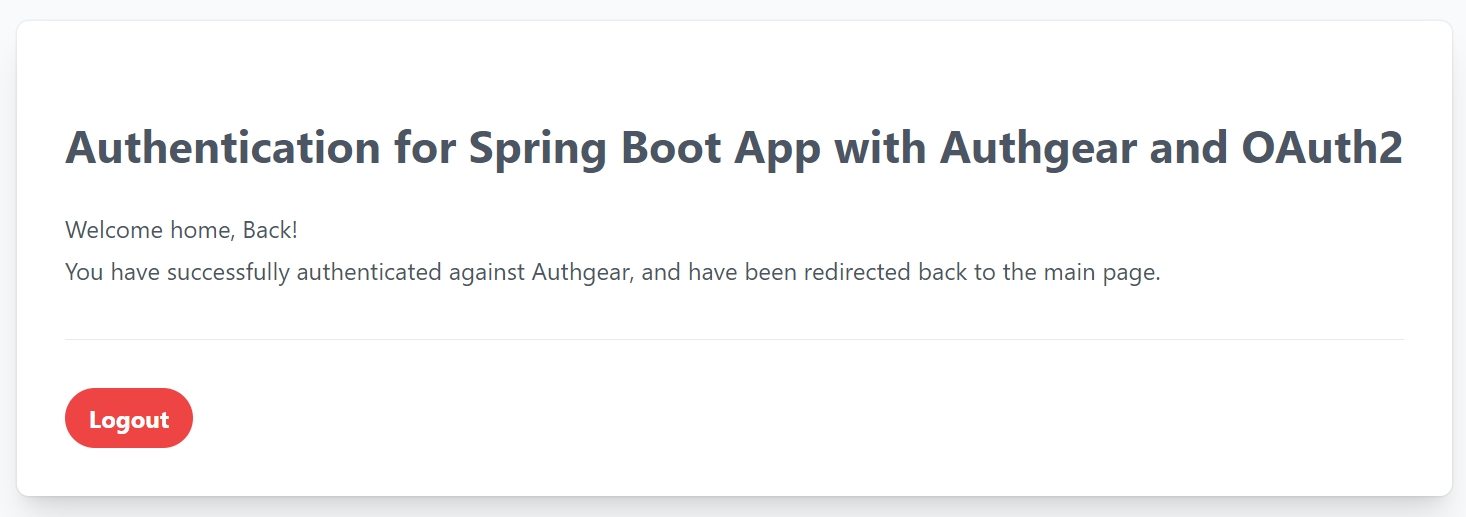
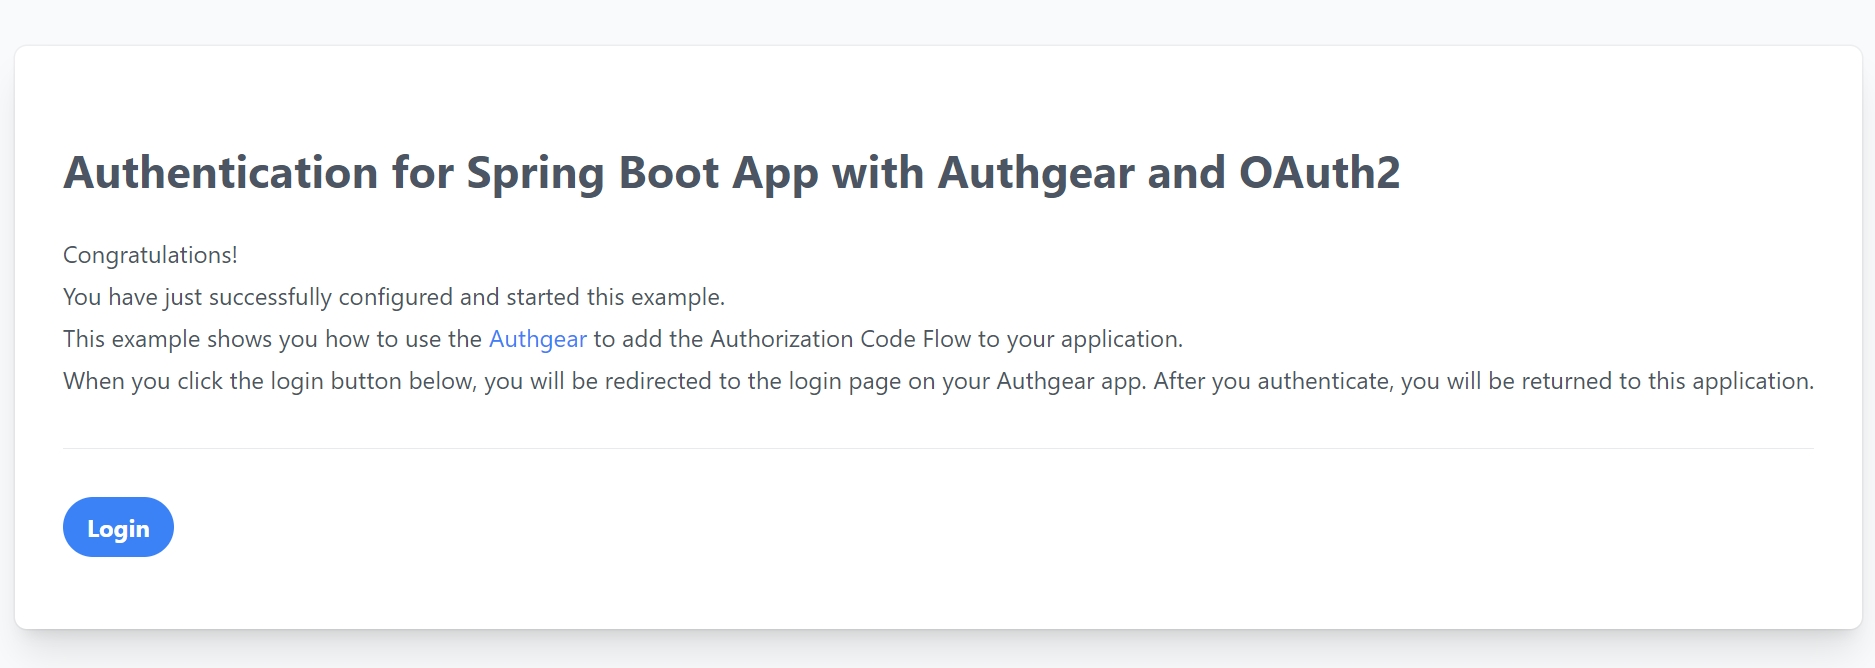
Authentication for Laravel websites with Authgear and OAuth2
In this guide, you'll learn how to add user authentication to a Laravel app using Authgear as an OIDC provider.
Authgear supports multiple ways to allow users to log in to apps such as passwordless sign-in, phone OTP, and 2FA. In this post, we'll show you how to enable all these options in your Laravel app without worrying about the underlying logic.
How to create an Authgear Application.
How to request OAuth 2.0 authorization code from Authgear.
How to get user info from Authgear using OAuth 2.0 access code.
Link user info from Authgear with Laravel's default Breeze authentication.
To follow along with the example, you should have the following in place:
A free Authgear account. if you don't have an account yet.
A Laravel project.
The example app we'll build in this post uses the default Laravel Breeze authentication kit. This kit provides the starter code for email and password user authentication systems.
We will be using Authgear to handle and process authentication data instead of the default Breeze database. By doing so, we get all the benefits of Authgear including more security and flexibility.
In this section, we'll walk through the complete steps for building the example app.
Before we can use Authgear as an OAuth identity provider, we need to set up an application on the Authgear portal.
To do that, log in to Authgear then select a project. Next, navigate to the Applications section for your project. Create a new application or configure an existing one with OIDC Client Application as Application Type as shown below:
Once you're done, click on Save to go to the application configuration page. This page reveals the application credentials and OAuth 2.0 endpoints.
Note down details like the Client ID, Client Secret, and the endpoints as you'll use them later in your Laravel project.
While you're still on the application configuration page, scroll down to the URL section then click on Add URI. Enter localhost:8000/oauth/callback in the text field if you will be running your Laravel app on your local machine. Once you're done, click Save.
The redirect URI we provided above should be a valid page on our Laravel app as Authgear will redirect users to the page after authorization.
Now create a new Laravel project on your computer by running the following command:
Once your project is created, open the project folder in your preferred code editor and replace the content of resources/views/welcome.blade.php with the following code:
Alternatively, you can create a new index.blade.php file in the resources folder and add the above code inside it. Then, update the web.php route file to render the new file instead of welcome.blade.php.
Next, run the php artisan serve command in the terminal to test your application. At this point, your application should look like the following screenshot when you access localhost:8000 on a browser:
Breeze is the official user authentication starter kit for Laravel. What that means is that Breeze helps you set up the database, routes, controller, and user interface for a user registration and user login system.
To install Breeze on your Laravel project, run the following command:
After that, run the following command to enable Breeze to set up all the resources for the user authentication system in your project:
During the setup, select blade as the stack and leave the other options as default.
Once the setup is complete, navigate around your project file structure and you should notice some new folders and files related to authentication were added. Some of these new folders/files include an Auth sub-folder in the controllers folder, another auth sub-folder inside the views folder, and some database migration files.
Before we continue, let's add an extra oauth_uid field to the users table migration file. This field will store a user's unique ID from Authgear after successful login.
Open the create_users_table... file that is inside the database/migrations/ folder (this file will have a date value at the end of its name) and add the following code to a new line inside the Schema::create() method:
Add the MySQL database DB_DATABASE, DB_USERNAME, and DB_PASSWORD for the database you wish to use with your Laravel project in your Laravel project's .env file.
Finally, create the users and other tables by running the following command:
In this step, we'll create a new route that will handle the task of redirecting users from our app to Authgear's OAuth authorization page where they can grant our app authorization to their data on Authgear. If you've used other OAuth 2.0 providers before, for example, signing in to a website using Google OAuth, you may already be familiar with an authorization page.
First, create a new controller that will handle all OAuth operations in our Laravel app by running the following command:
Before we start implementing the logic for our new controller, we need to install a PHP OAuth 2.0 client package. This package will simplify the process of interacting with Authgear's OAuth endpoints. Run the following commands to install the package:
Now, back to implementing the controller; open the new OAuthController file (from the app/Http/Controllers folder) and add the following code to it:
Next, add your Authgear Application's Client ID, Client Secret, and the redirect URI you specified earlier to your Laravel project's .env file using the following keys:
Note: Your Authgear project URL is the hostname of any of your endpoint URLs. For example, the project URL for a project with an authorization endpoint: https://laravel-app.authgear.cloud/oauth2/authorize will be https://laravel-app.authgear.cloud.
Now let's create a route in our Laravel project that will call the startAuthorization() method.
Open the routes/web.php file and add new routes using the following code:
We've included a second route for the redirect URI (callback), we'll implement this route in the next step.
Before we continue, let's clean up some of the additional routes added by the Breeze package that we won't be needing for this example. Open the routes/auth.php file and delete the following lines:
At this point accessing the /login route should redirect to the Authgear authorization page.
Update the empty handleRedirect() method in OAuthController to the following:
The above code gets the authorization code sent in the redirect URL from Authgear after user authorization and exchanges it for an access token. With this access token, our application can access protected resources like the user info endpoint.
In this step, we'll use the access token we got from the last step to get the current user's info from Authgear.
First, add the following code at the end of the handleRedirect() method:
The getResourceOwner() method will call Authgear's UserInfo endpoint.
If you dump the userInfo variable (dd($userInfo)), you should get an output similar to this:
The above array contains the user's info from Authgear. We'll proceed to use this information to link the Authgear user to a default (Breeze) Laravel authentication account. As a result, our app can start a regular Laravel authenticated user session and allow access to protected routes.
To implement the above feature, find the following line in OAuthController.php:
Add the following code after the above line:
Find the complete code for the OAuthController .
OAuth 2.0 access tokens expire after some time. The refresh token on the other hand live longer. As a result, you can use the refresh token to request a new access token. In this step, we'll do exactly that in our Laravel application.
First, app/Http/Controllers/ProfileController.php and update the content of the edit() method to the following:
The above code checks if the current access token is expired using the hasExpired() method. If the condition is true, we call the getAccessToken() method with the refresh token to get a new access token.
The value of the current access token is updated to the new access token.
Next, this edit() method also displays the current user's profile details from your Authgear project on the UI. To implement this, add the following code to resources/views/profile/edit.blade.php, just below the line with "<div class="max-w-7xl mx-auto sm:px-6 lg:px-8 space-y-6">":
At this point, if we run our app and click on the login link on the landing page, we should be redirected to the Authgear authorization page. After granting authorization, we are directed to the callback route of our Laravel app. If authentication is successful we should be redirected to the default Breeze-protected dashboard page that looks like this:
To log a user out, we'll delete all existing PHP session data and then call the Authgear token revoke endpoint.
First, add a new logout function to the OAuthController.php file using the following code:
Then, open routes/web.php and update the logout route to the following:
You should try enabling the different login methods on Authgear from the Portal to enjoy features like 2FA, passwordless login, and more without updating anything on the code for your app.
Find the complete code for the example app in our .
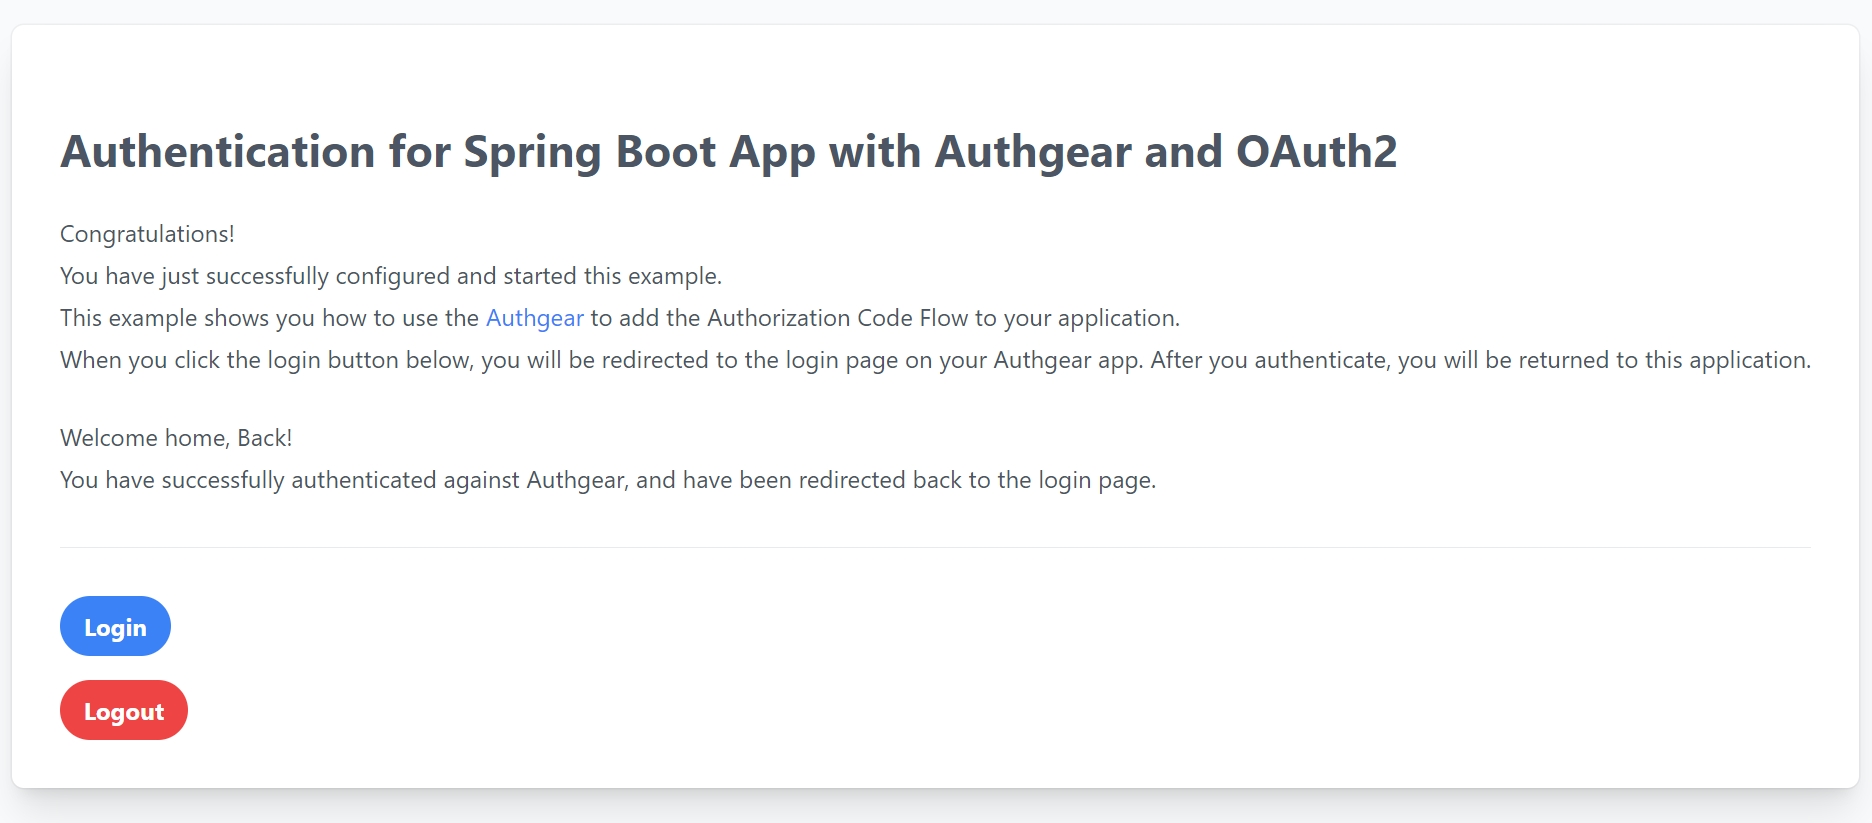
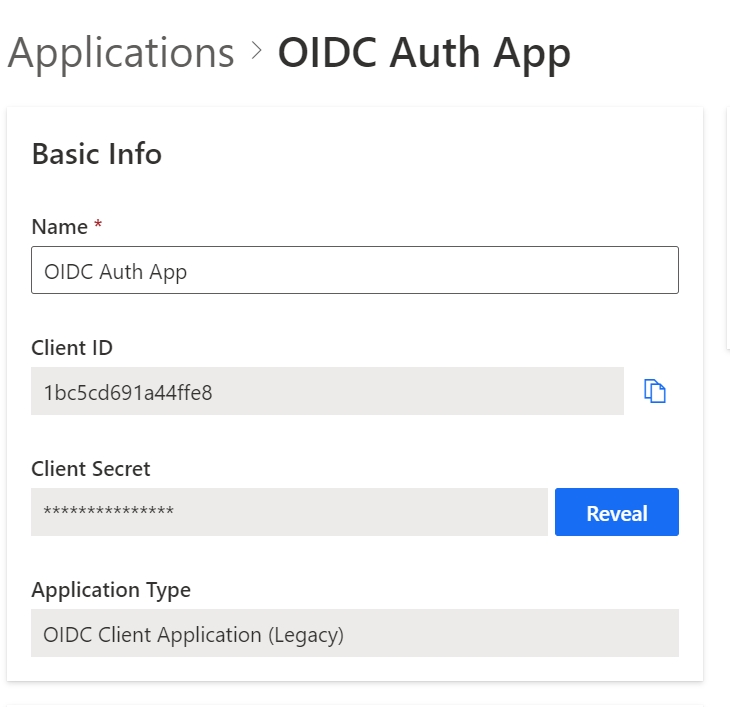
composer create-project laravel/laravel authgear-laravel-example<!DOCTYPE html>
<html lang="en">
<head>
<meta charset="UTF-8">
<meta name="viewport" content="width=device-width, initial-scale=1.0">
<title>PHP Demo - Home</title>
</head>
<body style="background-color: #DEDEDE">
<div style="max-width: 650px; margin: 16px auto; background-color: #FFFFFF; padding: 16px;">
<h3>Hello world!</h3>
<p>This demo app shows you how to add user authentication to your Laravel app using Authgear</p>
<p>Checkout <a href="https://docs.authgear.com">docs.authgear.com</a> to learn more about adding Authgear to your apps.</p>
<p><a href="/login">Login</a></p>
</div>
</body>
</html>composer require laravel/breeze --devphp artisan breeze:install$table->string('oauth_uid')->nullable();php artisan migratephp artisan make:controller OAuthControllercomposer require league/oauth2-clientuse \League\OAuth2\Client\Provider\GenericProvider;
use Illuminate\Support\Facades\Auth;
use Illuminate\Support\Facades\Hash;
use App\Models\User;
class OAuthController extends Controller {
public $provider;
public function __construct ()
{
$appUrl = env("AUTHGEAR_PROJECT_URL", "");
$this->provider = new GenericProvider([
'clientId' => env("AUTHGEAR_APP_CLIENT_ID", ""),
'clientSecret' => env("AUTHGEAR_APP_CLIENT_SECRET", ""),
'redirectUri' => env("AUTHGEAR_APP_REDIRECT_URI", ""),
'urlAuthorize' => $appUrl.'/oauth2/authorize',
'urlAccessToken' => $appUrl.'/oauth2/token',
'urlResourceOwnerDetails' => $appUrl.'/oauth2/userInfo',
'scopes' => 'openid offline_access'
]);
}
public function startAuthorization() {
$authorizationUrl = $this->provider->getAuthorizationUrl();
return redirect($authorizationUrl);
}
public function handleRedirect() {
}
}AUTHGEAR_PROJECT_URL=""
AUTHGEAR_APP_CLIENT_ID=""
AUTHGEAR_APP_CLIENT_SECRET=""
AUTHGEAR_APP_REDIRECT_URI="http://localhost:8000/oauth/callback"Route::get('/login', [OAuthController::class, 'startAuthorization']);
Route::get('/oauth/callback', [OAuthController::class, 'handleRedirect']);Route::get('login', [AuthenticatedSessionController::class, 'create'])
->name('login');
Route::post('login', [AuthenticatedSessionController::class, 'store']);public function handleRedirect() {
// if code is set, get access token
$accessToken = null;
if (isset($_GET['code'])) {
$code = $_GET['code'];
try {
$accessToken = $this->provider->getAccessToken('authorization_code', [
'code' => $code
]);
} catch (\League\OAuth2\Client\Provider\Exception\IdentityProviderException $e) {
// Failed to get the access token or user details.
exit($e->getMessage());
}
}
}//Use access token to get user info
if (isset($accessToken)) {
$resourceOwner = $this->provider->getResourceOwner($accessToken);
$userInfo = $resourceOwner->toArray();
}[
"custom_attributes" => []
"email" => "[email protected]"
"email_verified" => true
"https://authgear.com/claims/user/can_reauthenticate" => true
"https://authgear.com/claims/user/is_anonymous" => false
"https://authgear.com/claims/user/is_verified" => true
"sub" => "e1234323-f123-4b99-91d8-c2ca55a6a3dc"
"updated_at" => 1683898685
"x_web3" => []
]$userInfo = $resourceOwner->toArray();if (empty($userInfo['email'])) {
return redirect('/')->withErrors(['msg' => 'Only profile with email is supported!']);
}
//check if user already registered
$oldUser = User::query()->whereEmail($userInfo['email'])->first();
if (!empty($oldUser)) {
//if old user has the same Authgear sub (uuid), skip register and log them in.
if ($userInfo['sub'] == $oldUser->oauth_uid) {
Auth::guard('web')->login($oldUser);
session(['accessToken' => $accessToken]);
session(['refreshToken' => $accessToken->getRefreshToken()]);
} else {
//if sub is different,
//ask user to login to existing account and link the existing account to link new authgear profile
return redirect('/')->withErrors(['msg' => 'Email already registered please log in to link your account.']);
}
} else {
$user = User::create([
'name' => $userInfo['email'],
'email' => $userInfo['email'],
'oauth_uid' => $userInfo['sub'],
'password' => Hash::make($userInfo['sub'] . "-" . $userInfo['email'])
]);
Auth::guard('web')->login($user);
session(['accessToken' => $accessToken]);
session(['refreshToken' => $accessToken->getRefreshToken()]);
}
// Redirect user to a protected route
return redirect('/dashboard');public function edit(Request $request): View
{
$appUrl = env("AUTHGEAR_PROJECT_URL", "");
$provider = new GenericProvider([
'clientId' => env("AUTHGEAR_APP_CLIENT_ID", ""),
'clientSecret' => env("AUTHGEAR_APP_CLIENT_SECRET", ""),
'redirectUri' => env("AUTHGEAR_APP_REDIRECT_URI", ""),
'urlAuthorize' => $appUrl . '/oauth2/authorize',
'urlAccessToken' => $appUrl . '/oauth2/token',
'urlResourceOwnerDetails' => $appUrl . '/oauth2/userInfo',
'scopes' => 'openid offline_access'
]);
$accessToken = session('accessToken');
if ($accessToken->hasExpired()) {
$refreshToken = session('refreshToken');
$accessToken = $provider->getAccessToken('refresh_token', [
'refresh_token' => $refreshToken
]);
session(['accessToken' => $accessToken]);
}
$resourceOwner = $provider->getResourceOwner($accessToken);
$userInfo = $resourceOwner->toArray();
return view('profile.edit', [
'user' => $request->user(), 'authgearUserInfo' => $userInfo,
]);
}<div class="p-4 sm:p-8 bg-white shadow sm:rounded-lg">
<div class="max-w-xl">
<h2>Authgear user data</h2>
<p>Email: {{ $authgearUserInfo['email'] }}</p>
<p>UUID: {{ $authgearUserInfo['sub'] }}</p>
</div>
</div>public function logout(Request $request)
{
Auth::guard('web')->logout();
$request->session()->invalidate();
$request->session()->regenerateToken();
if (session('accessToken') != null) {
$options = [];
$options['headers']['content-type'] = 'application/x-www-form-urlencoded';
$options['body'] = http_build_query(['token'=>session('refreshToken')]);
$request = $this->provider->getRequest(
'POST',
env("AUTHGEAR_PROJECT_URL", "") . '/oauth2/revoke',
$options
);
$this->provider->getResponse($request);
session(['accessToken' => null]);
session(['refreshToken' => null]);
}
return redirect('/');
}Route::post('logout', [OAuthController::class, 'logout'])
->name('logout');


Authenticate the incoming HTTP requests by validating JWT in your application server
In this section, we will go through how to decode the JWT token to obtain the currently logged-in user.
Before we start, make sure the option Issue JWT as access token is enabled in your Application settings in the Portal.
With the Issue JWT as access token option turned on in your application, Authgear will issue JWT as access tokens. The incoming HTTP requests should include the access token in their Authorization headers. Without setting the reverse proxy, your backend server can use your Authgear JWKS to verify the request and decode user information from the JWT access token.
This Discovery endpoint serves as a JSON document containing the OpenID Connect configuration of your app. It includes the authorization endpoint, the token endpoint, and the JWKS endpoint.
https://<YOUR_AUTHGEAR_ENDPOINT>/.well-known/openid-configuration
Here is an example of how it looks.
The JSON Web Key Sets (JWKS) endpoint can be found in jwk_url in the configuration.
OpenID Connect Configuration JSON
{
"jwks_uri": "..."
...
}Follow this step-by-step example to verify and decode the JWT token.
pip install cryptography
pip install PyJWTDefine a function to find the JWKS endpoint from the OpenID Connect configuration. Use your Authgear endpoint as the base_address
import json
from contextlib import closing
from urllib.request import urlopen
base_address = "https://<your_app_endpoint>"
def fetch_jwks_uri(base_address):
doc_url = base_address + "/.well-known/openid-configuration"
with closing(urlopen(doc_url)) as f:
doc = json.load(f)
jwks_uri = doc["jwks_uri"]
if not jwks_uri:
raise Exception('Failed to fetch jwks uri.')
return jwks_uriDefine a function to extract the access token from the Authorization header in the incoming request. It should look like Authorization: Bearer <access_token>.
def parse_header(authz_header):
parts = authz_header.split(" ")
if len(parts) != 2:
return
scheme = parts[0]
if scheme.lower() != "bearer":
return
return parts[1]Here we show an example of using the Flask web framework to guard a path. You may need to adjust some of the codes to suit your technologies.
from flask import request
import jwt
from jwt import PyJWKClient
@app.route("/hello")
def hello():
authz_header = request.headers.get("Authorization")
if not authz_header:
return {
"message": "authz header not found"
}
# get jwt token from Authorization header
token = parse_header(authz_header)
if token:
try:
# fetch jwks_uri from the Authgear Discovery Endpoint
jwks_uri = fetch_jwks_uri(base_address)
# Reuse PyJWKClient for better performance
jwks_client = PyJWKClient(jwks_uri)
signing_key = jwks_client.get_signing_key_from_jwt(token)
user_data = jwt.decode(
token,
signing_key.key,
algorithms=["RS256"],
audience=base_address,
options={"verify_exp": True},
)
return {
"message": "Hello!",
"user_data": user_data
}
except:
return {
"message": "JWT decode failed"
}
else:
return {
"message": "no token"
}npm install --save axios jwks-rsa jsonwebtokenUse the following method to get the JWKS URI (you'll need to URI to extract the public signing key from a JWT).
const appUrl = ""; //place your authgear app endpoint here
const getJwksUri = async (appUrl) => {
const config_endpoint = appUrl + "/.well-known/openid-configuration";
const data = await axios.get(config_endpoint);
return data.data.jwks_uri;
}Use the following code to extract only the token part from a Bearer [token] authorization header in your Express app:
const express = require("express");
const axios = require("axios");
const node_jwt = require('jsonwebtoken');
const jwksClient = require('jwks-rsa');
const app = express();
const port = 3002;
app.get('/', async (req, res) => {
const requestHeader = req.headers;
if (requestHeader.authorization == undefined) {
res.send("Invalid header");
return;
}
const authorizationHeader = requestHeader.authorization.split(" ");
const access_token = authorizationHeader[1];
}Next, decode the access token so that you can extract the JWT kid from the result. You'll need this `kid to get the public signing key. Use the following code to decode the JWT:
const decoded_access_token = node_jwt.decode(access_token, {complete: true});Use the following code to extract the JWT public keys then verify the JWT using the keys:
const jwks_uri = await getJwksUri(appUrl);
const client = jwksClient({
strictSsl: true,
jwksUri: jwks_uri
});
const signing_key = await client.getSigningKey(decoded_access_token.header.kid);
try {
const verify = node_jwt.verify(access_token, signing_key.publicKey, { algorithms: ['RS256'] });
res.send(JSON.stringify(verify))
}
catch(error) {
res.send(error);
}
Here's what your Express app should look like after putting the code in all the steps together:
const express = require("express");
const axios = require("axios");
const node_jwt = require('jsonwebtoken');
const jwksClient = require('jwks-rsa');
const app = express();
const port = 3002;
const appUrl = "https://demo-1-ea.authgear.cloud";
const getJwksUri = async (appUrl) => {
const config_endpoint = appUrl + "/.well-known/openid-configuration";
const data = await axios.get(config_endpoint);
return data.data.jwks_uri;
}
app.get('/', async (req, res) => {
const requestHeader = req.headers;
if (requestHeader.authorization == undefined) {
res.send("Invalid header");
return;
}
const authorizationHeader = requestHeader.authorization.split(" ");
const access_token = authorizationHeader[1];
const decoded_access_token = node_jwt.decode(access_token, {complete: true});
const jwks_uri = await getJwksUri(appUrl);
const client = jwksClient({
strictSsl: true,
jwksUri: jwks_uri
});
const signing_key = await client.getSigningKey(decoded_access_token.header.kid);
try {
const verify = node_jwt.verify(access_token, signing_key.publicKey, { algorithms: ['RS256'] });
res.send(JSON.stringify(verify))
}
catch(error) {
res.send(error);
}
});
app.listen(port, () => {
console.log(`server started on port ${port}`);
});Use your Authgear endpoint as base_address
import (
"context"
"encoding/json"
"fmt"
"net/http"
"regexp"
"time"
"github.com/lestrrat-go/jwx/jwk"
"github.com/lestrrat-go/jwx/jwt"
)
var (
authzHeaderRegexp = regexp.MustCompile("(?i)^Bearer (.*)$")
baseAddress = "https://<your_app_endpoint>"
)
type OIDCDiscoveryDocument struct {
JWKSURI string `json:"jwks_uri"`
}
func FetchOIDCDiscoveryDocument(endpoint string) (*OIDCDiscoveryDocument, error) {
resp, err := http.DefaultClient.Get(endpoint)
if err != nil {
return nil, err
}
defer resp.Body.Close()
if resp.StatusCode != http.StatusOK {
return nil, fmt.Errorf(
"failed to fetch discovery document: unexpected status code: %d",
resp.StatusCode,
)
}
var document OIDCDiscoveryDocument
err = json.NewDecoder(resp.Body).Decode(&document)
if err != nil {
return nil, err
}
return &document, nil
}
func FetchJWK(baseAddress string) (jwk.Set, error) {
doc, err := FetchOIDCDiscoveryDocument(
baseAddress + "/.well-known/openid-configuration",
)
if err != nil {
return nil, err
}
set, err := jwk.Fetch(context.Background(), doc.JWKSURI)
return set, err
}
// DecodeUser parse request Authorization header and obtain user id and claims
func DecodeUser(r *http.Request) (string, map[string]interface{}, error) {
// fetch jwks_uri from Authgear
// you can cache the value of jwks to have better performance
set, err := FetchJWK(baseAddress)
if err != nil {
return "", nil, fmt.Errorf("failed to fetch JWK: %s", err)
}
// get jwt token from Authorization header
authzHeader := r.Header.Get("Authorization")
match := authzHeaderRegexp.FindStringSubmatch(authzHeader)
if len(match) != 2 {
return "", nil, fmt.Errorf("no token")
}
// parse jwt token
token, err := jwt.ParseString(match[1], jwt.WithKeySet(set))
if err != nil {
return "", nil, fmt.Errorf("invalid token: %s", err)
}
// validate jwt token
err = jwt.Validate(token,
jwt.WithClock(jwt.ClockFunc(
func() time.Time { return time.Now().UTC() },
)),
jwt.WithAudience(baseAddress),
)
if err != nil {
return "", nil, fmt.Errorf("invalid token: %s", err)
}
return token.Subject(), token.PrivateClaims(), nil
}
func handler(w http.ResponseWriter, r *http.Request) {
// decode user example
userid, claims, err := DecodeUser(r)
isUserVerified, _ :=
claims["https://authgear.com/claims/user/is_verified"].(bool)
isAnonymousUser, _ :=
claims["https://authgear.com/claims/user/is_anonymous"].(bool)
// ... your handler logic
}First, install the dependencies required by running these com
composer require firebase/php-jwtcomposer require guzzlehttp/guzzleCreate a function that finds the JWKS endpoint from your Authgear application endpoint using the following code:
<?php
require 'vendor/autoload.php';
use Firebase\JWT\JWT;
use Firebase\JWT\JWK;
use Firebase\JWT\Key;
use GuzzleHttp\Client;
$appUrl = ""; //place your authgear app endpoint here
function getJwksUri($appUrl) {
$configEndpoint = $appUrl . "/.well-known/openid-configuration";
$httpClient = new Client();
$response = $httpClient->request('GET', $configEndpoint);
$responseObject = json_decode($response->getBody());
return $responseObject->jwks_uri;
}Add the following code to your application to get the JWT signing key:
$jwksUri = getJwksUri($appUrl);
$httpClient = new Client();
$jwksUriResponse = $httpClient->request('GET', $jwksUri);
$keysObject = json_decode($jwksUriResponse->getBody());
$jwks = (array) ($keysObject->keys)[0];
$parsedKey = JWK::parseKey($jwks, "RS256");
$signingKey = $parsedKey->getKeyMaterial();To extract the access token from the HTTP request use the following code:
if (!isset($_SERVER['HTTP_AUTHORIZATION']))
throw new Exception("Invalid authorization header");
$authorizationHeader = $_SERVER['HTTP_AUTHORIZATION'];
$jwt = (explode(" ", $authorizationHeader))[1];Finally, decode the JWT signing key.
$decoded = JWT::decode($jwt, new Key($signingKey, 'RS256'));
echo json_encode($decoded);The auth_time claim in an OIDC ID token represents the time when the user authentication occurred. Extract the auth_time claim from the token, which should represent the time of the original authentication in seconds. If the difference between the current time and auth_time exceeds your threshold (for example, 5 minutes), initiate the re-authentication process.
See an example of how to verify the signature of the ID token, and then validate the claims auth_time inside here.
Validating JWT in your application server is currently only available for Token-based authentication.
How to integrate with a Xamarin app
This guide provides instructions on integrating Authgear with a Xamarin app. Supported packages include:
Xamarin.Essentials 1.7.2 or higher
Xamarin.Forms 5.0.0.2401 or higher
Signup for an Authgear Portal account in https://portal.authgear.com/. Or you can use your self-deployed Authgear.
From the Project listing, create a new Project or select an existing Project. After that, we will need to create an application in the project.
Step 1: Create an application in the Portal
Go to Applications on the left menu bar.
Click ⊕Add Application in the top tool bar.
Input the name of your application and select Native App as the application type. Click "Save".
You will see a list of guides that can help you for setting up, then click "Next".
Step 2: Configure the application
In your IDE (e.g. Visual Studio), define a custom URI scheme that the users will be redirected back to your app after they have authenticated with Authgear, e.g. com.myapp.example://host/path.[^1]
Head back to Authgear Portal, fill in the Redirect URI that you have defined in the previous steps.
Click "Save" in the top tool bar and keep the Client ID. You can also obtain it again from the Applications list later.
oauth:
clients:
- name: your_app_name
client_id: a_random_generated_string
redirect_uris:
- "com.myapp.example://host/path"
grant_types:
- authorization_code
- refresh_token
response_types:
- code
- noneOpen Visual Studio
Create a new project
Choose the Xamarin.Forms template
Search for "Authgear.Xamarin" on nuget.org and add it to your base project. https://www.nuget.org/packages/Authgear.Xamarin/
Authgear.Xamarin targets MonoAndroid 12.0 on Android, and Xamarin.iOS10 on iOS. Update the target framework of the Android and iOS projects to match Authgear.Xamarin's target frameworks.
Update Android and iOS project's Xamarin.Essentials to 1.7.2.
To finish the integration, setup the app to handle the redirectURI specified in the application. This part requires platform specific integration.
using System;
using Android.App;
using Android.Content.PM;
using Android.Runtime;
using Android.OS;
using Authgear.Xamarin;
using Xamarin.Forms;
namespace MyApp.Droid
{
[Activity(NoHistory = true, LaunchMode = LaunchMode.SingleTop, Exported = true)]
[IntentFilter(new[] { Android.Content.Intent.ActionView },
Categories = new[] { Android.Content.Intent.CategoryDefault, Android.Content.Intent.CategoryBrowsable },
DataScheme = "com.myapp.example")]
public class WebAuthenticationCallbackActivity : Xamarin.Essentials.WebAuthenticatorCallbackActivity
{
}
}If your Android app is targeting API level 30 or above (Android 11 or above), you need to add a queries section to AndroidManifest.xml.
<?xml version="1.0" encoding="utf-8"?>
<manifest xmlns:android="http://schemas.android.com/apk/res/android">
<!-- Other elements such <application> -->
<queries>
<intent>
<action android:name="android.support.customtabs.action.CustomTabsService" />
</intent>
</queries>
</manifest>In your MainActivity.cs
using System;
using Android.App;
using Android.Content.PM;
using Android.Runtime;
using Android.OS;
using Xamarin.Forms;
using Authgear.Xamarin;
namespace MyApp.Droid
{
public class MainActivity : global::Xamarin.Forms.Platform.Android.FormsAppCompatActivity
{
protected override void OnCreate(Bundle savedInstanceState)
{
// ...
var authgear = new AuthgearSdk(this, new AuthgearOptions
{
ClientId = CLIENT_ID,
AuthgearEndpoint = ENDPOINT
});
DependencyService.RegisterSingleton<AuthgearSdk>(authgear);
LoadApplication(new App());
// ...
}
// other methods are omitted for brevity.
}
}<?xml version="1.0" encoding="UTF-8"?>
<!DOCTYPE plist PUBLIC "-//Apple//DTD PLIST 1.0//EN" "http://www.apple.com/DTDs/PropertyList-1.0.dtd">
<plist version="1.0">
<dict>
<!-- other entries ... -->
<key>CFBundleURLTypes</key>
<array>
<dict>
<key>CFBundleURLName</key>
<string>com.myapp.example://host/path</string>
<key>CFBundleURLSchemes</key>
<array>
<string>com.myapp.example</string>
</array>
<key>CFBundleTypeRole</key>
<string>Editor</string>
</dict>
</array>
</dict>
</plist>In your AppDelegate.cs
using Xamarin.Essentials;
using Xamarin.Forms;
using Authgear.Xamarin;
namespace MyApp.iOS
{
[Register("AppDelegate")]
public partial class AppDelegate : global::Xamarin.Forms.Platform.iOS.FormsApplicationDelegate
{
public override bool FinishedLaunching(UIApplication app, NSDictionary options)
{
global::Xamarin.Forms.Forms.Init();
var authgear = new AuthgearSdk(app, new AuthgearOptions
{
ClientId = CLIENT_ID,
AuthgearEndpoint = ENDPOINT
});
DependencyService.RegisterSingleton<AuthgearSdk>(authgear);
LoadApplication(new App());
return base.FinishedLaunching(app, options);
}
public override bool OpenUrl(UIApplication app, NSUrl url, NSDictionary options)
{
return Xamarin.Essentials.Platform.OpenUrl(app, url, options);
}
public override bool ContinueUserActivity(UIApplication application, NSUserActivity userActivity, UIApplicationRestorationHandler completionHandler)
{
if (Xamarin.Essentials.Platform.ContinueUserActivity(application, userActivity, completionHandler))
return true;
return base.ContinueUserActivity(application, userActivity, completionHandler);
}
}
}<?xml version="1.0" encoding="utf-8" ?>
<ContentPage xmlns="http://xamarin.com/schemas/2014/forms"
xmlns:x="http://schemas.microsoft.com/winfx/2009/xaml"
x:Class="testauthgear.MainPage">
<StackLayout>
<Frame BackgroundColor="#2196F3" Padding="24" CornerRadius="0">
<Label Text="Welcome to Xamarin.Forms!" HorizontalTextAlignment="Center" TextColor="White" FontSize="36"/>
</Frame>
<Button Text="Configure" Clicked="Configure_Clicked" />
<Button Text="Authenticate" Clicked="Authenticate_Clicked"/>
</StackLayout>
</ContentPage>using System;
using System.Collections.Generic;
using System.ComponentModel;
using System.Linq;
using System.Text;
using System.Threading.Tasks;
using Xamarin.Forms;
using Authgear.Xamarin;
namespace MyApp
{
public partial class MainPage : ContentPage
{
private AuthgearSdk authgear;
public MainPage()
{
InitializeComponent();
authgear = DependencyService.Get<AuthgearSdk>();
}
async void Configure_Clicked(object sender, EventArgs e)
{
// You must configure the instance before use.
// Typically you should do this once on app launch.
await authgear.ConfigureAsync();
}
async void Authenticate_Clicked(object sender, EventArgs e)
{
var userInfo = await authgear.AuthenticateAsync(new AuthenticateOptions
{
RedirectUri = REDIRECT_URI
});
}
}
}When you start launching the application. You may want to know if the user has logged in. (e.g. Show users the login page if they haven't logged in). The SessionState reflects the user logged in state in the SDK locally on the device. That means even the SessionState is Authenticated, the session may be invalid if it is revoked remotely. After initializing the Authgear SDK, call FetchUserInfoAsync to update the SessionState as soon as it is proper to do so.
// value can be NoSession or Authenticated
// After Authgear.ConfigureAsync, it only reflects local state.
var sessionState = authgear.SessionState;
if (sessionState == SessionState.Authenticated)
{
try
{
var userInfo = await authgear.FetchUserInfoAsync();
// sessionState is now up to date
}
catch (Exception ex)
{
// sessionState is now up to date
// it will change to NoSession if the session is invalid
}
}The value of SessionState can be Unknown, NoSession or Authenticated. Initially, the SessionState is Unknown. After a call to authgear.configure, the session state would become Authenticated if a previous session was found, or NoSession if such session was not found.
In some cases, you may need to obtain current user info through the SDK. (e.g. Display email address in the UI). Use the FetchUserInfoAsync function to obtain the user info, see example.
To log out the user from the current app session, you need to invoke thelogoutfunction.
await authgear.LogoutAsync();To include the access token to the HTTP requests to your application server, you set the bearer token manually by using authgear.AccessToken.
You can get the access token through authgear.AccessToken. Call RefreshAccessTokenIfNeededAsync every time before using the access token, the function will check and make the network call only if the access token has expired. Then, include the access token into the Authorization header of the http request.
await authgear.RefreshAccessTokenIfNeededAsync();
// Access token is ready to use
// AccessToken can be string or undefined
// It will be empty if user is not logged in or session is invalid
var accessToken = authgear.AccessToken;
var client = GetHttpClient(); // Get the re-used http client of your app, as per recommendation.
var httpRequestMessage = new HttpRequestMessage(myHttpMethod, myUrl);
httpRequestMessage.Headers.Authorization = new AuthenticationHeaderValue("Bearer", accessToken);To protect your application server from unauthorized access. You will need to integrate your backend with Authgear.
For detailed documentation on the Xamarin SDK, visit Xamarin SDK Reference
[^1]: For futher instruction on setting up custom URI scheme in Xamarin, see https://www.xamarinhelp.com/uri-scheme/ [^2]: For more explaination on JWT, see https://en.wikipedia.org/wiki/JSON_Web_Token
Use the user import API to bulk import users from external systems to your Authgear project
Some ways to add users to your Authgear project include; using the Add User UI in Authgear Portal, using the createUser() mutation in Admin API, and last but not least, having the user accounts created using sign-up page on AuthUI.
A common downside of all the above-listed methods is that they do not support batch import of users. Meaning, that you have to add users one by one. This isn't ideal for importing multiple users from existing legacy systems to Authgear. For adding bulk users, there is the User Import API.
In this post, you'll learn what the User Import API is and see examples of how to import bulk users to an Authgear project.
The User Import API is an API that supports the bulk import of users from another system to an Authgear project. This API is not part of the Admin API GraphQL. However, the API endpoints require the to access it.
The following are other important things to note about the User Import API:
The actual process of importing the users is asynchronous. This means execution is done in the background. The API provides an endpoint developers can use to query the status of the import.
Once an import is initiated successfully, the API will return an ID for the task. This ID is required to query the status of the import.
The body of HTTP requests to the API has a limit of 500KB.
Using the User Import API does not trigger the user.pre_create and user.created hooks.
The API supports the Bcrypt password format. To import passwords using this format specify the format type and password_hash in an object that will be the value of the user's password field. For example:
The Import User API has two endpoints, one for initiating a user import task and the other for checking the status of the task. The endpoints only support secure HTTPS request and require a valid Admin API JWT token using Bearer authorization header (Authorization: Bearer <Admin API JWT Token>).
Here are more details about the endpoints and their expected inputs.
The accepts JSON input via an HTTP request body. The following sample JSON document shows the expected structure and fields of the input:
To understand the input better, let's take a close look at the three fields (upsert, identifier, records) that are directly on the root of the above JSON document.
upsert: This is an optional boolean that is false by default. When the value for this field is set to true and a user already exists with the same identity, the user's data is updated based on the for each attribute.
identifier: This field is required. It tells Authgear what attribute to use to identify an existing user. The following strings are the accepted values: preferred_username, email, and phone_number.
records: This is where a developer can provide the data of all the users they wish to import in an array. Each direct object in the array represents a single user. Within the object, you can define the standard attributes for the user using the various fields as shown in the sample above. You may also define custom attributes in an object nested inside the custom_attributes field as also shown above.
The update behavior for an attribute determines how Authgear will treat that attribute when an existing user has the same value for the specified identifier type. For example, if the identifier is "email", the update behavior for each attribute is how Authgear will treat the attribute if a user already exists with the same email address as the current user you're trying to import.
Each attribute can have one of the three different types of update behavior described below:
UPDATED_IF_PRESENT_AND_REMOVED_IF_NULL: An attribute with this update behavior will update the user's attribute to the new value if that new value is not null. If the new value is explicitly null, the attribute will be deleted for the user. And if the attribute is absent, no operation is done.
UPDATED_IF_PRESENT: When this is the update behavior of an attribute, it will be updated if it is present. If the attribute is not present, no operation is done.
IGNORED: If a user exists already, the new value of this attribute is ignored. If the attribute is absent, nothing is done.
The following table shows all attributes and their update behavior for reference purposes:
In this section, you can find code for a simple example of using the User Import API to add multiple users to an Authgear project.
To follow this example and be able to run the code on your local machine, you must have the following:
An Authgear account. Sign up for free .
installation on your local computer.
Install Express.js by running the following command from your project directory: npm install express.
As mentioned earlier in this post, the User Import API requires the Admin API JWT to access.
First, install JsonWebToken (a Node package for generating JWT) by running the following command:
The following code shows how to get the token:
See our post on for a more detailed guide on how to get your key ID, and private key and generate Admin API JWT.
In the following steps, we'll use the node-fetch package to make HTTP requests to the User Import API. Hence, install node-fetch by running the following command:
The following code sample demonstrates how to import 2 users from a JSON document that's stored in a simple constant (const data):
If the user import was initiated successfully, you'll get a response that looks like this:
In the next step, we'll use the value of the id field from the above response to query the status of the import task.
Add a new route to the Express app that accepts the task id as a parameter and uses that id to query the status of the task. Here's the code for the route:
The response to the request to query the status of the import task will look like this:
From the response, you can see the status of the entire task (import was completed), including a summary ( { "total": 2, "inserted": 2, "updated": 0, "skipped": 0, "failed": 0 } ).
The details field contains an array of details such as the outcome for each user in the original JSON document.
"password": {
"type": "bcrypt",
"password_hash": "$2a$10$N9qo8uLOickgx2ZMRZoMyeIjZAgcfl7p92ldGxad68LJZdL17lhWy"
},POST - /_api/admin/users/import
HTTP/1.1
Host: <Your Authgear Project domain>
Authorization: Bearer <Admin API JWT Token>
Content-type: application/json
Body: {
"identifier": "email",
"records": [
{
"email": "[email protected]",
"email_verified": true,
"password": {
"type": "bcrypt",
"password_hash": "$2a$10$N9qo8uLOickgx2ZMRZoMyeIjZAgcfl7p92ldGxad68LJZdL17lhWy"
}
}
]
}
GET - /_api/admin/users/import/{ID}
HTTP/1.1
Host: <Your Authgear Project domain>
Authorization: Bearer <Admin API JWT Token>{
"upsert": true,
"identifier": "email",
"records": [
{
"preferred_username": "jdoe",
"email": "[email protected]",
"phone_number": "+85123456789",
"email_verified": true,
"phone_number_verified": true,
"name": "John Doe",
"given_name": "John",
"family_name": "Doe",
"middle_name": "",
"nickname": "JD",
"profile": "https://example.com",
"picture": "https://example.com",
"website": "https://example.com",
"gender": "male",
"birthdate": "1990-01-01",
"zoneinfo": "Asia/Hong_Kong",
"locale": "zh-Hant-HK",
"address": {
"formatted": "1 Unnamed Road, Central, Hong Kong Island, HK",
"street_address": "1 Unnamed Road",
"locality": "Central",
"region": "Hong Kong",
"postal_code": "N/A",
"country": "HK"
},
"custom_attributes": {
"member_id": "123456789"
},
"roles": ["role_a", "role_b"],
"groups": ["group_a"],
"disabled": false,
"password": {
"type": "bcrypt",
"password_hash": "$2a$10$N9qo8uLOickgx2ZMRZoMyeIjZAgcfl7p92ldGxad68LJZdL17lhWy"
},
"mfa": {
"email": "[email protected]",
"phone_number": "+85123456789",
"password": {
"type": "bcrypt",
"password_hash": "$2a$10$N9qo8uLOickgx2ZMRZoMyeIjZAgcfl7p92ldGxad68LJZdL17lhWy"
},
"totp": {
"secret": "secret"
}
}
}
]
}preferred_username, email, phone_number
UPDATED_IF_PRESENT_AND_REMOVED_IF_NULL
If it is not identifier, then the update behavior applies. The corresponding Login ID will be created, updated or removed as needed.
email_verified, phone_number_verified
UPDATED_IF_PRESENT
For example, in the first import, if email_verified is absent, then email is marked as unverified.
All other standard attributes
UPDATED_IF_PRESENT_AND_REMOVED_IF_NULL
In particular, address IS NOT merged with the existing value, but REPLACES the existing address value.
custom_attributes.*
UPDATED_IF_PRESENT_AND_REMOVED_IF_NULL
For each attribute in custom_attributes, the update behavior applies individually. So an absent custom attribute in an upsert does not change the existing value.
roles, groups
UPDATED_IF_PRESENT
If present, the roles and groups of the user will match the value. For example, supposed the user originally has ["role_a", "role_b"]. roles is ["role_a", "role_c"]. role_b is removed and role_c is added.
disabled
UPDATED_IF_PRESENT
Re-importing a record without specifying disabled WILL NOT accidentally alter the disabled state previously set by other means.
password
IGNORED
If it was not provided when the record was first imported, subsequent import CANNOT add it back.
mfa.email
UPDATED_IF_PRESENT_AND_REMOVED_IF_NULL
If provided, the user can perform 2FA with email OTP.
mfa.phone_number
UPDATED_IF_PRESENT_AND_REMOVED_IF_NULL
If provided, the user can perform 2FA with phone OTP.
mfa.password
IGNORED
If it was not provided when the record was first imported, subsequent import CANNOT add it back.
mfa.totp
IGNORED
If it was not provided when the record was first imported, subsequent import CANNOT add it back.
npm install jsonwebtokenfunction generateJWT() {
const project_id = ""; //Your authgear app id
const key_id = ""; //you authgear key ID
const expiresAt = Math.floor(Date.now() / 1000) + (60 * 60); //the current value means token will expire in 1 hour.
//Payload to include in JWT
const claims = {
aud: project_id,
iat: Math.floor(Date.now() / 1000) - 30,
exp: expiresAt
}
const privateKey = fs.readFileSync("key.pem"); //Read value from the downloaded key file
const header = { "typ": "JWT", "kid": key_id, "alg": "RS256" }
const jwt = node_jwt.sign(claims, privateKey, { header: header });
return jwt;
}npm install node-fetchconst express = require("express");
const node_jwt = require('jsonwebtoken');
const fs = require('fs');
const fetch = require('node-fetch');
const app = express();
const port = 3002;
//TODO Place declaration of generateJWT() function here
app.get('/', (request, response) => {
const jwt = generateJWT();
const data = {
"identifier": "email",
"records": [
{
"email": "[email protected]",
"email_verified": true,
"password": {
"type": "bcrypt",
"password_hash": "$2a$10$N9qo8uLOickgx2ZMRZoMyeIjZAgcfl7p92ldGxad68LJZdL17lhWy"
}
},
{
"email": "[email protected]",
"email_verified": false,
"name": "John Doe",
"given_name": "John",
"family_name": "Doe",
"password": {
"type": "bcrypt",
"password_hash": "$2a$10$N9qo8uLOickgx2ZMRZoMyeIjZAgcfl7p92ldGxad68LJZdL17lhWy"
}
}
]
}
const options = {
method: 'POST',
headers: { 'Content-type': 'application/json', 'Authorization': 'Bearer ' + jwt },
body: JSON.stringify(data)
};
const appUrl = 'https://your-project.authgearapps.com'; // replace wuth your authgear project url
fetch(`${appUrl}/_api/admin/users/import`, options)
.then(result => result.json())
.then(result => console.log(JSON.stringify(result)));
response.send("Request sent using the follow JWT as Bearer: " + jwt + "See console for result");
});
app.listen(port, () => {
console.log("server started! PORT: " + port);
});{
"id": "task_4WZ0V7EPT4GZ2ABVN03QXYZ122W835C1",
"created_at": "2024-04-04T06:56:36.02508096Z",
"status": "pending"
}app.get("/status/:id", (request, response) => {
const jwt = generateJWT()
const options = {
method: 'GET',
headers: { 'Content-type': 'application/json', 'Authorization': 'Bearer ' + jwt }
};
const appUrl = 'https://your-project.authgearapps.com';
fetch(`${appUrl}/_api/admin/users/import/${request.params.id}`, options)
.then(result => result.json())
.then(result => console.log(JSON.stringify(result)));
response.send("Request sent using the follow JWT as Bearer: " + jwt + "See console for result");
});{
"id": "task_4WZ0V7EPT4GZ2ABVN03QXYZ122W835C1",
"created_at": "2024-04-04T06:56:36.02508096Z",
"status": "completed",
"summary": {
"total": 2,
"inserted": 2,
"updated": 0,
"skipped": 0,
"failed": 0
},
"details": [
{
"index": 0,
"record": {
"email": "[email protected]",
"email_verified": true,
"password": {
"password_hash": "REDACTED",
"type": "bcrypt"
}
},
"outcome": "inserted",
"user_id": "0f0f65ee-4c7d-45a0-a740-bcbbfd3fcf06"
},
{
"index": 1,
"record": {
"email": "[email protected]",
"email_verified": false,
"family_name": "Doe",
"given_name": "John",
"name": "John Doe",
"password": {
"password_hash": "REDACTED",
"type": "bcrypt"
}
},
"outcome": "inserted",
"user_id": "9c71fc29-6db6-4a18-aa73-774139fed16d",
"warnings": [
{
"message": "email_verified = false has no effect in insert."
}
]
}
]
}
Guide on how to use Authgear in an Ionic project
In this post, you'll learn how to use Authgear with your Ionic project using the Authgear Ionic SDK.
At the end of this tutorial, we'll build an Ionic app that can do the following:
Allow users to log in to their account on your Authgear project
Allow new users to sign up
Allow signed-in users to view their user info and logout.
The final UI for the app we'll build should look like this:
To follow this guide seamlessly, make sure to have the following:
Node.js installed on your local machine
Android Studio (for building the Android client of your application)
X-code (for building the iOS client of your application)
An Authgear account. You can sign up for one for free here.
Any code editor (VS Code, Sublime, etc)
Now let us get into the steps for using Authgear in an Ionic project.
In this part, you'll learn how to configure an Authgear application so that you can use it in your Ionic project. You'll do this by performing the following steps in the Authgear Portal.
First, log in to Authgear Portal at https://portal.authgear.com/ and select an existing project or create a new one.
In your project, navigate to the Applications section then click on Add Application to create a new Authgear application. Enter a name for your application and select Native App as the Application Type. Next, click Save to continue to the configuration page for your new application.
In this step, you'll set up authorized redirect URIs for your application. An authorized redirect URI should be a URI pointing to a page on your Ionic app where you want to redirect users at the end of the authorization flow.
To add a URI, scroll to the URIs section of your application configuration page and enter the URI in the text field. You can click the Add URI button to add additional URIs.
For our example app, add the following URIs:
com.authgear.example.capacitor://host/path
capacitor://localhost
http://localhost:8100/oauth-redirect
https://localhost
Once you're done, click on the Save button.
Now that we have our Authgear application configured, we can now proceed with creating the Ionic application that will have all the features stated in our objective earlier.
For this tutorial, we'll be implementing an Ionic app using React.
Before you can create an Ionic project, install the Ionic CLI on your computer by running the following command in Terminal or Command Prompt:
npm install -g @ionic/cli native-run cordova-resNow create a new Ionic project by running the following command:
ionic start authgear-ionic-example --type=react --capacitorAfter running the above command, follow the wizard to create a new blank project.
Next, open your new project in a code editor and update for appId in capacitor.config.ts to the following value:
appId: 'com.authgear.example.capacitor',This new value for appId is the same value we used in the authorized redirect URI earlier.
Note: It is important that you update the value for appId before you create the Android and iOS projects for your Ionic application. Doing this will enable Capacitor to create your Android and iOS project with the value for appId as the package name and app ID.
You can run the ionic serve command to preview your new blank project on a browser.
Finally, create the Android and iOS projects for your app by running the following commands from your Ionic project's root folder:
First, install the Android and iOS platforms:
npm i @capacitor/android @capacitor/iosThen, create the projects:
npx cap add android
npx cap add iosIn this step, you'll install the Authgear SDK for Ionic (Capacitor) and the Javascript SDK for the web. The web SDK will help you test your application on a web browser.
To install the SDKs, run the following commands in your Terminal or Command Prompt:
Authgear Ionic SDK
npm i @authgear/capacitorAuthgear Web SDK
npm i @authgear/webIn this step, you'll learn how to configure your Ionic project using the details from your Authgear application configuration.
To get started, open src/pages/Home.tsx in your code editor and import the Authgear SDK by adding the following code to the top of the file:
import authgearWeb, {
SessionState,
CancelError as WebCancelError,
UserInfo,
} from "@authgear/web";
import authgearCapacitor, {
CancelError as CapacitorCancelError,
} from "@authgear/capacitor";The above code imports all the components of the Authgear SDK we need for our example app.
Because Ionic apps can run on the web and native mobile platforms, we have to import both Authgear web and Authgear Capacitor SDKs.
Next, add the following constants to Home.tsx just below the last import statement:
const CLIENT_ID = "";
const ENDPOINT = "";
const REDIRECT_URI_WEB_AUTHENTICATE = "http://localhost:8100/oauth-redirect";
const REDIRECT_URI_CAPACITOR = "com.authgear.example.capacitor://host/path";
const REDIRECT_URI_WEB_REAUTH = "http://localhost:8100/reauth-redirect";Update the values for the constants (CLIENT_ID, ENDPOINT) you just added to the correct values from your application's configuration page in the Authgear Portal.
Also, add this small utility function that will help to check whether your Ionic app is running natively or on a web browser:
function isPlatformWeb(): boolean {
return Capacitor.getPlatform() === "web";
}Now implement a new AuthenticationScreen component in Home.tsx by pasting the following code:
function AuthenticationScreen() {
const [isAlertOpen, setIsAlertOpen] = useState(false);
const [alertHeader, setAlertHeader] = useState("");
const [alertMessage, setAlertMessage] = useState("");
const [loading, setLoading] = useState(false);
const [initialized, setInitialized] = useState(false);
const showError = useCallback((e: any) => {
const json = JSON.parse(JSON.stringify(e));
json["constructor.name"] = e?.constructor?.name;
json["message"] = e?.message;
let message = JSON.stringify(json);
if (e instanceof WebCancelError || e instanceof CapacitorCancelError) {
// Cancel is not an error actually.
return;
}
setIsAlertOpen(true);
setAlertHeader("Error");
setAlertMessage(message);
}, []);
const postConfigure = useCallback(async () => {
const sessionState = isPlatformWeb()
? authgearWeb.sessionState
: authgearCapacitor.sessionState;
if (sessionState !== "AUTHENTICATED") {
setInitialized(true);
return;
}
if (isPlatformWeb()) {
await authgearWeb.fetchUserInfo();
} else {
await authgearCapacitor.fetchUserInfo();
}
setInitialized(true);
}, []);
const configure = useCallback(async () => {
setLoading(true);
try {
if (isPlatformWeb()) {
await authgearWeb.configure({
clientID: CLIENT_ID,
endpoint: ENDPOINT,
sessionType: "refresh_token",
isSSOEnabled: false,
});
} else {
await authgearCapacitor.configure({
clientID: CLIENT_ID,
endpoint: ENDPOINT
});
}
await postConfigure();
} catch (e) {
showError(e);
} finally {
setLoading(false);
}
}, [
CLIENT_ID,
ENDPOINT
]);
}Here, we'll implement an authenticate() method inside the AuthenticationScreen component we created in the previous step.
To do this, first, add the following constants that the method will depend on to the top of AuthenticationScreen component:
const [page, setPage] = useState("");
const [sessionState, setSessionState] = useState<SessionState | null>(() => {
if (isPlatformWeb()) {
return authgearWeb.sessionState;
}
return authgearCapacitor.sessionState;
});
const loggedIn = sessionState === "AUTHENTICATED";Then, add the authentucate() method by pasting the following code to the end of the AuthenticationScreen component:
const authenticate = useCallback(async (page: string) => {
setLoading(true);
try {
if (isPlatformWeb()) {
authgearWeb.startAuthentication({
redirectURI: REDIRECT_URI_WEB_AUTHENTICATE,
page: page,
});
} else {
const result = await authgearCapacitor.authenticate({
redirectURI: REDIRECT_URI_CAPACITOR,
page: page,
});
showUserInfo(result.userInfo);
}
} catch (e) {
showError(e);
} finally {
setLoading(false);
}
}, [showUserInfo, page]);Calling this authenticate() method will initialize an authentication flow. The page parameter can be used to specify whether to start the authentication flow on the login page or signup page.
At the end of an authentication flow, your users will be redirected to the URL you specified in redirectURI. In this step, we'll set up the routes and code to process redirects to the URIs.
First, create a new file OAuthRedirect.tsx in src/pages/ and add the following code to it:
import { useCallback, useEffect } from "react";
import authgearWeb from "@authgear/web";
import { useIonRouter } from "@ionic/react";
export default function OAuthRedirect() {
const router = useIonRouter();
const finishAuthentication = useCallback(async () => {
const CLIENT_ID = "";
const ENDPOINT = "";
try {
await authgearWeb.configure({
clientID: CLIENT_ID,
endpoint: ENDPOINT,
sessionType: "refresh_token",
});
await authgearWeb.finishAuthentication();
router.push("/", "root", "replace");
} catch (e) {
console.error(e);
}
}, [router]);
useEffect(() => {
finishAuthentication();
}, [finishAuthentication]);
return (
<div>
Finishing authentication. Open the inspector to see if there is any error.
</div>
);
}Change the values for CLIENT_ID and ENDPOINT in the above code to the correct value from your Authgear application configuration page.
Now open src/App.tsx and create a new route for OAuthRedirect using the following code:
<Route exact path="/oauth-redirect">
<OAuthRedirect />
</Route>Remember to import OAuthRedirect in App.tsx.
To handle redirect in the Android project, add the following code to android/app/src/main/AndroidManifest.xml:
<!-- Authgear SDK -->
<activity
android:name="com.authgear.capacitor.OAuthRedirectActivity"
android:launchMode="singleTask"
android:exported="true">
<intent-filter>
<action android:name="android.intent.action.VIEW" />
<category android:name="android.intent.category.DEFAULT" />
<category android:name="android.intent.category.BROWSABLE" />
<!-- Configure data to be the exact redirect URI your app uses. -->
<!-- NOTE: The redirectURI supplied in AuthenticateOptions has to match as well -->
<data
android:host="host"
android:pathPrefix="/path"
android:scheme="com.authgear.example.capacitor" />
</intent-filter>
</activity>At this point, you will create the User Interface for the AuthenticationScreen component.
To do that, add the following code to the end of the AuthenticationScreen component method:
const fetchUserInfo = useCallback(async () => {
setLoading(true);
try {
if (isPlatformWeb()) {
const userInfo = await authgearWeb.fetchUserInfo();
showUserInfo(userInfo);
} else {
const userInfo = await authgearCapacitor.fetchUserInfo();
showUserInfo(userInfo);
}
} catch (e) {
showError(e);
} finally {
setLoading(false);
}
}, [showError, showUserInfo]);
const logout = useCallback(async () => {
setLoading(true);
try {
if (isPlatformWeb()) {
await authgearWeb.logout({
redirectURI: window.location.origin + "/",
});
} else {
await authgearCapacitor.logout();
}
} catch (e) {
showError(e);
} finally {
setLoading(false);
}
}, [showError]);
// On web, it is more natural to configure automatically if client ID and endpoint are filled in.
useEffect(() => {
configure();
// eslint-disable-next-line react-hooks/exhaustive-deps
}, []);
const onAlertDismiss = useCallback(
(_e: IonAlertCustomEvent<OverlayEventDetail>) => {
setIsAlertOpen(false);
},
[]
);
const onClickAuthenticate = useCallback(
(e: MouseEvent<HTMLIonButtonElement>, page: string) => {
e.preventDefault();
e.stopPropagation();
authenticate(page);
},
[authenticate]
);
const onClickFetchUserInfo = useCallback(
(e: MouseEvent<HTMLIonButtonElement>) => {
e.preventDefault();
e.stopPropagation();
fetchUserInfo();
},
[fetchUserInfo]
);
const onClickLogout = useCallback(
(e: MouseEvent<HTMLIonButtonElement>) => {
e.preventDefault();
e.stopPropagation();
logout();
},
[logout]
);
return (
<>
<IonAlert
isOpen={isAlertOpen}
header={alertHeader}
message={alertMessage}
onIonAlertDidDismiss={onAlertDismiss}
/>
<div className="container">
<h1>
Welcome
</h1>
<p>Tap any of the buttons to below to login or signup</p>
<IonButton
className="button"
disabled={!initialized || loading || loggedIn}
onClick={
(event) => {
setPage("signup");
onClickAuthenticate(event, "login")
}
}
>
Login
</IonButton>
<IonButton
className="button"
disabled={!initialized || loading || loggedIn}
onClick={(event) => {
onClickAuthenticate(event, "signup")
}}
>
Signup
</IonButton>
<IonButton
className="button"
disabled={!initialized || loading || !loggedIn}
onClick={onClickFetchUserInfo}
>
Fetch User Info
</IonButton>
<IonButton
className="button"
disabled={!initialized || loading || !loggedIn}
onClick={onClickLogout}
>
Logout
</IonButton>
</div>
</>
);To deploy your app to a mobile device (for example Android) run the following commands:
First build your project by running:
npm run buildThen sync the changes to the mobile project using this command:
npx cap syncYou can run the project by opening the android project folder in Android Studio or ios folder in X-code.
You can quickly open the project in Android Studio using the following command:
npx cap open androidOnce your project builds successfully, you can try the Login, Signup, Fetch User Info, and Logout buttons.
Authgear Capacitor SDK makes it easier to use Authgear in your Ionic application. It provides many helpful methods and interfaces for interacting with the Authgear service from your Ionic application. To learn more about the SDK check the SDK Reference. Also, check out the complete repo for the Authgear Ionic SDK example app here.
Guide on how to implement your own account recovery UI powered by the Authentication Flow API
In this guide, you'll learn how to implement your own custom account recovery page that is powered by the Authentication Flow API.
Before we continue, here's an overview of our objectives for this post:
At the end of this guide we'll build a custom account recovery UI using Express.js that will do the following:
Allow users to enter the phone number associated with their account as login ID.
Send an account recovery code to the phone number.
Provide a UI for the user to enter and verify the recovery code.
Finally, a UI for the user to set a new password for their account.
To follow this guide, you should have the following:
installed on your local machine.
A code editor like VS Code, Sublime, Atom, or any editor you already use for JavaScript development.
Be comfortable working with CLI tools like NPM.
Last but not least, an Authgear account. Sign up for free .
Using custom UI in your Authgear application requires setting the value for Custom UI URI to where your custom UI is hosted.
To set this value, log in to the Authgear Portal and navigate to Applications then select your application. Next, in your application's configuration page, scroll down to the Custom UI section and enter the URL for your custom UI.
For the example in this post, we'll be using CloudFlare Tunnel to expose the custom UI we'll be building so that we can have a public URL to enter in the Custom UI URI field in our Authgear application configuration.
If you're new to the Authentication Flow API, check this getting started post [HERE(LINK)] to learn more about configuring your project for the API.
Now let's create the Express project that we'll be using to implement the account recovery Custom UI.
To create a new Express project create a new folder with the name "custom-recovery" on your computer using a file explorer or using the following command in PowerShell or Terminal:
This folder will serve as your Express project folder.
Next, install the Express package by running the following command:
Finally, create a new JavaScript file with the name "app.js" in the new folder you created earlier. This is the file where we'll implement our application logic.
Add the following code to the new app.js file:
At this point, test your work so far by running the following command from the root of your Express project folder:
Then go to your preferred web browser and visit .
Here we'll create the UI for the first page of the recovery flow. This will be a basic webpage with an input field for the user to enter their phone (login id) and a submit button.
Open app.js in your code editor and update the content of the app.get('/recovery') route to the following:
The above code refers to a rawURLQuery() and initRecovery() functions that we've not implemented yet. We'll implement the first function in this step and the second in the next step.
The form we created using the above code looks like this:
Look for the following line of code in your app.js file:
Then add the following code on a new line just below it:
The above code implements the rawURLQuery() function we mentioned earlier. This function is a helper that helps us extract URL Query from the current request. We need a special URL Query from Authgear in order to get the finish redirect URI at the end of our recovery flow. You can learn more about the URL Query [HERE(LINK)].
In this step, we'll initialize a new authentication flow of type account_recovery.
For this step and other steps that follow, we'll be making HTTP request to the Authentication Flow API using the Axios node package. Install Axios by running the following command:
Import Axios to your project by adding the following code to the top of app,js:
Next, again, look for the following line in your app.js file:
Add the following code on a new line just below it:
The above code implements the initRecovery() function. The function sends the HTTP request that initializes a new account recovery flow and returns a state_token. We'll use this state_token to continue to the next step of the flow. Hence we are passing the value for state_token to the next step using <input type="hidden">.
The response to the HTTP request looks like this:
In this step, we'll implement the code that will send the recovery code to the user's phone after they enter their phone number on the form and click submit.
Add a new beginRecovery() function to app.js (just below the initRecovery() function) using the following code:
The above code sends a request with the user's phone number (login_id) and the position of the channel (index) to which the code should be sent.
To enable Express to process form data correctly, add the following code on a new line to the top of app.js (just below const app = express();):
Now create a POST route that will call the beginRecovery() function by adding the following code just below the app.get('/recovery') route:
The above code will redirect the user to a verifyRecovery page if a recovery code was sent successfully. We'll implement this page in the next step.
The above code uses express-session, so install the package by running the following command:
Then import express-session to your app.js by adding this code to the top of the file:
Finally, enable express-session as a middle-ware by adding for following code on a new line at the top of app.js (just below const app = express();):
Now let us implement the page where the user can enter the recovery code they got for verification.
Add a new route to app.js to create the UI for the verification page:
Here is what the verify recovery code page looks like:
Next, add a new verifyRecoveryCode() function to app.js using the following code:
The above code will send the request to the Authentication Flow API with the account recovery code a user enters.
To finish up the recovery code verification process, add a new route that will handle the form submission using the following code:
The code sample above will redirect the user to a setPassword page after successful verification of the recovery code they entered. In the next step, we'll implement the page where the user can set a new password.
The final step of the account recovery process is for the user to set a new password for their account. In this step, we'll implement the UI for that.
First, add a new route to your app.js to create the UI using the following code:
The above code will implement a page that looks like this:
Add a new recoverySetPassword() function to app.js using the following code:
Next, create the route that will handle the submission of the set new password form using the following:
If the new password is set successfully, the above code will return control to Authgear to complete the rest of the authentication flow and return to your application. This is done by redirecting the client to the finish_redirect_uri.
And there you have it, you've successfully implemented your own custom password recovery UI powered by the Authentication Flow API.
For our example application, we used the phone number as login_id and the channel for receiving the recovery code. In a real app, you may use another channel such as email instead or even support both depending on what is available for the user.
mkdir custom-recoverynpm i expressconst express = require('express');
const app = express();
const port = process.env.PORT || 3000;
app.get('/', (req, res) => {
res.send(`
<p>A demo for account recovery using authflow API. Click on the following link to try it</p>
<a href="/recovery">Forgot password</a>
`)
});
app.get('/recovery', async (req, res)=> {
res.send("Test recovery");
});
app.listen(port, () => {
console.log(`server started on port ${port}!`);
});node app.jsapp.get('/recovery', async (req, res)=> {
const URLQuery = rawURLQuery(req.url);
res.send(`
<!DOCTYPE html>
<html lang="en">
<head>
<meta charset="UTF-8">
<meta name="viewport" content="width=device-width, initial-scale=1.0">
<link rel="stylesheet" href="https://cdn.jsdelivr.net/npm/[email protected]/dist/css/bootstrap.min.css"
integrity="sha384-Gn5384xqQ1aoWXA+058RXPxPg6fy4IWvTNh0E263XmFcJlSAwiGgFAW/dAiS6JXm" crossorigin="anonymous">
<title>Account recovery</title>
</head>
<body>
<div class="container pt-4">
<form class="" action="./recovery" method="POST" enctype="application/x-www-form-urlencoded">
<div class="">
<label class="">
Phone number (include country code)
</label>
<input name="phone" id="phone" type="text" class="form-control mb-2" placeholder="Enter your phone number" />
</div>
<input type="hidden" name="state_token" value="${await initRecovery(URLQuery)}">
<button type="submit" class="btn btn-primary">
Submit
</button>
</form>
</div>
</body>
</html>
`);
});const port = process.env.PORT || 3000;function rawURLQuery(url) {
const index = url.indexOf('?');
return (index === 0) ? url.substr(index + 1) : "";
}npm i axiosconst axios = require('axios');const port = process.env.PORT || 3000;const endpoint = "https://cube-crisp-110.authgear-staging.com";
async function initRecovery(url_query) {
const url = `${endpoint}/api/v1/authentication_flows?${url_query}`;
const input = {
"type": "account_recovery",
"name": "default"
};
const headers = {
"Content-Type": "application/json",
"Accept": "application/json",
}
try {
startRecovery = await axios.post(url, input, {
headers: headers
});
return startRecovery.data.result.state_token;
}
catch (error) {
console.log(error.response.data.error);
return error.response;
}
}{
"result": {
"state_token": "authflowstate_5QKK3BRPETYQ7SYWYFQ4N2MR3F0S8S0Q",
"type": "account_recovery",
"name": "default",
"action": {
"type": "identify",
"data": {
"options": [
{
"identification": "email"
},
{
"identification": "phone"
}
]
}
}
}
}async function beginRecovery(login_id, state_token) {
const url = `${endpoint}/api/v1/authentication_flows/states/input`;
const input = {
"state_token": state_token,
"batch_input": [
{
"identification": "phone",
"login_id": login_id
},
{
"index": 0 //option of the channel the recovery code will be sent to
}
]
};
const headers = {
"Content-Type": "application/json",
"Accept": "application/json",
}
try {
const recoveryIdentityStep = await axios.post(url, input, {
headers: headers
});
return recoveryIdentityStep;
}
catch (error) {
console.log(error.response.data.error);
return error.response;
}
}app.use(express.urlencoded({ extended: true }));app.post('/recovery', async (req, res) => {
try {
const apiResponse = await beginRecovery(req.body.phone, req.body.state_token);
if (apiResponse.status == 200) {
req.session.recovery_response = apiResponse.data.result.action.data;
req.session.recovery_response.state_token = apiResponse.data.result.state_token;
res.redirect("/verifyRecovery");
} else {
res.send("Error!")
}
}
catch (error) {
console.log(error)
res.send("Error: anthentication failed!");
}
});npm i express-sessionconst session = require('express-session');const session = require('express-session');app.get('/verifyRecovery', async (req, res) => {
const recoveryResponseData = req.session.recovery_response;
res.send(`
<!DOCTYPE html>
<html lang="en">
<head>
<meta charset="UTF-8">
<meta name="viewport" content="width=device-width, initial-scale=1.0">
<link rel="stylesheet" href="https://cdn.jsdelivr.net/npm/[email protected]/dist/css/bootstrap.min.css"
integrity="sha384-Gn5384xqQ1aoWXA+058RXPxPg6fy4IWvTNh0E263XmFcJlSAwiGgFAW/dAiS6JXm" crossorigin="anonymous">
<title>Verify recovery code</title>
</head>
<body>
<div class="container pt-4">
<form class="" action="./verifyRecovery" method="POST" enctype="application/x-www-form-urlencoded">
<div class="">
<p>Email: ${recoveryResponseData.masked_display_name}</p>
<label class="">
Code
</label>
<input name="code" id="code" type="text" class="form-control mb-2" placeholder="Enter the Recovery code (000000 for this test) sent to the above email " />
</div>
<input type="hidden" name="state_token" value="${recoveryResponseData.state_token}">
<button type="submit" class="btn btn-primary">
Verify
</button>
<div>
<a href="/resendOtp">Resend Code</a>
<span> (wait untill ${recoveryResponseData.can_resend_at})</span>
</div>
</form>
</div>
</body>
</html>
`);
});async function verifyRecoveryCode(code, state_token) {
const url = `${endpoint}/api/v1/authentication_flows/states/input`;
const input = {
"state_token": state_token,
"input": {
"account_recovery_code": code
}
};
const headers = {
"Content-Type": "application/json",
"Accept": "application/json",
}
try {
const verifyCodeStep = await axios.post(url, input, {
headers: headers
});
return verifyCodeStep;
}
catch (error) {
return error.response;
}
}app.post('/verifyRecovery', async (req, res) => {
try {
const apiResponse = await verifyRecoveryCode(req.body.code, req.body.state_token);
if (apiResponse.status == 200) {
req.session.verify_step_state_token = apiResponse.data.result.state_token;
res.redirect("/setPassword");
} else {
res.send("Error!")
}
}
catch (error) {
console.log(error)
res.send("Error: anthentication failed!");
}
});app.get('/setPassword', async (req, res) => {
res.send(`
<!DOCTYPE html>
<html lang="en">
<head>
<meta charset="UTF-8">
<meta name="viewport" content="width=device-width, initial-scale=1.0">
<link rel="stylesheet" href="https://cdn.jsdelivr.net/npm/[email protected]/dist/css/bootstrap.min.css"
integrity="sha384-Gn5384xqQ1aoWXA+058RXPxPg6fy4IWvTNh0E263XmFcJlSAwiGgFAW/dAiS6JXm" crossorigin="anonymous">
<title>Set new password</title>
</head>
<body>
<div class="container pt-4">
<form class="" action="./setPassword" method="POST" enctype="application/x-www-form-urlencoded">
<div class="">
<p>Set new password</p>
</div>
<div class="form-group">
<label>
New Password
</label>
<input name="password" type="password" class="form-control mb-2" placeholder="Enter your password" />
</div>
<div class="form-group">
<label>
Repeat Password
</label>
<input name="password2" type="password" class="form-control mb-2" placeholder="Enter your password" />
</div>
<input type="hidden" name="state_token" value="${req.session.verify_step_state_token}">
<button type="submit" class="btn btn-primary">
Submit
</button>
</form>
</div>
</body>
</html>
`);
});async function recoverySetPassword(password, state_token) {
const url = `${endpoint}/api/v1/authentication_flows/states/input`;
const input = {
"state_token": state_token,
"input": {
"new_password": password
}
};
const headers = {
"Content-Type": "application/json",
"Accept": "application/json",
}
try {
const verifyCodeStep = await axios.post(url, input, {
headers: headers
});
return verifyCodeStep;
}
catch (error) {
console.log(error.response.data.error);
return error.response;
}
}app.post('/setPassword', async (req, res) => {
try {
const apiResponse = await recoverySetPassword(req.body.password, req.body.state_token);
if (apiResponse.status == 200 && apiResponse.data.result.action.data.finish_redirect_uri !== undefined) {
//password reset complete, return control back to Authgear
res.redirect(apiResponse.data.result.action.data.finish_redirect_uri);
} else {
res.send(apiResponse.data)
}
}
catch (error) {
console.log(error)
res.send("Error: account recovery failed!");
}
});


This guide shows how to setup custom login and signup pages using Authentication flow API.
You can create your own login and signup page from the ground up, using the Authentication flow API. In this guide, we'll implement Authentication Flow API using PHP.
Before we dive into the step-by-step guide, here are some key things you should know about working with the Authentication Flow API.
URL Query: When any of the Authgear SDKs redirects users to your Custom UI URL, Authgear adds some additional queries to the URL. These queries are required in order to get the finish_redirect_uri.
Endpoint: You can find your Authgear project domain from your application configuration page (usually under the Endpoint section) in Authgear Portal. The full endpoint is this Authgear domain followed by a valid path for an operation. For example, https://my-project.authgear.cloud/api/v1/authentication_flows to start an authentication flow. The two valid paths the API supports are /api/v1/authentication_flows and /api/v1/authentication_flows/states/input (which is for passing input to an existing authentication flow).
State Token: The Authentication Flow API supports authentication with multi-step UI just like the default authentication flow in Auth UI. State tokens can be used to make this type of type of authentication flow work. You can pass information about a previous step to the next step by using the state token. For example, using the state token in the result of step A as input in step B to continue using the state of the previous step.
Inputs: You can pass values to Authentication Flow API using the input or batch_input parameters in your HTTP request body. Use the batch_input to send multiple values as in an array and input when you are passing only 1 value.
Finish Redirect URI: A URL that you can use to redirect back to your app at the end of the authentication flow.
To follow along with the example in this post, you should have the following:
PHP installed on your local machine.
Composer installed on your computer.
A code editor like VS Code, Sublime, Atom, or any editor you use for PHP development.
An Authgear account. You can create one for free here.
Enable Custom UI for your Authgear Project. Contact us to enable custom UI.
Now that you understand basic concepts about the Authentication API and what you need to follow along with our example, let's look at how to create our first custom login and signup page from scratch.
In this section, you'll learn how to configure your Authgear project for the Authentication Flow API.
Navigate to Application > Add Application in Authgear Portal (or select an existing application then update the configuration).
Enter a name for your application and set the Application Type as OIDC Client Application. then click on the Save button.
Note: You can select any Application Type on the Portal depending on the nature of your client application that will be interacting with Authgear and your Custom UI.
In this step, you'll add redirect URIs to your application. An Authorized Redirect URI should be a valid page on your application that you want Authgear to redirect users to at the end of the authentication flow.
To add a new URI, scroll down to the URIs section on the configuration page for the application you created in the previous step. Next, click on the Add URI button then enter a valid URL for your application. For this example, enter http://localhost:8081/ as a redirect URI.
Once you're done, save the changes to continue.
The value for the Custom UI URI should be a link (absolute URL) to your custom login page. Authgear will redirect users to this page when they start an authentication request. Also, during redirect, Authgear will automatically include the URL query we mentioned earlier.
Now, still within the configuration page for your application, scroll down to the Custom UI section and add a link to your custom login page.
If you're testing your custom UI on a browser on the same device that you'll be using to serve the PHP code, you can enter your localhost URL in Custom UI URI. For example, you can use the following URL if you will run the PHP code on your local machine using port 8081 :
http://localhost:8081/login.phpAlternatively, can use CloudFlare Tunnel to get a public URL for your PHP application that's running locally. Then, enter the public URL from CloudFlare as your Custom UI URI.
With that, we're done with the required configuration on the Authgear Portal. In the next part, we'll design some custom UI and implement the Authentication Flow API.
For our example app in this tutorial, users will be using their email and password to log in. Hence, you are required to enable this option in the Authgear Portal.
To do that, enable the "Email + Password" option under Authentication > Login Methods.
Also, disable 2FA (if enabled) so that the authentication flow does not include an extra step which our demo app will not cover. You can disable 2FA Requirements in Authentication > 2FA in the Authgear Portal.
Now that your Authgear project is set to use the Authentication Flow API, let's walk through the steps for creating a custom login and signup page. Our example app for this part of the guide uses PHP.
The application you'll build in this part is the same application your Custom UI URI should point to.
Step 1: Set up Authgear PHP Example App
Create a new folder on your computer for your PHP project using the following command or a file explore:
mkdir authgear-php-exampleChange your current directory to the new folder using by running the following command:
cd authgear-php-exampleFor this example, we'll be using the oauth2-client package to interact with Authgear. Install the package using the following command:
composer require league/oauth2-clientCreate the following files in and add the corresponding code to the files:
config.php:
<?php
require 'vendor/autoload.php';
$appUrl = "";
$clientID = "";
$clientSecret = "";
$redirectUri = "http://localhost:8081/";
$provider = new \League\OAuth2\Client\Provider\GenericProvider([
'clientId' => $clientID, // The client ID assigned to you by the provider
'clientSecret' => $clientSecret, // The client password assigned to you by the provider
'redirectUri' => $redirectUri,
'urlAuthorize' => $appUrl.'/oauth2/authorize',
'urlAccessToken' => $appUrl.'/oauth2/token',
'urlResourceOwnerDetails' => $appUrl.'/oauth2/userInfo',
'scopes' => 'openid'
]);
?>Add the correct values for $clientID, $clientSecret, and $redirectUri from your Authgear application configuration page. The value for $appUrl should be your application endpoint.
index.php:
<?php
include "config.php";
// if code is set, get access token
if (isset($_GET['code'])) {
$code = $_GET['code'];
try {
$accessToken = $provider->getAccessToken('authorization_code', [
'code' => $code
]);
$_SESSION['accessToken'] = $accessToken;
} catch (\League\OAuth2\Client\Provider\Exception\IdentityProviderException $e) {
// Failed to get the access token or user details.
exit($e->getMessage());
}
}
?>
<!DOCTYPE html>
<html lang="en">
<head>
<meta charset="UTF-8">
<meta name="viewport" content="width=device-width, initial-scale=1.0">
<title>PHP Demo - Home</title>
</head>
<body style="background-color: #DEDEDE">
<div style="max-width: 650px; margin: 16px auto; background-color: #FFFFFF; padding: 16px;">
<h3>Hello world!</h3>
<p>This demo app shows you how to add user authentication to your app using Authgear</p>
<p>Checkout <a href="https://docs.authgear.com">docs.authgear.com</a> to learn more about adding Authgear to your apps.</p>
<?php
if (isset($_SESSION['accessToken'])) {
//if access token exists in session, attempt to fetch user info
$resourceOwner = $provider->getResourceOwner($accessToken);
$userInfo = $resourceOwner->toArray();
echo "Welcome back " . $userInfo['email'];
echo "<br/>";
echo '<a href="'.$appUrl.'/logout">Logout</a>';
} else { ?>
<p><a href="startLogin.php">Login/Signup</a></p>
<?php
}
?>
</div>
</body>
</html>The above page will serve as a landing page for our example application. After a user clicks on the login link, they'll be redirected to your custom login page.
startLogin.php:
<?php
include "config.php";
if (!isset($_GET['code'])) {
// Fetch the authorization URL from the provider; this returns the
// urlAuthorize option and generates and applies any necessary parameters
// (e.g. state).
$authorizationUrl = $provider->getAuthorizationUrl();
// Get the state generated for you and store it to the session.
$_SESSION['oauth2state'] = $provider->getState();
// Redirect the user to the authorization URL.
header('Location: ' . $authorizationUrl);
exit;
}
?>The code in startLogin.php initiates a regular Authgear authentication flow by redirecting the user to the authorization URL. In the case of our example, this authorization URL will point to our custom login page instead.
Still, in your PHP project folder, create a new login.php file and add the following code to it:
<?php $url_params = $_SERVER['QUERY_STRING'];
?>
<!DOCTYPE html>
<html lang="en">
<head>
<meta charset="UTF-8">
<meta name="viewport" content="width=device-width, initial-scale=1.0">
<link rel="stylesheet" href="https://cdn.jsdelivr.net/npm/[email protected]/dist/css/bootstrap.min.css"
integrity="sha384-Gn5384xqQ1aoWXA+058RXPxPg6fy4IWvTNh0E263XmFcJlSAwiGgFAW/dAiS6JXm" crossorigin="anonymous">
<title>Login</title>
</head>
<body>
<div class="container pt-4">
<form class="" action="<?php echo "form.php?action=login&" . $url_params; ?>" method="POST">
<div class="">
<label class="">
Email
</label>
<input name="email" type="email" class="form-control mb-2" placeholder="Enter your email" />
</div>
<div>
<label>
Password
</label>
<input name="password" type="password" class="form-control mb-2" placeholder="Enter your password" />
</div>
<button type="submit" class="btn btn-primary">
Submit
</button>
</form>
<div>
<span>Or</span>
<a href="signup.php?<?php echo $url_params; ?>">Sign Up</a>
</div>
</div>
</body>
</html>The above code creates a basic login page with email and password fields and a submit button.
On the first line of the code, the value for the URL Query that Authgear adds to your custom UI URI is read and stored in the $url_params variable. This value is required to finish the authentication flow.
Also in the above code, the form action points to a form.php with $url_params appended to the path. It is this form.php file that will process the form data and complete the login flow. We'll implement the file in a later step.
The following screenshot shows the output of the custom login page on a browser:
This is the part where you start to make interactions with the actual Authentication Flow API.
In this first interaction, we'll be making an HTTP request to the API endpoint to log a user into our application.
In the request, we'll send the email and password the user enters in the login.php page to the API endpoint to complete the authentication flow in a single step. What this means is that we'll initiate and finish the login flow using a single HTTP request. Unlike what we'll do in later steps for signup and OTP flows.
We'll use the GuzzleHttp package to make HTTP requests to the Authentication Flow API. Hence, run the following command in the root folder of your project to install it:
composer require guzzlehttp/guzzleNow create a new form.php file and the following code to it:
<?php
require 'vendor/autoload.php';
use GuzzleHttp\Client;
$endpoint = "https://your-project.authgear.cloud"; //Check Authgear Portal for your endpoint
if (isset($_GET["action"])) {
$action = $_GET["action"];
if ($action == "login") {
$url_params = $_SERVER['QUERY_STRING'];
$url = $endpoint . "/api/v1/authentication_flows";
$client = new Client();
$headers = [
'Content-Type' => 'application/json',
'Accept' => 'application/json',
];
$response = $client->post($url . "?" . $url_params, [
"json" => [
'type' => 'login',
'name' => 'default',
"batch_input" => [
[
"identification" => "email",
"login_id" => $_POST['email']
],
[
"authentication" => "primary_password",
"password" => $_POST['password']
]
]
],
"headers" => $headers
]);
if ($response->getStatusCode() == 200) {
$response_array = json_decode($response->getBody(), true);
header("Location: " . $response_array["result"]["action"]["data"]["finish_redirect_uri"]);
}
}
}Here are the key things the PHP code in form.php does at this point:
First, it reads the URL query from the form action and appends it to the API endpoint.
Then it makes a POST HTTP request to the endpoint with both Content-Type and Accept header values set to application/json. These header values are required for sending requests to the endpoint.
Next, the user input (email and password) from the form is sent in the body of the HTTP request. Also in the request body is type and name parameters that specify the type of authentication flow (login) and the name of the flow (default) respectively.
And finally, the value for finish_redirect_uri is read from the response of the HTTP request. This value is then used to redirect the user to the "finish redirect URI" to complete the login flow.
The HTTP response from the above request will look like this:
{
"result": {
"state_token": "authflowstate_RB482Y95Q4BT8D4CAHXD499Y21MGAH2J",
"type": "login",
"name": "default",
"action": {
"type": "finished",
"data": {
"finish_redirect_uri": "https://cube-crisp-110.authgear-staging.com/oauth2/consent?code=HD2AS7394RJCGVYWYHQHXGDKYX8BZ28Q"
}
}
}
}To your application, start your PHP server and try visiting the index.php from a web browser. If you have PHP installed on your local machine and the environment path set, you can start a PHP server for your project by running:
php -S localhost:8081Now test the login flow by clicking on the login link on the landing page. You should be redirected to the custom login instead of the default AuthUI Authgear provides.
Enter a valid email and password combination and click the Login button like a normal user would test your implementation. The user should be redirected back to the application at the end of the authentication flow.
For this signup flow example, we'll be making two requests to the Authentication Flow API. In this step, we'll implement the first request which will only initialize the signup flow.
Create a new signup.php file inside your project folder and add the following code to it:
<?php
require 'vendor/autoload.php';
use GuzzleHttp\Client;
$endpoint = "https://your-project.authgear.cloud"; //Check Authgear Portal for your endpoint
function initSignUp() {
$url_params = $_SERVER['QUERY_STRING'];
$url = $endpoint . "/api/v1/authentication_flows?" . $url_params;
$client = new Client();
$headers = [
'Content-Type' => 'application/json',
'Accept' => 'application/json',
];
$response = $client->post($url, [
"json" => [
"type" => "signup",
"name" => "default"
],
"headers" => $headers
]);
$response_array = json_decode($response->getBody(), true);
$state_token = $response_array["result"]["state_token"];
return $state_token;
}
?>As you can see from the code snippet above, for this authentication flow, the type is "signup".
The initSignUp() method handles the step that starts the authentication flow for the specified type and returns a state_token that you can use to continue the flow.
In this step, we'll create a sign-up page. The login page already contains a link that points to the sign-up page and also includes the URL Query.
To create the UI for the signup page, add the following code to the signup.php file just below the closing "?>" PHP embedded closing tag:
<!DOCTYPE html>
<html lang="en">
<head>
<meta charset="UTF-8">
<meta name="viewport" content="width=device-width, initial-scale=1.0">
<link rel="stylesheet" href="https://cdn.jsdelivr.net/npm/[email protected]/dist/css/bootstrap.min.css"
integrity="sha384-Gn5384xqQ1aoWXA+058RXPxPg6fy4IWvTNh0E263XmFcJlSAwiGgFAW/dAiS6JXm" crossorigin="anonymous">
<title>Register</title>
</head>
<body>
<div class="container pt-4">
<form class="" action="form.php?action=signup" method="POST">
<div class="form-group">
<label class="">
Email
</label>
<input name="email" type="email" class="form-control mb-2" placeholder="Enter your email" />
</div>
<div class="form-group">
<label>
Password
</label>
<input name="password" type="password" class="form-control mb-2" placeholder="Enter your password" />
</div>
<div class="form-group">
<label>
Repeat Password
</label>
<input name="password" type="password" class="form-control mb-2" placeholder="Enter your password" />
</div>
<input type="hidden" name="state_token" value="<?php echo initSignUp(); ?>">
<button type="submit" class="btn btn-primary">
Submit
</button>
</form>
<div>
</body>
</html>The above code implements a signup form that includes fields for users to enter their email and password and a submit button. The value for the <input type="hidden"> is the state_token returned from the previous. You need this state_token to proceed with the flow.
Open form.php and add a new conditional block for when action=="signup" using the following code:
else if ($action == "signup") {
$url = $endpoint . "/api/v1/authentication_flows/states/input";
$client = new Client();
$headers = [
'Content-Type' => 'application/json',
'Accept' => 'application/json',
];
$response = $client->post($url, [
"json" => [
'state_token' => $_POST['state_token'],
"batch_input" => [
[
"identification" => "email",
"login_id" => $_POST['email']
],
[
"authentication" => "primary_password",
"new_password" => $_POST["password"]
]
]
],
"headers" => $headers
]);
if ($response->getStatusCode() == 200) {
$response_array = json_decode($response->getBody(), true);
header("Location: " . $response_array["result"]["action"]["data"]["finish_redirect_uri"]);
}
}The above code sends the state_token from the previous step as part of the request body.
It also sends the email and password the user entered in the form.
On successful response, the code will redirect the user to the finish_redirect_url .
Test your implementation again using your frontend application and you should be able to register a new account using the custom UI.
Beyond login and sign-up, there's more you can do with the Authentication Flow API. However, the focus of this post has been to provide a guide for getting started with your first implementation of Authentication Flow API.
To learn more about supported flows, endpoints, their inputs, and responses, check out the official API Reference for Authentication Flow API.


Authgear provides an easy method to reauthenticate the end-users. You can use this as a security measure to protect sensitive operations.
Reauthentication in Authgear is built on top of the OIDC ID token. The ID token is a JWT.
Your sensitive operation server endpoint MUST require the ID token. When you receive the ID token, you MUST verify the signature of it. If the signature is valid, you can trust the claims inside the ID token.
The auth_time claim in the ID token tells when was the end-user last authenticated. You should check the auth_time claim to see if the end-user was authenticated recently enough.
The https://authgear.com/claims/user/can_reauthenticate claim in the ID token tells whether the end-user can be reauthenticated. If the value of this claim is false, then depending on your business needs, you can either allow the end-user to proceed, or forbid the end-user to perform sensitive operations. The flows are illustrated by the following diagrams.
The following code snippets illustrate the interaction between the SDK and Authgear.
const biometricOptions = {
ios: {
localizedReason: 'Use biometric to authenticate',
constraint: 'biometryCurrentSet' as const,
},
android: {
title: 'Biometric Authentication',
subtitle: 'Biometric authentication',
description: 'Use biometric to authenticate',
negativeButtonText: 'Cancel',
constraint: ['BIOMETRIC_STRONG' as const],
invalidatedByBiometricEnrollment: true,
},
};
async function onClickPerformSensitiveOperation() {
// Step 1: Refresh the ID token to ensure the claims are up-to-date.
await authgear.refreshIDToken();
// Step 2: Check if the end-user can be reauthenticated.
const canReauthenticate = authgear.canReauthenticate();
if (!canReauthenticate) {
// Step 2.1: Depending on your business need, you may want to allow
// the end-user to proceed.
// Here we assume you want to proceed.
const idTokenHint = authgear.getIDTokenHint();
// Step 2.2: Call the sensitive endpoint with the ID token.
// It is still required to pass the ID token to the endpoint so that
// the endpoint can know the end-user CANNOT be reauthenticated.
return callMySensitiveEndpoint(idTokenHint);
}
// Step 3: The end-user can be reauthenticated.
// If your app supports biometric authentication, you can pass
// the biometric options to reauthenticate.
// If biometric is enabled for the current user, it will be used instead.
await authgear.reauthenticate({
redirectURI: THE_REDIRECT_URI,
}, biometricOptions);
// Step 4: If we reach here, the reauthentication was done.
// The ID token have up-to-date auth_time claim.
const idTokenHint = authgear.getIDTokenHint();
return callMySensitiveEndpoint(idTokenHint);
}final ios = BiometricOptionsIOS(
localizedReason: "Use biometric to authenticate",
constraint: BiometricAccessConstraintIOS.biometryAny,
);
final android = BiometricOptionsAndroid(
title: "Biometric Authentication",
subtitle: "Biometric authentication",
description: "Use biometric to authenticate",
negativeButtonText: "Cancel",
constraint: [BiometricAccessConstraintAndroid.biometricStrong],
invalidatedByBiometricEnrollment: false,
);
Future<void> onClickPerformSensitiveOperation() async {
// Step 1: Refresh the ID token to ensure the claims are up-to-date.
await authgear.refreshIDToken();
// Step 2: Check if the end-user can be reauthenticated.
final canReauthenticate = authgear.canReauthenticate;
if (!canReauthenticate) {
// Step 2.1: Depending on your business need, you may want to allow
// the end-user to proceed.
// Here we assume you want to proceed.
final idTokenHint = authgear.idTokenHint;
// Step 2.2: Call the sensitive endpoint with the ID token.
// It is still required to pass the ID token to the endpoint so that
// the endpoint can know the end-user CANNOT be reauthenticated.
return callMySensitiveEndpoint(idTokenHint);
}
// Step 3: The end-user can be reauthenticated.
// If your app supports biometric authentication, you can pass
// the biometric options to reauthenticate.
// If biometric is enabled for the current user, it will be used instead.
await authgear.reauthenticate(
redirectURI: THE_REDIRECT_URI,
biometricIOS: ios,
biometricAndroid: android,
);
// Step 4: If we reach here, the reauthentication was done.
// The ID token have up-to-date auth_time claim.
final idTokenHint = authgear.idTokenHint;
return callMySensitiveEndpoint(idTokenHint);
}var ios = new BiometricOptionsIos
{
LocalizedReason = "Use biometric to authenticate",
AccessConstraint = BiometricAccessConstraintIos.BiometricAny,
};
var android = new BiometricOptionsAndroid
{
Title = "Biometric Authentication",
Subtitle = "Biometric authentication",
Description = "Use biometric to authenticate",
NegativeButtonText = "Cancel",
AccessConstraint = BiometricAccessConstraintAndroid.BiometricOnly,
InvalidatedByBiometricEnrollment = false,
};
async void OnPerformSensitiveOperationClicked(object sender, EventArgs args)
{
// Step 1: Refresh the ID token to ensure the claims are up-to-date.
await authgear.RefreshIdTokenAsync();
// Step 2: Check if the end-user can be reauthenticated.
var canReauthenticate = authgear.CanReauthenticate;
if (!canReauthenticate)
{
// Step 2.1: Depending on your business need, you may want to allow
// the end-user to proceed.
// Here we assume you want to proceed.
var idTokenHint = authgear.IdTokenHint;
// Step 2.2: Call the sensitive endpoint with the ID token.
// It is still required to pass the ID token to the endpoint so that
// the endpoint can know the end-user CANNOT be reauthenticated.
await CallMySensitiveEndpointAsync(idTokenHint);
return;
}
// Step 3: The end-user can be reauthenticated.
// If your app supports biometric authentication, you can pass
// the biometric options to reauthenticate.
// If biometric is enabled for the current user, it will be used instead.
await authgear.ReauthenticateAsync(new ReauthenticateOptions
{
RedirectURI: THE_REDIRECT_URI,
}, new BiometricOptions
{
Ios = ios,
Android = android,
});
// Step 4: If we reach here, the reauthentication was done.
// The ID token have up-to-date auth_time claim.
var idTokenHint = authgear.IdTokenHint;
await CallMySensitiveEndpointAsync(idTokenHint);
}async function onClickPerformSensitiveOperation() {
// Step 1: Refresh the ID token to ensure the claims are up-to-date.
await authgear.refreshIDToken();
// Step 2: Check if the end-user can be reauthenticated.
const canReauthenticate = authgear.canReauthenticate();
if (!canReauthenticate) {
// Step 2.1: Depending on your business need, you may want to allow
// the end-user to proceed.
// Here we assume you want to proceed.
const idTokenHint = authgear.getIDTokenHint();
// Step 2.2: Call the sensitive endpoint with the ID token.
// It is still required to pass the ID token to the endpoint so that
// the endpoint can know the end-user CANNOT be reauthenticated.
return callMySensitiveEndpoint(idTokenHint);
}
// Step 3: The end-user can be reauthenticated.
// The end-user will be redirected to Authgear.
// When the reauthentication finishes,
// The end-user will be redirected back to the given redirect URI.
await authgear.startReauthentication({
redirectURI: THE_REDIRECT_URI
});
}
// Suppose the following function is run when the end-user is redirected to
// the redirect URI
async function onRedirectAfterReauthentication() {
// You HAVE to configure authgear again
// because your website have been visited freshly.
await authgear.finishReauthentication();
await authgear.refreshIDToken();
const idTokenHint = authgear.getIDTokenHint();
return callMySensitiveEndpoint(idTokenHint);
}func onClickPerformSensitiveOperation() {
// Step 1: Refresh the ID token to ensure the claims are up-to-date.
authgear.refreshIDToken() { result in
switch result {
case .success:
// Step 2: Check if the end-user can be reauthenticated.
let canReauthenticate = authgear.canReauthenticate
if !canReauthenticate {
// Step 2.1: Depending on your business need, you may want to allow
// the end-user to proceed.
// Here we assume you want to proceed.
let idTokenHint = authgear.idTokenHint
// Step 2.2: Call the sensitive endpoint with the ID token.
// It is still required to pass the ID token to the endpoint
// so that the endpoint can know the end-user CANNOT
// be reauthenticated.
callMySensitiveEndpoint(idTokenHint)
return
}
// Step 3: The end-user can be reauthenticated.
// By default biometric is used for reauthentication if it is enabled for the current user.
// If you do not want biometric to be used, specify skipUsingBiometric: true
authgear.reauthenticate(redirectURI: THE_REDIRECT_URI, skipUsingBiometric: false) { result in
switch result {
case .success:
// Step 4: If we reach here, the reauthentication was done.
// The ID token have up-to-date auth_time claim.
let idTokenHint = authgear.idTokenHint
callMySensitiveEndpoint(idTokenHint)
return
case let .failure(error):
// Handle the error
}
}
case let .failure(error):
// Handle the error
}
}
}public void onClickPerformSensitiveOperation() {
BiometricOptions biometricOptions = new BiometricOptions(
activity, // FragmentActivity
"Biometric authentication", // title
"Biometric authentication", // subtitle
"Use biometric to authenticate", // description
"Cancel", // negativeButtonText
ALLOWED, // allowedAuthenticators
true // invalidatedByBiometricEnrollment
);
// Step 1: Refresh the ID token to ensure the claims are up-to-date.
authgear.refreshIDToken(new OnRefreshIDTokenListener() {
@Override
public void onFailed(Throwable throwable) {
// Handle error
}
@Override
public void onFinished() {
// Step 2: Check if the end-user can be reauthenticated.
boolean canReauthenticate = authgear.getCanReauthenticate();
if (!canReauthenticate) {
// Step 2.1: Depending on your business need, you may want to allow
// the end-user to proceed.
// Here we assume you want to proceed.
String idTokenHint = authgear.getIDTokenHint();
// Step 2.2: Call the sensitive endpoint with the ID token.
// It is still required to pass the ID token to the endpoint
// so that the endpoint can know the end-user CANNOT
// be reauthenticated.
callMySensitiveEndpoint(idTokenHint);
return;
}
// Step 3: The end-user can be reauthenticated.
// If your app supports biometric authentication, you can pass
// the biometric options to reauthenticate.
// If biometric is enabled for the current user, it will be used.
ReauthenticateOptions options =
new ReauthenticateOptions(THE_REDIRECT_URI);
authgear.reauthenticate(options, biometricOptions, new OnReauthenticateListener() {
@Override
public void onFailed(Throwable throwable) {
// Handle error
}
@Override
public void onFinished(UserInfo userInfo) {
// Step 4: If we reach here, the reauthentication was done.
// The ID token have up-to-date auth_time claim.
String idTokenHint = authgear.getIDTokenHint();
callMySensitiveEndpoint(idTokenHint);
return;
}
});
}
});
}If the end-users in your application often perform a series of sensitive operation, it is annoying that they have to reauthenticate themselves repeatedly before every operation. To allow the end-users to skip reauthentication if they have just reauthenticated themselves recently, the SDK allows you to inspect the last authentication time of the end-user.
async function onClickPerformSensitiveOperation() {
await authgear.refreshIDToken();
// Before you trigger reauthentication, check authTime first.
const authTime = authgear.getAuthTime();
if (authTime != null) {
const now = new Date();
const timeDelta = now.getTime() - authTime.getTime();
if (timeDelta < 5 * 60 * 1000 /* 5 minutes */) {
const idTokenHint = authgear.getIDTokenHint();
return callMySensitiveEndpoint(idTokenHint);
}
}
// Otherwise trigger authentication.
}func onClickPerformSensitiveOperation() {
authgear.refreshIDToken() { result in
switch result {
case .success:
// Before you trigger reauthentication, check authTime first.
if let authTime = authgear.authTime {
let now = Date()
let timeDelta = now.timeIntervalSince(authTime)
if timeDelta < 5 * 60 {
let idTokenHint = authgear.idTokenHint
callMySensitiveEndpoint(idTokenHint)
return
}
}
// Otherwise trigger authentication.
case let .failure(error):
// Handle the error
}
}
}public void onClickPerformSensitiveOperation() {
authgear.refreshIDToken(new OnRefreshIDTokenListener() {
@Override
public void onFailed(Throwable throwable) {
// Handle error
}
@Override
public void onFinished() {
// Before you trigger reauthentication, check authTime first.
Date authTime = authgear.getAuthTime();
if (authTime != null) {
Date now = new Date();
long timedelta = now.getTime() - authTime.getTime();
if (timedelta < 5 * 60 * 1000) {
String idTokenHint = authgear.getIDTokenHint();
callMySensitiveEndpoint(idTokenHint);
return;
}
}
// Otherwise trigger authentication.
}
});
}public async void OnPerformSensitiveOperationClicked(object sender, EventArgs args)
{
await authgear.RefreshIdTokenAsync();
var authTime = authgear.AuthTime;
if (authTime != null)
{
var now = DateTimeOffset.UtcNow;
var timedelta = now - authTime.Value;
if (timedelta < TimeSpan.FromMinutes(5))
{
var idTokenHint = authgear.IdTokenHint;
callMySensitiveEndpoint(idTokenHint);
return;
}
}
}Finally in your backend, you have to verify the signature of the ID token, and then validate the claims inside.
import json
from contextlib import closing
from urllib.request import urlopen
from datetime import datetime, timezone, timedelta
import jwt
from jwt import PyJWKClient
base_address = "https://<your_app_endpoint>"
def fetch_jwks_uri(base_address):
doc_url = base_address + "/.well-known/openid-configuration"
with closing(urlopen(doc_url)) as f:
doc = json.load(f)
jwks_uri = doc["jwks_uri"]
if not jwks_uri:
raise Exception('Failed to fetch jwks uri.')
return jwks_uri
def my_endpoint():
id_token = GET_ID_TOKEN_FROM_HTTP_REQUEST_SOMEHOW()
try:
jwks_uri = fetch_jwks_uri(base_address)
# Reuse PyJWKClient for better performance
jwks_client = PyJWKClient(jwks_uri)
signing_key = jwks_client.get_signing_key_from_jwt(id_token)
claims = jwt.decode(
id_token,
signing_key.key,
algorithms=["RS256"],
audience=base_address,
options={"verify_exp": True},
)
auth_time = claims["auth_time"]
dt = datetime.fromtimestamp(auth_time)
now = datetime.utcnow()
delta = now - dt
if delta > timedelta(minutes=5):
raise ValueError("auth_time is not recent enough")
except:
# Handle error
raisepackage main
import (
"context"
"encoding/json"
"fmt"
"net/http"
"time"
"github.com/lestrrat-go/jwx/jwk"
"github.com/lestrrat-go/jwx/jwt"
)
var (
baseAddress = "https://<your_app_endpoint>"
)
type OIDCDiscoveryDocument struct {
JWKSURI string `json:"jwks_uri"`
}
func FetchOIDCDiscoveryDocument(endpoint string) (*OIDCDiscoveryDocument, error) {
resp, err := http.DefaultClient.Get(endpoint)
if err != nil {
return nil, err
}
defer resp.Body.Close()
if resp.StatusCode != http.StatusOK {
return nil, fmt.Errorf(
"failed to fetch discovery document: unexpected status code: %d",
resp.StatusCode,
)
}
var document OIDCDiscoveryDocument
err = json.NewDecoder(resp.Body).Decode(&document)
if err != nil {
return nil, err
}
return &document, nil
}
func FetchJWK(baseAddress string) (jwk.Set, error) {
doc, err := FetchOIDCDiscoveryDocument(
baseAddress + "/.well-known/openid-configuration",
)
if err != nil {
return nil, err
}
set, err := jwk.Fetch(context.Background(), doc.JWKSURI)
return set, err
}
func CheckIDToken(idToken string) error {
// fetch jwks_uri from Authgear
// you can cache the value of jwks to have better performance
set, err := FetchJWK(baseAddress)
if err != nil {
return fmt.Errorf("failed to fetch JWK: %s", err)
}
// parse jwt token
token, err := jwt.ParseString(idToken, jwt.WithKeySet(set))
if err != nil {
return fmt.Errorf("invalid token: %s", err)
}
// validate jwt token
err = jwt.Validate(token,
jwt.WithClock(jwt.ClockFunc(
func() time.Time { return time.Now().UTC() },
)),
jwt.WithIssuer(baseAddress),
)
if err != nil {
return fmt.Errorf("invalid token: %s", err)
}
authTimeAny, ok := token.Get("auth_time")
if !ok {
return fmt.Errorf("no auth_time")
}
authTimeUnix, ok := authTimeAny.(float64)
if !ok {
return fmt.Errorf("auth_time is not number")
}
authTime := time.Unix(int64(authTimeUnix), 0)
now := time.Now().UTC()
diff := now.Sub(authTime)
if diff > 5*time.Minute {
return fmt.Errorf("auth_time is not recent enough")
}
return nil
}Add authentication for ASP.NET app with Authgear
In this guide, you will learn how to add authentication features with Authgear by implementing an OpenID Connect flow, then retrieving OAuth tokens, to call APIs. View implementation on GitHub.
You will learn the following throughout the article:
How to add user login, sign-up, and logout to ASP.NET Core Applications.
Before you get started, you will need the following:
A free Authgear account. Sign up if you don't have one already.
.NET 7 downloaded and installed on your machine. You can also use Visual Studio and VS code to automatically detect the .NET version.
To use Authgear services, you’ll need to have an application set up in the Authgear Dashboard. The Authgear application is where you will configure how you want to authenticate and manage your users.
Use the interactive selector to create a new Authgear OIDC Client application or select an existing application that represents the project you want to integrate with.
Every application in Authgear is assigned an alphanumeric, unique client ID that your application code will use to call Authgear APIs through the OpenID Connect Client in the .NET app. Note down the Authgear ISSUER (for example, https://example-auth.authgear.cloud), CLIENT ID, CLIENT SECRET, and OpenID Token Endpoint (https://example-auth.authgear.cloud/oauth2/token) from the output. You will use these values in the next step for the client app config.
A Redirect URI of your application is the URL that Authgear will redirect to after the user has authenticated in order for the OpenID Connect middleware to complete the authentication process. In our case, it will be a home page for our ASP.NET and it will run athttp://localhost:5002.
Set the following redirect URI: http://localhost:5002/signin-oidc If not set, users will not be returned to your application after they log in.
Also, enable Issue JWT as an access token option under the Access Token section of the app configuration:
After you create the Authgear app, you choose how users need to authenticate on the login page. From the Authentication tab, navigate to Login Methods, you can choose a login method from various options including, by email, mobile, or social, just using a username or the custom method you specify. For this demo, we choose the Email+Passwordless approach where our users are asked to register an account and log in by using their emails. They will receive a One-time password (OTP) to their emails and verify the code to use the app.
This guide will be used to provide a way for your users to log in to your ASP.NET Core application. The project source code can be found on GitHub. If you are familiar with the steps, you can skip this part and clone the code repository and run the code sample by following the README.md file there.
To integrate Authgear with ASP.NET Core you will use both the Cookie and OpenID Connect (OIDC) authentication handlers. If you are not using a sample project and are integrating Authgear into your own existing project, then please make sure that you add Microsoft.AspNetCore.Authentication.OpenIdConnect packages to your application. Run the following command in your terminal or use your editor to include the NuGet package there:
Install-Package Microsoft.AspNetCore.Authentication.OpenIdConnectTo enable authentication in your ASP.NET Core application, use the OpenID Connect (OIDC) middleware. Open Startup the class and in the ConfigureServices method, add the authentication services and call the AddAuthentication method. To enable cookie authentication, call the AddCookie method. Next, configure the OIDC authentication handler by adding method AddOpenIdConnect implementation. Configure other parameters, such as Issuer, ClientId, ClientSecret , and Scope. Here, is what looks like Startup.cs after you apply these changes:
public class Startup
{
public IWebHostEnvironment Environment { get; }
public IConfiguration Configuration { get; }
public Startup(IWebHostEnvironment environment, IConfiguration config)
{
Environment = environment;
Configuration = config;
}
// This method gets called by the runtime. Use this method to configure the HTTP request pipeline.
public void Configure(IApplicationBuilder app, IWebHostEnvironment env)
{
app.UseRouting();
app.UseAuthentication();
app.UseAuthorization();
app.UseEndpoints(endpoints =>
{
endpoints.MapRazorPages();
});
}
public void ConfigureServices(IServiceCollection services)
{
// Prevent WS-Federation claim names being written to tokens
JwtSecurityTokenHandler.DefaultInboundClaimTypeMap.Clear();
services.AddAuthentication(options =>
{
options.DefaultScheme = CookieAuthenticationDefaults.AuthenticationScheme;
options.DefaultChallengeScheme = OpenIdConnectDefaults.AuthenticationScheme;
})
.AddCookie(CookieAuthenticationDefaults.AuthenticationScheme, options =>
{
// Use the strongest setting in production, which also enables HTTP on developer workstations
options.Cookie.SameSite = SameSiteMode.Strict;
})
.AddOpenIdConnect(options =>
{
// Use the same settings for temporary cookies
options.NonceCookie.SameSite = SameSiteMode.Strict;
options.CorrelationCookie.SameSite = SameSiteMode.Strict;
// Set the main OpenID Connect settings
options.Authority = Configuration.GetValue<string>("OpenIdConnect:Issuer");
options.ClientId = Configuration.GetValue<string>("OpenIdConnect:ClientId");
options.ClientSecret = Configuration.GetValue<string>("OpenIdConnect:ClientSecret");
options.ResponseType = OpenIdConnectResponseType.Code;
options.ResponseMode = OpenIdConnectResponseMode.Query;
string scopeString = Configuration.GetValue<string>("OpenIDConnect:Scope");
options.Scope.Clear();
scopeString.Split(" ", StringSplitOptions.TrimEntries).ToList().ForEach(scope =>
{
options.Scope.Add(scope);
});
// If required, override the issuer and audience used to validate ID tokens
options.TokenValidationParameters = new TokenValidationParameters
{
ValidIssuer = options.Authority,
ValidAudience = options.ClientId
};
// This example gets user information for display from the user info endpoint
options.GetClaimsFromUserInfoEndpoint = true;
// Handle the post logout redirect URI
options.Events.OnRedirectToIdentityProviderForSignOut = (context) =>
{
context.ProtocolMessage.PostLogoutRedirectUri = Configuration.GetValue<string>("OpenIdConnect:PostLogoutRedirectUri");
return Task.CompletedTask;
};
// Save tokens issued to encrypted cookies
options.SaveTokens = true;
// Set this in developer setups if the OpenID Provider uses plain HTTP
options.RequireHttpsMetadata = false;
});
services.AddAuthorization();
services.AddRazorPages();
// Add this app's types to dependency injection
services.AddSingleton<TokenClient>();
}
}Assume that there is a protected resource like a Razor page Protected.cshtml that is used to represent views:
@page "/protected"
@model ProtectedModel
@addTagHelper*, Microsoft.AspNetCore.Mvc.TagHelpers
<style type="text/css">
button
{
width: 200px;
}
</style>
<h1>Protected View</h1>
<h3>
<p>Welcome: @Model.Username</a>
<p>Current Access Token: @Model.AccessToken</a>
<p>Current Refresh Token: @Model.RefreshToken</a>
<form method="post">
<p><button value="RefreshToken" asp-page-handler="RefreshToken">Refresh Token</button></p>
<p><button value="Logout" asp-page-handler="Logout">Logout</button></p>
</form>
</h3>And ProtectedModel.cs class to which Authorize the attribute is applied requires authorization.
[Authorize]
public class ProtectedModel : PageModel
{
public string Username { get; set; }
public string AccessToken { get; set; }
public string RefreshToken { get; set; }
private readonly TokenClient tokenClient;
public ProtectedModel(TokenClient tokenClient)
{
this.tokenClient = tokenClient;
}
public async Task OnGet()
{
ClaimsPrincipal user = this.User;
var givenName = user.FindFirstValue("given_name");
var familyName = user.FindFirstValue("family_name");
this.Username = $"{givenName} {familyName}";
this.AccessToken = await this.tokenClient.GetAccessToken(this.HttpContext);
this.RefreshToken = await this.tokenClient.GetRefreshToken(this.HttpContext);
}
public async Task<IActionResult> OnPostRefreshToken()
{
await this.tokenClient.RefreshAccessToken(this.HttpContext);
this.AccessToken = await this.tokenClient.GetAccessToken(this.HttpContext);
this.RefreshToken = await this.tokenClient.GetRefreshToken(this.HttpContext);
return Page();
}
public async Task OnPostLogout()
{
await HttpContext.SignOutAsync(CookieAuthenticationDefaults.AuthenticationScheme);
await HttpContext.SignOutAsync(OpenIdConnectDefaults.AuthenticationScheme);
}
}To see protected data, users need to go through the authentication process via Authgear.
If a user has not authenticated yet, Unauthenticated.chtml the page is rendered, an OpenID Connect redirect flow is triggered and the user needs to authenticate through the Authgear login page. See Run the Application section
After successful authentication, you should see the protected page with the following details:
As part of the OAuth 2.0 standard, we can use the refresh token returned by the token endpoint to get a new access token. Doing so enables our application to replace an expired access token without requiring the user to repeat the entire login process.
The following code in ProtectedModel.cs is responsible for doing that:
public async Task<IActionResult> OnPostRefreshToken()
{
await this.tokenClient.RefreshAccessToken(this.HttpContext);
this.AccessToken = await this.tokenClient.GetAccessToken(this.HttpContext);
this.RefreshToken = await this.tokenClient.GetRefreshToken(this.HttpContext);
return Page();
}Note: You must include offline_access in your OAuth 2.0 scope for the Authgear authorization server to return a refresh token.
The Logout button on the Protected.cshtml page calls the OnPostLogout() method in ProtectedModel.cs. The method will delete the current user session and redirect to Authgear's end session endpoint for the user to complete the logout process.
The code sample below shows the implementation of the OnPostLogout() method:
public async Task OnPostLogout()
{
await HttpContext.SignOutAsync(CookieAuthenticationDefaults.AuthenticationScheme);
await HttpContext.SignOutAsync(OpenIdConnectDefaults.AuthenticationScheme);
}Start by cloning the project into your local machine:
git clone Make the project directory your current working directory:
cd authgear-example-dotnetUpdate the following configuration variables in the appsettings.json file with your Authgear app settings values from Part1 such as Issuer, ClientId, ClientSecret, and Authgear endpoint:
{
"OpenIDConnect": {
"ClientId": "{your-client-id}",
"ClientSecret": "{your-client-secret}",
"Issuer": "{your-authgear-app-endpoint}",
"Scope": "openid offline_access",
"PostLogoutRedirectUri": "<http://localhost:5002>",
"TokenEndpoint": "{your-authgear-app-endpoint}/oauth2/token"
},
"Urls": "<http://localhost:5002>",
"Logging": {
"LogLevel": {
"Default": "Information",
"Microsoft": "Warning",
"Microsoft.Hosting.Lifetime": "Information"
}
}
}Execute the following command to run the ASP.NET Core web application:
dotnet build
dotnet runYou can now visit http://localhost:5002 to access the application. When you click on the "View Protected Data" button, ASP.NET Core takes you to the Authgear’s Login page.
Your users can log in to your application through a page hosted by Authgear, which provides them with a secure, standards-based login experience that you can customize with your own branding and various authentication methods, such as social logins, passwordless, biometrics logins, one-time-password (OTP) with SMS/WhatsApp, and multi-factor authentication (MFA).
After you have authenticated, a protected view is rendered. The application receives an Access token that it uses to present user data on the screen, and tokens that could be used in upstream requests to some backend API, to access data on behalf of the user.
This guide showed how to quickly implement an end-to-end OpenID Connect flow in .NET with Authgear. Only simple code is needed, after which protected views are secured with built-in UI login pages.


This post provides a simple guide for implementing a custom email + password login and signup pages using Authentication Flow API and Express.
With the Authentication Flow API, you can replace the default Auth UI provided by Authgear with your own custom UI built from the ground up.
In this post, we'll walk you through an example of building your own custom login and signup pages using Express and the Authentication Flow API.
Before we continue, it's important for you to familiarize yourself with the following concepts about the Authentication Flow API:
URL Query: This is an additional set of URL query parameters that Authgear adds to your Custom UI URI during the initialization of the authentication flow. The initial request to the Authentication Flow API must include this URL query in order to return get value for finish_redirect_uri at the end of the flow.
Endpoint: Your Authgear project's domain is visible on your application configuration page in Authgear Portal, under the Endpoint section. Your full endpoint is your Authgear domain followed by a valid path for an operation (such as starting a new authentication flow, or sending input to an existing flow. For example, https://my-project.authgear.cloud/api/v1/authentication_flows to start an authentication flow and https://my-project.authgear.cloud/api/v1/authentication_flows/states/input to send input to an existing flow.
State Token: The Authentication Flow API supports authentication with multi-step UI just like the default authentication flow in Auth UI. State tokens can be used to make this type of type of authentication flow work. You can pass information about a previous step to the next step by using the state token. For example, using the state token in the result of step A as input in step B to continue using the state of the previous step.
Inputs: You can pass values to Authentication Flow API using the input or batch_input parameters in your HTTP request body. Use the batch_input to send multiple values as in an array and input when you are passing only 1 value.
Finish Redirect URI: This is a URL that you can use to redirect back to your app at the end of the authentication flow.
Note: In order to follow this tutorial and implement the example app, you need to enable a login method that supports "Email and Password" under Authentication > Login Methods in Authgear Portal. Also, disable 2FA Requirements from Authentication > 2FA in Authgear Portal.
In order to follow along with the example in this post, you should have the following:
Node.js installed on your local machine.
A code editor such as VS Code, Sublime, Atom, etc.
An Authgear account. You can create one for free here.
Be familiar with CLI tools like npm.
Enable Custom UI for your Authgear Project. Contact us to enable custom UI.
Next, set up your Authgear project to use custom authentication UI by following the steps below.
An important part of getting your application ready to use custom authentication UI is to configure your Authgear project in Portal. In this section, we'll cover the configuration required for the example app.
Login to the Authgear Portal and navigate to the Application section. Select an existing application and modify it or click on the Add Application button to create a new application.
Configure your application using the following details:
Application name: My app <or any name of your choice>
Application type: OIDC Client Application
Once you're done, click on the Save button to continue.
Note: You can select any Application Type on the Portal depending on the nature of your client application that will be interacting with Authgear and your Custom UI.
To follow this example, select OIDC Client Application as your Application type.
An Authorized Redirect URI is a page on your application that you want Authgear to redirect users to at the end of an authentication flow.
To add an Authorized Redirect URI, scroll to the URIs section on your Authgear application configuration page. Click on the Add URI button then enter a valid URI for your application.
For our example, the redirect URI will be:
http://localhost:3000/Once you're done, click on the Save button to keep your changes.
To use your custom authentication UI with Authgear, you need to specify the URI for your custom UI in the Authgear portal using the custom UI URI field. This will cause your application to show the custom UI instead of the default Auth UI during login/sign. The custom UI URI is basically a link to your custom login page.
Since we'll be testing the example app on a browser that runs on the same computer as the Express server, you can use the following value for the Custom UI URI:
http://localhost:3000/loginAlternatively, you can get a public URL for our local Express app with CloudFlare Tunnel. See more instructions on how to set up CloudFlare tunnel on your local machine here.
To set the custom UI URI, scroll to the Custom UI section on your application configuration page and paste the URL (e.g the unique public URL from CloudFlare Tunnel) in the Custom UI URI text box.
Note: For our example app, you must include the /login path in the URL so that the user is redirected straight to our login route.
That concludes all the configuration requirements in the Authgear portal for this example.
For our example app in this tutorial, users will be using their email and password to log in. Hence, you are required to enable this option in the Authgear Portal.
To do that, enable the "Email + Password" option under Authentication > Login Methods.
Also, disable 2FA (if enabled) so that the authentication flow does not include an extra step which our demo app will not cover. You can disable 2FA Requirements in Authentication > 2FA in the Authgear Portal.
In this part of the guide, we'll implement custom login and signup pages using Express and the Authentication Flow API.
The application you'll build in this part is the same application your Custom UI URI should point to.
Create a basic Express application for your Authgear project.
To do that, first run the following commands on your computer to create a new project folder and install all the necessary dependencies:
Create project folder/directory:
mkdir authgear-express-exampleChange your working directory to the new folder by running the following command:
cd authgear-express-exampleInstall Express:
npm install expressFor our example application, we'll be using the Axios node package to make HTTP requests. Run the following command to install Axios in your project:
npm install axiosInstall dotenv. We'll use this package to enable the use of .env file to store project configuration:
npm install dotenvAfter installing the above dependencies, create a new app.js file in the project directory you created earlier. Add the following code to the file:
const express = require('express');
const axios = require('axios');
require("dotenv").config();
const app = express();
app.use(express.urlencoded({ extended: true }));
const port = process.env.PORT || 3000;
const config = {
client: {
id: process.env.CLIENT_ID,
secret: process.env.CLIENT_SECRET,
redirect_url: process.env.REDIRECT_URL
},
auth: {
tokenHost: process.env.AUTHGEAR_ENDPOINT,
tokenPath: '/oauth2/token',
authorizePath: '/oauth2/authorize'
},
};
app.get('/', async (req, res) => {
if (req.query.code != null) {
const data = {
client_id: config.client.id,
client_secret: config.client.secret,
code: req.query.code,
grant_type: 'authorization_code',
response_type: 'code',
redirect_uri: config.client.redirect_url,
scope: "openid"
};
try {
const getToken = await axios.post(`${config.auth.tokenHost}${config.auth.tokenPath}`, data, {
headers: { "Content-Type": "application/x-www-form-urlencoded" }
});
const accessToken = getToken.data.access_token;
//Now use access token to get user info.
const getUserInfo = await axios.get(`${config.auth.tokenHost}/oauth2/userinfo`, { headers: { "Authorization": "Bearer " + accessToken } });
const userInfo = getUserInfo.data;
res.send(`
<div style="max-width: 650px; margin: 16px auto; background-color: #EDEDED; padding: 16px;">
<p>Welcome ${userInfo.email}</p>
<p>This demo app shows you how to add user authentication to your Express app using Authgear</p>
<div>
<pre>${JSON.stringify(userInfo, null, 2)}</pre>
</div>
<p>Checkout <a href="https://docs.authgear.com">docs.authgear.com</a> to learn more about adding Authgear to your apps.</p>
</div>
`);
} catch (error) {
res.send("An error occoured! Login could not complete. Error data: " + JSON.stringify(error.response.data));
}
}
else {
res.send(`
<div style="max-width: 650px; margin: 16px auto; background-color: #EDEDED; padding: 16px;">
<p>Hi there!</p>
<p>This demo app shows you how to add user authentication to your Express app using Authgear</p>
<p>Checkout <a href="https://docs.authgear.com">docs.authgear.com</a> to learn more about adding Authgear to your apps.</p>
<a href="/startLogin">Login</a>
</div>
`);
}
});
app.get('/startLogin', (req, res) => {
res.redirect(`${config.auth.tokenHost}${config.auth.authorizePath}/?client_id=${config.client.id}&redirect_uri=${config.client.redirect_url}&response_type=code&scope=openid`);
});Create a .env file then add the following code to it:
CLIENT_ID=paste_your_client_id_here
CLIENT_SECRET=paste_your_client_id_here
AUTHGEAR_ENDPOINT=paste_your_client_id_here
REDIRECT_URL=http://localhost:3000/Add the correct values from your Authgear application configuration page in the .env file.
At the end of this step, you should have an Express application that can connect to Authgear. However, we are yet to implement the custom login/signup page. In the next steps, we'll implement both pages.
Add the following code to your app.js file just below the app.get('/startLogin',...) route:
function rawURLQuery(url) {
const index = url.indexOf('?');
return (index >= 0) ? `?${url.substr(index + 1)}` : "";
}
app.get('/login', (req, res) => {
//get URL query
const URLQuery = rawURLQuery(req.url);
res.send(`
<!DOCTYPE html>
<html lang="en">
<head>
<meta charset="UTF-8">
<meta name="viewport" content="width=device-width, initial-scale=1.0">
<link rel="stylesheet" href="https://cdn.jsdelivr.net/npm/[email protected]/dist/css/bootstrap.min.css"
integrity="sha384-Gn5384xqQ1aoWXA+058RXPxPg6fy4IWvTNh0E263XmFcJlSAwiGgFAW/dAiS6JXm" crossorigin="anonymous">
<title>Login</title>
</head>
<body>
<div class="container pt-4">
<form class="" action="./login" method="POST" enctype="application/x-www-form-urlencoded">
<div class="">
<label class="">
Email
</label>
<input name="email" id="email" type="email" class="form-control mb-2" placeholder="Enter your email" />
</div>
<div>
<label>
Password
</label>
<input name="password" id="password" type="password" class="form-control mb-2" placeholder="Enter your password" />
</div>
<input type="hidden" name="url_query" value="${URLQuery}">
<button type="submit" class="btn btn-primary">
Submit
</button>
</form>
<div>
<span>Or</span>
<a href="/signup?${URLQuery}">Sign Up</a>
</div>
</div>
</body>
</html>
`);
});
app.listen(port, () => {
console.log(`server started on port ${port}!`);
});The above code sets up a basic email + password login page using Express.
The rawURLQuery() function extracts the URL query we mentioned earlier from the URL of the login page. The code includes the query as the value for an <input type="hidden"> so that we can include the value in the request we'll make to the Authentication Flow API later.
The following screenshot shows the output of the login page in a browser:
Now your application needs to make an HTTP request to the Authentication Flow API with the user inputs to authenticate them.
First, we'll create a userLogin() function that sends the HTTP request. To do that, add the following code to your app.js just above the declaration of the rawURLQuery() function:
const endpoint = process.env.AUTHGEAR_ENDPOINT;
async function userLogin(email, password, url_query) {
const url = `${endpoint}/api/v1/authentication_flows?${url_query}`;
const input = {
"type": "login",
"name": "default",
"batch_input":
[
{
"identification": "email",
"login_id": email
},
{
"authentication": "primary_password",
"password": password
}
]
};
const headers = {
"Content-Type": "application/json",
"Accept": "application/json",
}
try {
const startLogin = await axios.post(`${url}`, input, {
headers: headers
});
return startLogin;
}
catch (error) {
return error.response;
}
}Here are a few key things to note about the above code:
The code initiates an Authentication Flow API request of type login and finishes the entire login flow in a single step (one HTTP request).
As we mentioned earlier, the URL query from Authgear is added to the API endpoint for the initial request.
The user inputs (email and password) are sent in the request body using the batch_input parameter.
The structure of the HTTP response will look like this:
{
"result": {
"state_token": "authflowstate_RB482Y95Q4BT8D4CAHXD499Y21MGAH2J",
"type": "login",
"name": "default",
"action": {
"type": "finished",
"data": {
"finish_redirect_uri": "https://cube-crisp-110.authgear-staging.com/oauth2/consent?code=HD2AS7394RJCGVYWYHQHXGDKYX8BZ28Q"
}
}
}
}Now add the following code after the app.get('/login',...) route to create a new route that handles the action of submitting the login form:
app.post('/login', async (req, res) => {
try {
const apiResponse = await userLogin(req.body.email, req.body.password, req.body.url_query);
if (apiResponse.status == 200 && apiResponse.data.result.action.data.finish_redirect_uri !== undefined) {
res.redirect(apiResponse.data.result.action.data.finish_redirect_uri);
} else {
//this code will run usually when your authentication flow starts without the URL Query in the initial request.
res.send(apiResponse.data);
}
}
catch (error) {
console.log(error);
res.send("Error: anthentication failed!");
}
});Once the login flow is complete and a finish_redirect_uri is returned, we redirect the user to this URL for Authgear to finish the authentication process and redirect the user back to your application.
To test your progress so far, start your Express app by running the following command:
node app.jsNow open your app in a web browser by visiting localhost:3000. Once the page loads, click on the Login link. You should be redirected to the custom login page instead of the default Auth UI by Authgear.
Enter a valid email and password and click the Submit button. You should be redirected back to your application on successful login.
This step includes an example of using the Authentication Flow API for user signup. Unlike in the previous login flow example, this time we'll use the API to perform a signup flow using 2 steps(also 2 HTTP requests).
The first step is to initialize the signup flow. To do that, create an initSignUp() function just after the userLogin() function in app.js using the following code:
//function for first step of signup flow
async function initSignUp(url_query) {
const url = `${endpoint}/api/v1/authentication_flows?${url_query}`;
const input = {
"type": "signup",
"name": "default"
};
const headers = {
"Content-Type": "application/json",
"Accept": "application/json",
}
try {
startSignUp = await axios.post(url, input, {
headers: headers
});
return startSignUp.data.result.state_token;
}
catch (error) {
return error.response;
}
}Here is a breakdown of what the above code does:
First, in the code, the value for the URL query is added to the Authentication Flow API endpoint so as to meet the requirement for getting the finish_redirect_uri at the end of the flow.
The type of authentication flow is also specified as signup in the input variable that's passed in the HTTP request body.
The function returns the value of state_token from the HTTP request response. This value is required in the next step (request) to continue the signup flow.
To create the actual page with a signup, add the following code just after the app.post('/login',...) route in app.js:
app.get('/signup', async (req, res) => {
const URLQuery = rawURLQuery(req.url);
res.send(`
<!DOCTYPE html>
<html lang="en">
<head>
<meta charset="UTF-8">
<meta name="viewport" content="width=device-width, initial-scale=1.0">
<link rel="stylesheet" href="https://cdn.jsdelivr.net/npm/[email protected]/dist/css/bootstrap.min.css"
integrity="sha384-Gn5384xqQ1aoWXA+058RXPxPg6fy4IWvTNh0E263XmFcJlSAwiGgFAW/dAiS6JXm" crossorigin="anonymous">
<title>Register</title>
</head>
<body>
<div class="container pt-4">
<form class="" action="./signup" method="POST" enctype="application/x-www-form-urlencoded">
<div class="form-group">
<label class="">
Email
</label>
<input name="email" type="email" class="form-control mb-2" placeholder="Enter your email" />
</div>
<div class="form-group">
<label>
Password
</label>
<input name="password" type="password" class="form-control mb-2" placeholder="Enter your password" />
</div>
<div class="form-group">
<label>
Repeat Password
</label>
<input name="password2" type="password" class="form-control mb-2" placeholder="Enter your password" />
</div>
<input type="hidden" name="state_token" value="${await initSignUp(URLQuery)}">
<button type="submit" class="btn btn-primary">
Submit
</button>
</form>
<div>
</body>
</html>
`);
});The above code contains the HTML code for rendering a simple email and password signup page. It also calls the initSignUp() to start the authorization flow and add the state token in an <input type="hidden">.
To complete the signup flow, first create a submitSignUpData() function by adding the following code just after the initSignUp() function in app.js:
async function submitSignUpData(email, password, state_token) {
const url = `${endpoint}/api/v1/authentication_flows/states/input`;
const input = {
"state_token": state_token,
"batch_input":
[
{
"identification": "email",
"login_id": email
},
{
"authentication": "primary_password",
"new_password": password
}
]
};
const headers = {
"Content-Type": "application/json",
"Accept": "application/json",
}
try {
const sendSignUpData = await axios.post(`${url}`, input, {
headers: headers
});
return sendSignUpData;
}
catch (error) {
console.log(error.response);
return error.response;
}
}The above code implements the second step of the signup flow. It takes the state token from the first step and sends it in the second HTTP request so that the flow can continue.
Next, add the following code just after the app.get('/signup',...) route:
app.post('/signup', async (req, res) => {
try {
const apiResponse = await submitSignUpData(req.body.email, req.body.password, req.body.state_token);
if (apiResponse.status == 200 && apiResponse.data.result.action.data.finish_redirect_uri !== undefined) {
res.redirect(apiResponse.data.result.action.data.finish_redirect_uri);
} else {
//this code will run usually when your authentication flow starts without the URL Query in the initial request.
res.send(apiResponse.data);
}
}
catch (error) {
console.log(error)
res.send("Error: anthentication failed!");
}
});The above code calls the submitSignUpData() function which initiates the second step of the signup flow and submits the user inputs. At the end, the user is redirected to the finish_redirect_uri again to complete the authentication process.
Just like we've implemented custom UI for email and password authentication in this example, you can design custom UIs for other authentication flows that Authgear supports. For example, OTP and TOTP.
To learn more about all the endpoints the Authentication Flow API supports, and their inputs and outputs, you should check out the API reference page for Authentication Flow API.


Follow this quickstart tutorial to add authentication to your React application
Authgear helps you add user logins to your React apps. It provides prebuilt login page and user settings page that accelerate the development.
Follow this 🕐 15 minutes tutorial to create a simple app using React with Authgear SDK.
Table of Content
Signup for an account in https://portal.authgear.com/ and create a Project.
After that, we will need to create an Application in the Project Portal.
Go to Applications on the left menu bar.
Click ⊕Add Application in the top tool bar.
Input the name of your application, e.g. "MyAwesomeApp".
Select Single Page Application as the application type
Click "Save" to create the application
The Redirect URI is a URL in you application where the user will be redirected to after login with Authgear. In this path, make a finish authentication call to complete the login process.
For this tutorial, add http://localhost:4000/auth-redirect to Authorize Redirect URIs.
The Post Logout Redirect URI is the URL users will be redirected after they have logged out. The URL must be whitelisted.
For this tutorial, add http://localhost:4000/ to Post Logout Redirect URIs.
Save the configuration before next steps.
Here are some recommended steps to scaffold a React project. You can skip this part if you are adding Authgear to an existing project. See React in the next section.
Create the project folder and install the dependencies. We will use parcel as the build tool and the react-router-dom, react , and react-dom packages. Also, we will use TypeScript in this tutorial.
# Create a new folder for your project
mkdir my-app
# Move into the project directory
cd my-app
# Create source folder
mkdir src
# Create a brand new package.json file
npm init -y
# Install parcel
npm install --save-dev --save-exact parcel
# Install react, react-dom and react router
npm install --save-exact react react-dom react-router-dom
# Install TypeScript and related types
npm install --save-dev --save-exact typescript @types/react @types/react-dom @types/react-router-domIn the package.json file, add these two lines to the script section
"start": "parcel serve --port 4000 --no-cache ./src/index.html",
"build": "parcel build --no-cache ./src/index.html"The start script run the app in development mode on port 4000. The build script build the app for production to the dist/ folder.
index.html fileIn src/, create a new file called index.html for parcel to bundle the app:
src/index.html:
<!DOCTYPE html>
<html lang="en">
<head>
<meta charset="utf-8" />
<meta name="viewport" content="width=device-width, initial-scale=1" />
<title>Authgear React Tutorial Demo App</title>
</head>
<body>
<div id="react-app-root"></div>
<script type="module" src="./index.tsx"></script>
</body>
</html>
App.tsx fileCreate a new file called App.tsx with simply showing Hello World in the screen:
// src/App.tsx
import React from "react";
const App: React.FC = () => {
return <div>Hello World</div>;
};
export default App;
index.tsx fileCreate a new file called index.tsx as the entry point of the application.
// src/index.tsx
import React from "react";
import { createRoot } from "react-dom/client";
import App from "./App";
async function init() {
try {
// initialization code
} finally {
createRoot(document.getElementById("react-app-root")!).render(<App />);
}
}
init().catch((e) => {
// Error handling
console.error(e)
});
The file structure in your project is now:
my-app
├── node_modules
│ └── (...)
├── package-lock.json
├── package.json
└── src
├── App.tsx
├── index.html
└── index.tsxRun npm start now to run the project and you will see "Hello World" on http://localhost:4000.
Run the following command within your React project directory to install the Authgear Web SDK
npm install --save --save-exact @authgear/webIn src/index.tsx , import authgear and call the configure function to initialize an Authgear instance on application loads.
// src/index.tsx
import React from "react";
import { createRoot } from "react-dom/client";
import App from "./App";
import authgear from "@authgear/web";
async function init() {
try {
// configure Authgear container instance
await authgear.configure({
endpoint: "<your_app_endpoint>",
clientID: "<your_client_id>",
sessionType: "refresh_token",
});
} finally {
createRoot(document.getElementById("react-app-root")!).render(<App />);
}
}
init().catch((e) => {
// Error handling
console.error(e)
});The Authgear container instance takes endpoint and clientID as parameters. They can be obtained from the application page created in Setup Application in Authgear.
It is recommend to render the app after configure() resolves. So by the time the app is rendered, Authgear is ready to use.
Since we want to reference the logged in state in anywhere of the app, let's put the state in a context provider with UserProvider.tsx in the /src/context folder.
In UserProvider.tsx, it will have a isLoggedIn boolean and a setIsLoggedIn function. The is LoggedIn boolean state can be auto updated using the onSessionStateChange callback. This callback can be stored in delegate which is in the local SDK container.
// src/context/UserProvider.tsx
import React, { createContext, useEffect, useState, useMemo } from "react";
import authgear from "@authgear/web";
interface UserContextValue {
isLoggedIn: boolean;
}
export const UserContext = createContext<UserContextValue>({
isLoggedIn: false,
});
interface UserContextProviderProps {
children: React.ReactNode;
}
const UserContextProvider: React.FC<UserContextProviderProps> = ({
children,
}) => {
// By default the user is not logged in
const [isLoggedIn, setIsLoggedIn] = useState<boolean>(false);
useEffect(() => {
// When the sessionState changed, logged in state will also be changed
authgear.delegate = {
onSessionStateChange: (container) => {
// sessionState is now up to date
// Value of sessionState can be "NO_SESSION" or "AUTHENTICATED"
const sessionState = container.sessionState;
if (sessionState === "AUTHENTICATED") {
setIsLoggedIn(true);
} else {
setIsLoggedIn(false);
}
},
};
}, [setIsLoggedIn]);
const contextValue = useMemo<UserContextValue>(() => {
return {
isLoggedIn,
};
}, [isLoggedIn]);
return (
<UserContext.Provider value={contextValue}>{children}</UserContext.Provider>
);
};
export default UserContextProvider;
Next, we will add an "AuthRedirect" page for handling the authentication result after the user have been authenticated by Authgear.
Create the AuthRedirect.tsx component file in the src/ folder.
Call the Authgear finishAuthentication() function in the Auth Redirect component to send a token back to Authgear server in exchange for access token and refresh token. Don't worry about the technical jargons, finishAuthentication() will do all the hard work for you and and save the authentication data.
When the authentication is finished, the isLoggedIn state from the UserContextProvider will automatic set to true. Finally, navigate back to root (/) which is our Home page.
The final AuthRedirect.tsx will look like this
// src/AuthRedirect.tsx
import React, { useEffect, useRef } from "react";
import { useNavigate } from "react-router-dom";
import authgear from "@authgear/web";
const AuthRedirect: React.FC = () => {
const usedToken = useRef(false);
const navigate = useNavigate();
useEffect(() => {
async function updateToken() {
try {
await authgear.finishAuthentication();
} finally {
navigate("/");
usedToken.current = true;
}
}
if (!usedToken.current) {
updateToken().catch((e) => console.error(e));
}
}, [navigate]);
return <></>;
};
export default AuthRedirect;
Next, we will add a "Home" page . Create a Home.tsx component file the src/ folder.
Then import Home and AuthRedirect as routes. And Import UserContextProvider and wrap the routes with it.
Your final App.tsx should look like this:
// src/App.tsx
import React from "react";
import { BrowserRouter as Router, Routes, Route } from 'react-router-dom';
import Home from './Home';
import AuthRedirect from './AuthRedirect';
import UserContextProvider from './context/UserProvider';
const App: React.FC = () => {
return (
<UserContextProvider>
<Router>
<Routes>
<Route path="/auth-redirect" element={<AuthRedirect />} />
<Route path="/" element={<Home />} />
</Routes>
</Router>
</UserContextProvider>
);
}
export default App;
The file structure should now look like
src
├── App.tsx
├── AuthRedirect.tsx
├── Home.tsx
├── context
│ └── UserProvider.tsx
├── index.html
└── index.tsxFirst we will import the Authgear dependency and the React Hook that we will use to Home.tsx. Then add the login button which will call startAuthentication(ConfigureOptions) through startLogin callback on click. This will redirect the user to the login page.
// src/Home.tsx
import React, { useEffect, useState, useCallback, useContext } from 'react';
import authgear from '@authgear/web';
const Home: React.FC = () => {
const startLogin = useCallback(() => {
authgear
.startAuthentication({
redirectURI: 'http://localhost:4000/auth-redirect',
prompt: 'login'
})
.then(
() => {
// started authentication, user should be redirected to Authgear
},
err => {
// failed to start authentication
}
);
}, []);
return (
<div>
<h1>Home Page</h1>
<div>
<button onClick={startLogin}>Login</button>
</div>
</div>
);
}
export default Home;
You can now run npm start and you will be redirected to the Authgear Login page when you click the Login button.
The Authgear SDK helps you get the information of the logged in users easily.
In the last step, the user is successfully logged in so let's try to print the user ID (sub) of the user in the Home page.
In Home.tsx, we will add a simple Loading splash and a greeting message printing the Sub ID. We will add two conditional elements such that they are only shown when user is logged in. We can also change the login button to show only if the user is not logged in.
Make use of isLoggedIn from the UserContext to control the components on the page. Fetch the user info by fetchInfo() and access its sub property.
// src/Home.tsx
import React, { useEffect, useState, useCallback, useContext } from "react";
import authgear from "@authgear/web";
import { UserContext } from "./context/UserProvider";
const Home: React.FC = () => {
const [greetingMessage, setGreetingMessage] = useState<string>("");
const [isLoading, setIsLoading] = useState<boolean>(false);
const { isLoggedIn } = useContext(UserContext);
useEffect(() => {
async function updateGreetingMessage() {
setIsLoading(true);
try {
if (isLoggedIn) {
const userInfo = await authgear.fetchUserInfo();
setGreetingMessage("The current User sub: " + userInfo.sub);
}
} finally {
setIsLoading(false);
}
}
updateGreetingMessage().catch((e) => {
console.error(e);
});
}, [isLoggedIn]);
const startLogin = useCallback(() => {
authgear
.startAuthentication({
redirectURI: "http://localhost:4000/auth-redirect",
prompt: "login",
})
.then(
() => {
// started authentication, user should be redirected to Authgear
},
(err) => {
// failed to start authentication
}
);
}, []);
return (
<div>
<h1>Home Page</h1>
{isLoading && "Loading"}
{greetingMessage ? <span>{greetingMessage}</span> : null}
{!isLoggedIn && (
<div>
<button type="button" onClick={startLogin}>
Login
</button>
</div>
)}
</div>
);
};
export default Home;Run the app again, the User ID (sub) of the user should be printed on the Home page.
Finally, let's add an Logout button when user is logged in.
In Home.tsx, we will add a conditional elements in the elements:
{isLoggedIn && (
<div>
<button onClick={logout}>Logout</button>
</div>
)}And add the logout callback:
const logout = useCallback(() => {
authgear
.logout({
redirectURI: "http://localhost:4000/",
})
.then(
() => {
setGreetingMessage('');
},
(err) => {
console.error(err);
}
);
}, []);Run the app again, we can now logout by clicking the logout button.
Authgear provide a built-in UI for the users to set their attributes and change security settings.
Use the openURL function to open the setting page at <your_app_endpoint>/settings
In Home.tsx Add a conditional link to the elements.
{isLoggedIn && (
<a target="_blank" rel="noreferrer" onClick={userSetting} href="#">
User Setting
</a>
)}And add the userSetting callback:
import authgear, { Page } from "@authgear/web";
const userSetting = useCallback((e: React.MouseEvent<HTMLAnchorElement>) => {
e.preventDefault();
e.stopPropagation();
authgear.open(Page.Settings);
}, []);This the the resulting Home.tsx:
// src/Home.tsx
import React, { useEffect, useState, useCallback, useContext } from "react";
import { UserContext } from "./context/UserProvider";
import authgear, { Page } from "@authgear/web";
const Home: React.FC = () => {
const [greetingMessage, setGreetingMessage] = useState<string>("");
const [isLoading, setIsLoading] = useState<boolean>(false);
const { isLoggedIn } = useContext(UserContext);
useEffect(() => {
async function updateGreetingMessage() {
setIsLoading(true);
try {
if (isLoggedIn) {
const userInfo = await authgear.fetchUserInfo();
setGreetingMessage("The current User sub: " + userInfo.sub);
}
} finally {
setIsLoading(false);
}
}
updateGreetingMessage().catch((e) => {
console.error(e);
});
}, [isLoggedIn]);
const startLogin = useCallback(() => {
authgear
.startAuthentication({
redirectURI: "http://localhost:4000/auth-redirect",
prompt: "login",
})
.then(
() => {
// started authorization, user should be redirected to Authgear
},
(err) => {
// failed to start authorization
console.error(err);
}
);
}, []);
const logout = useCallback(() => {
authgear
.logout({
redirectURI: "http://localhost:4000/",
})
.then(
() => {
setGreetingMessage("");
},
(err) => {
console.error(err);
}
);
}, []);
const userSetting = useCallback((e: React.MouseEvent<HTMLAnchorElement>) => {
e.preventDefault();
e.stopPropagation();
authgear.open(Page.Settings);
}, []);
return (
<div>
{/* eslint-disable-next-line react/forbid-elements */}
<h1>Home Page</h1>
{isLoading && "Loading"}
{greetingMessage ? <span>{greetingMessage}</span> : null}
{!isLoggedIn && (
<div>
<button type="button" onClick={startLogin}>
Login
</button>
</div>
)}
{isLoggedIn && (
<div>
<button type="button" onClick={logout}>
Logout
</button>
<br />
<a target="_blank" rel="noreferrer" onClick={userSetting} href="#">
User Setting
</a>
</div>
)}
</div>
);
};
export default Home;To access restricted resources on your backend application server, the HTTP requests should include the access token in their Authorization headers. The Web SDK provides a fetch function which automatically handle this, or you can get the token with authgear.accessToken.
Authgear SDK provides the fetch function for you to call your application server. This fetch function will include the Authorization header in your application request, and handle refresh access token automatically. The authgear.fetch implements fetch.
authgear
.fetch("YOUR_SERVER_URL")
.then(response => response.json())
.then(data => console.log(data));You can get the access token through authgear.accessToken. Call refreshAccessTokenIfNeeded every time before using the access token, the function will check and make the network call only if the access token has expired. Include the access token into the Authorization header of the application request.
authgear
.refreshAccessTokenIfNeeded()
.then(() => {
// access token is ready to use
// accessToken can be string or undefined
// it will be empty if user is not logged in or session is invalid
const accessToken = authgear.accessToken;
// include Authorization header in your application request
const headers = {
Authorization: `Bearer ${accessToken}`
};
});


Follow this quickstart tutorial to add authentication to your Vue application
Authgear helps you add user logins to your Vue apps. It provides prebuilt login page and user settings page that accelerate the development.
Follow this 🕐 15 minutes tutorial to create a simple app using Vue with Authgear SDK.
Table of Content
Signup for an account in https://portal.authgear.com/ and create a Project.
After that, we will need to create an Application in the Project Portal.
Go to Applications on the left menu bar.
Click ⊕Add Application in the top tool bar.
Input the name of your application, e.g. "MyAwesomeApp".
Select Single Page Application as the application type
Click "Save" to create the application
The Redirect URI is a URL in you application where the user will be redirected to after login with Authgear. In this path, make a finish authentication call to complete the login process.
For this tutorial, add http://localhost:4000/auth-redirect to Authorize Redirect URIs.
The Post Logout Redirect URI is the URL users will be redirected after they have logged out. The URL must be whitelisted.
For this tutorial, add http://localhost:4000/ to Post Logout Redirect URIs.
Save the configuration before next steps.
Here are some recommended steps to scaffold a Vue project. You can skip this part if you are adding Authgear to an existing project. See Step 3: Install Authgear SDK to the project in the next section.
Create the project folder and install the dependencies. We will use vite as the build tool and the vue-router package. Also, we will use TypeScript in this tutorial.
# Create a brand new project using vite
npm create vite@latest my-app -- --template vue-ts
# Move into the project directory
cd my-app
# Install dependencies
npm install
# Install vue-router
npm install --save-exact vue-routerAs we are using port 4000 for this tutorial, we need to add the port information to the config. In the vite.config.ts file, modify the file with the following lines:
// vite.config.ts
import { defineConfig } from "vite";
import vue from "@vitejs/plugin-vue";
// https://vitejs.dev/config/
export default defineConfig({
plugins: [vue()],
server: {
port: 4000,
},
});After doing so, when you run npm run dev , the server will be running on port 4000.
Home.vue fileCreate a new file called Home.vue in the src/components folder with simply showing Hello World on the screen.
// src/components/Home.vue
<script setup lang="ts"></script>
<template><div>Hello World</div></template>App.vue fileThe App.vue file is generated by Vite already but some sections might not being needed for this tutorial.
// src/components/App.vue
<script setup lang="ts">
import Home from "./components/Home.vue";
</script>
<template>
<Home />
</template>Some of the files might not being used and thus can be deleted. You can perform the following script to delete these files:
rm -rf src/assets src/components/HelloWorld.vueThe file structure in your project is now:
my-app
├── node_modules
│ └── (...)
├── package-lock.json
├── package.json
├── vite.config.ts
├── (...)
└── src
├── components
│ └── Home.vue
├── App.vue
├── main.ts
└── (...)Run npm run dev now to run the project and you will see default page with the title Vite + Vue and a count button on http://localhost:4000.
Create a AuthReditect.vue file in the src/components folder with the same content as src/components/Home.vue at this moment.
Create a file called router.ts in the src/ folder. We will import Home and AuthRedirect component as the route and we will implement these components later. The content of this file will look like this:
// src/router.ts
import { createRouter, createWebHistory } from "vue-router";
export const history = createWebHistory();
export const router = createRouter({
history,
routes: [
{
path: "/",
// We will implement this component later
component: () => import("./components/Home.vue"),
},
{
path: "/auth-redirect",
// We will implement this component later
component: () => import("./components/AuthRedirect.vue"),
},
],
});Run the following command within your Vue project directory to install the Authgear Web SDK
npm install --save-exact @authgear/webIn src/main.ts , import authgear and call the configure function to initialize an Authgear instance on application loads. We will also import router and use it to build routes for us.
// src/main.ts
import { createApp } from "vue";
import './style.css'
import App from "./App.vue";
import { router } from "./router";
import authgear from "@authgear/web";
const app = createApp(App);
async function init() {
try {
// configure Authgear container instance
await authgear.configure({
endpoint: "<your_app_endpoint>",
clientID: "<your_client_id>",
sessionType: "refresh_token",
});
} finally {
app.use(router);
app.mount("#app");
}
}
init().catch((e) => {
// Error handling
console.error(e)
});The Authgear container instance takes endpoint and clientID as parameters. They can be obtained from the application page created in Setup Application in Authgear.
It is recommend to render the app after configure() resolves. So by the time the app is rendered, Authgear is ready to use.
Since we want to reference the logged in state in anywhere of the app, let's put the state in a context provider with UserProvider.vue in the /src/contexts folder.
In UserProvider.vue, it will have a isLoggedIn boolean value. The isLoggedIn boolean state can be auto updated using the onSessionStateChange callback. This callback can be stored in delegate which is in the local SDK container.
// src/context/UserProvider.vue
<script lang="ts">
import {
defineComponent,
InjectionKey,
provide,
readonly,
ref,
Ref,
toRefs,
} from "vue";
import authgear from "@authgear/web";
export interface UserContextValue {
isLoggedIn: Ref<boolean>;
}
export const UserStateSymbol: InjectionKey<UserContextValue> =
Symbol("UserState");
export default defineComponent({
setup() {
const isLoggedIn = ref(false);
const state: UserContextValue = {
isLoggedIn,
};
authgear.delegate = {
onSessionStateChange: (container) => {
const sessionState = container.sessionState;
if (sessionState === "AUTHENTICATED") {
isLoggedIn.value = true;
} else {
isLoggedIn.value = false;
}
},
};
provide<UserContextValue>(UserStateSymbol, toRefs(readonly(state)));
return { state };
},
});
</script>
<template>
<slot />
</template>
Next, we will add an "AuthRedirect" page for handling the authentication result after the user have been authenticated by Authgear.
Create the AuthRedirect.vue component file in the src/components/ folder.
Call the Authgear finishAuthentication() function in the Auth Redirect component to send a token back to Authgear server in exchange for access token and refresh token. Don't worry about the technical jargons, finishAuthentication() will do all the hard work for you and and save the authentication data.
When the authentication is finished, the isLoggedIn state from the UserContextProvider will automatic set to true. Finally, navigate back to root (/) which is our Home page.
The final AuthRedirect.vue will look like this
// src/components/AuthRedirect.vue
<script setup lang="ts">
import { onMounted } from "vue";
import authgear from "@authgear/web";
import { router } from "../router";
onMounted(() => {
async function updateToken() {
try {
await authgear.finishAuthentication();
} finally {
router.replace({ path: "/" });
}
}
updateToken().catch((e) => console.error(e));
});
</script>
<template></template>
As we have already configure the routes in the previous section, we can simply add <router-view /> tag to the App.vue. We can then Import UserProvider and wrap the router-view with it.
Your final App.vue should look like this:
// src/App.vue
<script setup lang="ts">
import UserProvider from "./contexts/UserProvider.vue";
</script>
<template>
<UserProvider>
<router-view />
</UserProvider>
</template>The file structure should now look like
src
├── App.vue
├── main.ts
├── router.ts
├── vite-env.d.ts
├── contexts
│ └── UserProvider.vue
└── components
├── AuthRedirect.vue
└── Home.vueFirst we will import the Authgear dependency. Then add the login button which will call startAuthentication(ConfigureOptions) through startLogin callback on click. This will redirect the user to the login page.
// src/components/Home.vue
<script setup lang="ts">
import authgear from "@authgear/web";
const startLogin = () => {
authgear
.startAuthentication({
redirectURI: "http://localhost:4000/auth-redirect",
prompt: "login",
})
.then(
() => {
// started authorization, user should be redirected to Authgear
},
(err) => {
// failed to start authorization
console.error(err);
}
);
};
</script>
<template>
<h1>Home Page</h1>
<button @click="startLogin">Login</button>
</template>You can now run npm run dev and you will be redirected to the Authgear Login page when you click the Login button.
The Authgear SDK helps you get the information of the logged in users easily.
In the last step, the user is successfully logged in so let's try to print the user ID (sub) of the user in the Home page.
In Home.vue, we will add a simple Loading splash and a greeting message printing the Sub ID. We will add two conditional elements such that they are only shown when user is logged in. We can also change the login button to show only if the user is not logged in.
Make use of isLoggedIn from the UserProvider to control the components on the page. Fetch the user info by fetchInfo() and access its sub property.
The Login button can be also rendered conditionally which only visible if the user is not logged in.
// src/components/Home.vue
<script setup lang="ts">
import authgear from "@authgear/web";
import { inject, onMounted, ref } from "vue";
import { UserStateSymbol } from "../contexts/UserProvider.vue";
const { isLoggedIn } = inject(UserStateSymbol)!;
const isLoading = ref(false);
const greetingMessage = ref("");
onMounted(() => {
async function updateGreetingMessage() {
isLoading.value = true;
try {
if (isLoggedIn.value) {
const userInfo = await authgear.fetchUserInfo();
greetingMessage.value = "The current User sub: " + userInfo.sub;
}
} finally {
isLoading.value = false;
}
}
updateGreetingMessage().catch((e) => {
console.error(e);
});
});
const startLogin = () => {
authgear
.startAuthentication({
redirectURI: "http://localhost:4000/auth-redirect",
prompt: "login",
})
.then(
() => {
// started authorization, user should be redirected to Authgear
},
(err) => {
// failed to start authorization
console.error(err);
}
);
};
</script>
<template>
<h1>Home Page</h1>
<span v-if="isLoading">Loading...</span>
<span v-if="greetingMessage">{{ greetingMessage }}</span>
<div v-if="!isLoggedIn">
<button @click="startLogin">Login</button>
</div>
</template>
Run the app again, the User ID (sub) of the user should be printed on the Home page.
Finally, let's add an Logout button when user is logged in.
In Home.vue, we will add a conditional elements in the template:
<div v-if="isLoggedIn">
<button @click="logout">Logout</button>
</div>And add the logout callback:
const logout = () => {
authgear
.logout({
redirectURI: "http://localhost:4000/",
})
.then(
() => {
greetingMessage.value = "";
},
(err) => {
console.error(err);
}
);
};Run the app again, we can now logout by clicking the logout button.
Authgear provide a built-in UI for the users to set their attributes and change security settings.
Use the open function to open the setting page at <your_app_endpoint>/settings
In Home.vue append a conditional link to the logout button section.
<div v-if="isLoggedIn">
<button @click="logout()">Logout</button>
<br />
<a
target="_blank"
rel="noreferrer"
@click.stop.prevent="userSetting"
href="#"
>
User Setting
</a>
</div>And add the userSetting callback:
import authgear, { Page } from "@authgear/web";
const userSetting = async () => {
await authgear.open(Page.Settings);
};This the the resulting Home.vue:
// src/components/Home.vue
<script setup lang="ts">
import authgear, { Page } from "@authgear/web";
import { inject, onMounted, ref } from "vue";
import { UserStateSymbol } from "../contexts/UserProvider.vue";
const { isLoggedIn } = inject(UserStateSymbol)!;
const isLoading = ref(false);
const greetingMessage = ref("");
onMounted(() => {
async function updateGreetingMessage() {
isLoading.value = true;
try {
if (isLoggedIn.value) {
const userInfo = await authgear.fetchUserInfo();
greetingMessage.value = "The current User sub: " + userInfo.sub;
}
} finally {
isLoading.value = false;
}
}
updateGreetingMessage().catch((e) => {
console.error(e);
});
});
const startLogin = () => {
authgear
.startAuthentication({
redirectURI: "http://localhost:4000/auth-redirect",
prompt: "login",
})
.then(
() => {
// started authorization, user should be redirected to Authgear
},
(err) => {
// failed to start authorization
console.error(err);
}
);
};
const logout = () => {
authgear
.logout({
redirectURI: "http://localhost:4000/",
})
.then(
() => {
greetingMessage.value = "";
},
(err) => {
console.error(err);
}
);
};
const userSetting = async () => {
await authgear.open(Page.Settings);
};
</script>
<template>
<h1>Home Page</h1>
<span v-if="isLoading">Loading...</span>
<span v-if="greetingMessage">{{ greetingMessage }}</span>
<div v-if="!isLoggedIn">
<button @click="startLogin">Login</button>
</div>
<div v-if="isLoggedIn">
<button @click="logout">Logout</button>
<br />
<a
target="_blank"
rel="noreferrer"
@click.stop.prevent="userSetting"
href="#"
>
User Setting
</a>
</div>
</template>
To access restricted resources on your backend application server, the HTTP requests should include the access token in their Authorization headers. The Web SDK provides a fetch function which automatically handle this, or you can get the token with authgear.accessToken.
Authgear SDK provides the fetch function for you to call your application server. This fetch function will include the Authorization header in your application request, and handle refresh access token automatically. The authgear.fetch implements fetch.
authgear
.fetch("YOUR_SERVER_URL")
.then(response => response.json())
.then(data => console.log(data));You can get the access token through authgear.accessToken. Call refreshAccessTokenIfNeeded every time before using the access token, the function will check and make the network call only if the access token has expired. Include the access token into the Authorization header of the application request.
authgear
.refreshAccessTokenIfNeeded()
.then(() => {
// access token is ready to use
// accessToken can be string or undefined
// it will be empty if user is not logged in or session is invalid
const accessToken = authgear.accessToken;
// include Authorization header in your application request
const headers = {
Authorization: `Bearer ${accessToken}`
};
});
Follow this quickstart tutorial to add authentication to your Angular application
Authgear helps you add user logins to your Angular apps. It provides prebuilt login page and user settings page that accelerate the development.
Follow this 🕐 15 minutes tutorial to create a simple app using Angular with Authgear SDK.
Table of Content
Signup for an account in https://portal.authgear.com/ and create a Project.
After that, we will need to create an Application in the Project Portal.
Go to Applications on the left menu bar.
Click ⊕Add Application in the top tool bar.
Input the name of your application, e.g. "MyAwesomeApp".
Select Single Page Application as the application type
Click "Save" to create the application
The Redirect URI is a URL in you application where the user will be redirected to after login with Authgear. In this path, make a finish authentication call to complete the login process.
For this tutorial, add http://localhost:4000/auth-redirect to Authorize Redirect URIs.
The Post Logout Redirect URI is the URL users will be redirected after they have logged out. The URL must be whitelisted.
For this tutorial, add http://localhost:4000/ to Post Logout Redirect URIs.
Save the configuration before next steps.
Here are some recommended steps to scaffold an Angular project. You can skip this part if you are adding Authgear to an existing project. See Step 2: Install Authgear SDK to the project in the next section.
To install the Angular CLI, open a terminal window and run the following command:
npm install -g @angular/cliRun the following cli command to create a new workspace and initial app called my-app with a routing module generated.
# Create a workspace called my-app
ng new my-app --routing --defaults
# Move into the project directory
cd my-appIn the package.json file, edit the start script in the script section
# before
"start": "ng serve"
# after
"start": "ng serve --port 4000"The start script run the app in development mode on port 4000 instead of the default one.
app.component.html fileBy default, the Angular CLI generated an initial application for us, but for simplicity, we recommend to modify some of these files to scratch.
In the src/app/app.component.html file, remove all the lines and add the following line:
<div>Hello world</div>Run npm start now to run the project and you will see "Hello world" on http://localhost:4000.
Run the following command within your Angular project directory to install the Authgear Web SDK
npm install --save-exact @authgear/webIn src/app/app.component.ts , import authgear and call the configure function to initialize an Authgear instance on application loads.
// src/app/app.component.ts
import { Component, OnInit } from '@angular/core';
import authgear from '@authgear/web';
@Component({
selector: 'app-root',
templateUrl: './app.component.html',
styleUrls: ['./app.component.css'],
})
export class AppComponent implements OnInit {
// configure Authgear container instance
initAuthgear(): Promise<void> {
return authgear.configure({
endpoint: '<your_app_endpoint>',
clientID: '<your_client_id>',
sessionType: 'refresh_token',
});
}
ngOnInit(): void {
this.initAuthgear().catch((e) => {
// Error handling
console.log(e);
});
}
}The Authgear container instance takes endpoint and clientID as parameters. They can be obtained from the application page created in Setup Application in Authgear.
It is recommend to render the app after configure() resolves. So by the time the app is rendered, Authgear is ready to use.
Since we want to reference the logged in state in anywhere of the app, let's put the state in a service with user.service.ts in the /src/app/services/ folder.
In user.service.ts, it will have a isLoggedIn boolean variable. The isLoggedIn boolean variable can be auto updated using the onSessionStateChange callback. This callback can be stored in delegate which is in the local SDK container.
// src/app/services/user.service.ts
import { Injectable } from '@angular/core';
import authgear from '@authgear/web';
@Injectable({
providedIn: 'root',
})
export class UserService {
// By default the user is not logged in
isLoggedIn: boolean = false;
constructor() {
// When the sessionState changed, logged in state will also be changed
authgear.delegate = {
onSessionStateChange: (container) => {
// sessionState is now up to date
// value of sessionState can be "NO_SESSION" or "AUTHENTICATED"
const sessionState = container.sessionState;
if (sessionState === 'AUTHENTICATED') {
this.isLoggedIn = true;
} else {
this.isLoggedIn = false;
}
},
};
}
}Next, we will add an "auth-redirect" page for handling the authentication result after the user have been authenticated by Authgear.
Create the auth-redirect component using the following command:
ng generate component auth-redirectWe will inject the router and the UserService to get the use of navigation and the isLoggedIn state.
Call the Authgear finishAuthentication() function in the Auth Redirect component to send a token back to Authgear server in exchange for access token and refresh token. Don't worry about the technical jargons, finishAuthentication() will do all the hard work for you and and save the authentication data.
When the authentication is finished, the isLoggedIn state from the UserService will automatic set to true. Finally, navigate back to root (/) which is our Home page.
The final auth-redirect.component.ts will look like this
// src/app/auth-redirect/auth-redirect.component.ts
import { Component, OnInit } from '@angular/core';
import { UserService } from '../services/user.service';
import authgear from '@authgear/web';
import { Router } from '@angular/router';
@Component({
selector: 'app-auth-redirect',
templateUrl: './auth-redirect.component.html',
styleUrls: ['./auth-redirect.component.css'],
})
export class AuthRedirectComponent implements OnInit {
constructor(private router: Router, private user: UserService) {}
ngOnInit(): void {
authgear
.finishAuthentication()
.catch((e) => console.error(e))
.then(() => {
this.router.navigate(['']);
});
}
}Next, we will add a "Home" page . Create a home component using the following command:
ng generate component homeThen import HomeComponent and AuthRedirectComponent as routes. We can add those routes in the app-routing.module.ts file:
// src/app/app-routing.module.ts
import { NgModule } from '@angular/core';
import { RouterModule, Routes } from '@angular/router';
import { AuthRedirectComponent } from './auth-redirect/auth-redirect.component';
import { HomeComponent } from './home/home.component';
const routes: Routes = [
{ path: '', component: HomeComponent },
{ path: 'auth-redirect', component: AuthRedirectComponent },
];
@NgModule({
imports: [RouterModule.forRoot(routes)],
exports: [RouterModule],
})
export class AppRoutingModule {}You can apply those routes in src/app/app.component.html by replace the lines with the following:
<router-outlet></router-outlet>The file structure should now look like
src
├── (...)
└── app
├── app-routing.module.ts
├── app.component.ts
├── app.component.html
├── app.module.ts
├── (...)
├── auth-redirect
│ ├── auth-redirect.component.ts
│ ├── auth-redirect.component.html
│ └── (...)
├── home
│ ├── home.component.ts
│ ├── home.component.html
│ └── (...)
└── services
└── user.service.tsFirst we will import the Authgear dependency and inject the UserService in home.component.ts. Then add the startLogin method which will call startAuthentication(ConfigureOptions). This will redirect the user to the login page.
// src/app/home/home.component.ts
import { Component, OnInit } from '@angular/core';
import { UserService } from '../services/user.service';
import authgear from '@authgear/web';
@Component({
selector: 'app-home',
templateUrl: './home.component.html',
styleUrls: ['./home.component.css'],
})
export class HomeComponent implements OnInit {
constructor(public user: UserService) {}
ngOnInit(): void {}
startLogin(): void {
authgear
.startAuthentication({
redirectURI: 'http://localhost:4000/auth-redirect',
prompt: 'login',
})
.then(
() => {
// started authorization, user should be redirected to Authgear
},
(err) => {
// failed to start authorization
console.error(err);
}
);
}
}Then you can add a button which will trigger the startLogin method in home.component.html:
<h1>Home Page</h1>
<button type="button" (click)="startLogin()">Login</button>You can now run npm start and you will be redirected to the Authgear Login page when you click the Login button.
The Authgear SDK helps you get the information of the logged in users easily.
In the last step, the user is successfully logged in so let's try to print the user ID (sub) of the user in the Home page.
In home component, we will add a simple Loading splash and a greeting message printing the Sub ID. We will add two conditional elements such that they are only shown when user is logged in. We can also change the login button to show only if the user is not logged in.
Make use of isLoggedIn from the UserService to control the components on the page. Fetch the user info by fetchInfo() and access its sub property.
// src/app/home/home.component.ts
import { Component, OnInit } from '@angular/core';
import { UserService } from '../services/user.service';
import authgear from '@authgear/web';
@Component({
selector: 'app-home',
templateUrl: './home.component.html',
styleUrls: ['./home.component.css'],
})
export class HomeComponent implements OnInit {
isLoading: boolean = false;
greetingMessage: string = '';
constructor(public user: UserService) {}
async updateGreetingMessage() {
this.isLoading = true;
try {
if (this.user.isLoggedIn) {
const userInfo = await authgear.fetchUserInfo();
this.greetingMessage = 'The current User sub: ' + userInfo.sub;
}
} finally {
this.isLoading = false;
}
}
ngOnInit(): void {
this.updateGreetingMessage().catch((e) => {
console.error(e);
});
}
startLogin(): void {
authgear
.startAuthentication({
redirectURI: 'http://localhost:4000/auth-redirect',
prompt: 'login',
})
.then(
() => {
// started authorization, user should be redirected to Authgear
},
(err) => {
// failed to start authorization
console.error(err);
}
);
}
}
In the home.component.html:
<h1>Home Page</h1>
<span *ngIf="isLoading">Loading</span>
<span *ngIf="greetingMessage">{{ greetingMessage }}</span>
<div *ngIf="!user.isLoggedIn">
<button type="button" (click)="startLogin()">Login</button>
</div>Run the app again, the User ID (sub) of the user should be printed on the Home page.
Finally, let's add an Logout button when user is logged in.
In home.component.html, we will add a conditional element in the markup:
<div *ngIf="user.isLoggedIn">
<button type="button" (click)="logout()">Logout</button>
</div>And add the logout method:
logout(): void {
authgear
.logout({
redirectURI: 'http://localhost:4000/',
})
.then(
() => {
this.greetingMessage = '';
},
(err) => {
console.error(err);
}
);
}Run the app again, we can now logout by clicking the logout button.
Authgear provide a built-in UI for the users to set their attributes and change security settings.
Use the open function to open the setting page at <your_app_endpoint>/settings
In home.component.html append a conditional link to the logout button section.
<div *ngIf="user.isLoggedIn">
<button type="button" (click)="logout()">Logout</button>
<br />
<a target="_blank" rel="noreferrer" (click)="userSetting($event)" href="#">
User Setting
</a>
</div>And add the userSetting method:
import authgear, { Page } from "@authgear/web";
async userSetting(event: MouseEvent) {
event.preventDefault();
event.stopPropagation();
await authgear.open(Page.Settings);
}This the resulting home.component.ts:
// src/app/home/home.component.ts
import { Component, OnInit } from '@angular/core';
import { UserService } from '../services/user.service';
import authgear, { Page } from '@authgear/web';
@Component({
selector: 'app-home',
templateUrl: './home.component.html',
styleUrls: ['./home.component.css'],
})
export class HomeComponent implements OnInit {
isLoading: boolean = false;
greetingMessage: string = '';
constructor(public user: UserService) {}
async updateGreetingMessage() {
this.isLoading = true;
try {
if (this.user.isLoggedIn) {
const userInfo = await authgear.fetchUserInfo();
this.greetingMessage = 'The current User sub: ' + userInfo.sub;
}
} finally {
this.isLoading = false;
}
}
ngOnInit(): void {
this.updateGreetingMessage().catch((e) => {
console.error(e);
});
}
startLogin(): void {
authgear
.startAuthentication({
redirectURI: 'http://localhost:4000/auth-redirect',
prompt: 'login',
})
.then(
() => {
// started authorization, user should be redirected to Authgear
},
(err) => {
// failed to start authorization
console.error(err);
}
);
}
logout(): void {
authgear
.logout({
redirectURI: 'http://localhost:4000/',
})
.then(
() => {
this.greetingMessage = '';
},
(err) => {
console.error(err);
}
);
}
async userSetting(event: MouseEvent) {
event.preventDefault();
event.stopPropagation();
await authgear.open(Page.Settings);
}
}This is the resulting home.component.html:
<h1>Home Page</h1>
<span *ngIf="isLoading">Loading</span>
<span *ngIf="greetingMessage">{{ greetingMessage }}</span>
<div *ngIf="!user.isLoggedIn">
<button type="button" (click)="startLogin()">Login</button>
</div>
<div *ngIf="user.isLoggedIn">
<button type="button" (click)="logout()">Logout</button>
<br />
<a target="_blank" rel="noreferrer" (click)="userSetting($event)" href="#">
User Setting
</a>
</div>To access restricted resources on your backend application server, the HTTP requests should include the access token in their Authorization headers. The Web SDK provides a fetch function which automatically handle this, or you can get the token with authgear.accessToken.
Authgear SDK provides the fetch function for you to call your application server. This fetch function will include the Authorization header in your application request, and handle refresh access token automatically. The authgear.fetch implements fetch.
authgear
.fetch("YOUR_SERVER_URL")
.then(response => response.json())
.then(data => console.log(data));You can get the access token through authgear.accessToken. Call refreshAccessTokenIfNeeded every time before using the access token, the function will check and make the network call only if the access token has expired. Include the access token into the Authorization header of the application request.
authgear
.refreshAccessTokenIfNeeded()
.then(() => {
// access token is ready to use
// accessToken can be string or undefined
// it will be empty if user is not logged in or session is invalid
const accessToken = authgear.accessToken;
// include Authorization header in your application request
const headers = {
Authorization: `Bearer ${accessToken}`
};
});To create a website application in WeChat, you can choose to setup a website application and wait for approval or a sandbox account for testing.
Register an account in WeChat Open Platform.
Create Website Application (网站应用), fill in information and wait for approval (It may take few days).
View the application detail page, obtain the "AppID" and "AppSecret" on the top of the application page.
Go to Account Center > Basic information, to obtain the "原始ID".
Use your WeChat app to login in 微信公众平台接口测试帐号申请.
Obtain the "appID", "appSecret" and "原始ID". The "原始ID" is the "微信号" in the top right corner.
Fill in 接口配置信息. The URL must be pointing at a publicly reachable server. The token is a string of your choice.
Implement the 接口配置信息 server. Here is an example written in Golang.
package main
import (
"crypto/sha1"
"crypto/subtle"
"encoding/hex"
"fmt"
"io"
"net/http"
"sort"
"strings"
)
type WechatVerifyHandler struct {
Token string
}
func (h *WechatVerifyHandler) ServeHTTP(w http.ResponseWriter, r *http.Request) {
err := r.ParseForm()
if err != nil {
http.Error(w, err.Error(), http.StatusBadRequest)
return
}
signature := r.Form.Get("signature")
timestamp := r.Form.Get("timestamp")
nonce := r.Form.Get("nonce")
echostr := r.Form.Get("echostr")
token := h.Token
tmpArr := []string{token, timestamp, nonce}
sort.Strings(tmpArr)
tmpStr := strings.Join(tmpArr, "")
hasher := sha1.New()
io.WriteString(hasher, tmpStr)
computedHash := hasher.Sum(nil)
computedhashInHex := hex.EncodeToString(computedHash)
if subtle.ConstantTimeCompare([]byte(signature), []byte(computedhashInHex)) == 1 {
w.Write([]byte(echostr))
return
}
http.Error(w, fmt.Sprintf("%v != %v", signature, computedhashInHex), http.StatusBadRequest)
}
func main() {
http.Handle("/", &WechatVerifyHandler{
Token: "TOKEN", // Change this value to the value you told Wechat!
})
http.ListenAndServe(":9999", nil)
}Fill in JS接口安全域名. The value is your Authgear domain name plus port, e.g. 192.168.2.88:3000 or myapp.authgear.cloud
Fill in 网页授权获取用户基本信息. The value is your Authgear domain name plus port, e.g. 192.168.2.88:3000 or myapp.authgear.cloud
Look for an QR code in the sandbox settings page. You must scan it with your Wechat app and follow the sandbox account.
In the portal, do the following:
In the portal, go to Authentication > Social / Enterprise Login.
Enable Sign in with WeChat (Web/网站应用).
Fill in Client ID with the AppID.
Fill in Client Secret with the AppSecret.
Fill in 原始 ID with the 原始 ID.
Check the checkbox Is Sandbox account if you are using sandbox account.
Save the settings.
Wechat integration is a bit more complicated then other social login, here are the overview of what needs to be done:
Register an account and create mobile application in WeChat Open Platform. Approval is needed in this process.
Enable and configure WeChat Login in Authgear portal.
Include Authgear SDK on your app.
Implement a delegate function to be triggered when user clicks the "Login with WeChat" button during authorization. You need to integrate WeChat SDK to open WeChat app to perform authentication in the delegate function (we have sample code below). After obtaining the authorization code from WeChat, call the Authgear callback with the auth code and complete the "Login With WeChat" process.
Here are the detailed steps for iOS, Android, React Native, and Flutter.
Register an account in WeChat Open Platform.
Create Mobile Application (移动应用), fill in information and wait for approval (It may take few days).
View the application detail page, obtain the AppID and AppSecret on the top of the page.
Go to Account Center > Basic information, to obtain the "原始ID".
Save those values, we will need them in the section below.
Setup Authgear iOS SDK.
Follow iOS接入指南 to setup WeChat SDK. For the coding part, we will further explain in the below steps.
WechatOpenSDK is Objective-C library. If you are using swift. You will need to create bridging header. To setup bridge header, please check Importing Objective-C into Swift. Here is the example WechatOpenSDK-Bridging-Header.h.
#ifndef WechatOpenSDK_Bridging_Header_h
#define WechatOpenSDK_Bridging_Header_h
#import "WXApiObject.h"
#import "WXApi.h"
#endifAfter setting up the WechatOpenSDK, universal link should be enabled in your application. We will need two links for the setup. One is for the WeChat SDK used, another is for the Authgear SDK to trigger delegate function when user click "Login with WeChat" button. Here are the suggestion of the links.
WECHAT_UNIVERICAL_LINK: https://{YOUR_DOMAIN}/wechat
WECHAT_REDICRECT_URI_FOR_AUTHGEAR: https://{YOUR_DOMAIN}/open_wechat_app
Login WeChat Open platform, open the application detail page, update the development information iOS section.
Fill in "Bundle ID" field with your app bundle id.
Fill in "Universal Links" with "WECHAT_UNIVERICAL_LINK" above.
Go to Authgear portal, do the following:
In the portal, go to Authentication > Social / Enterprise Login.
Enable Sign in with WeChat (Mobile/移动应用).
Fill in Client ID with the AppID.
Fill in Client Secret with the AppSecret.
Fill in 原始 ID with the 原始 ID.
Add WECHAT_REDICRECT_URI_FOR_AUTHGEAR above in WeChat redirect URIs.
Save the settings.
Update the code
Setup WeChat SDK when app launch
// Replace WECHAT_APP_ID with wechat app id
// Replace WECHAT_UNIVERICAL_LINK with the link defined above
WXApi.registerApp("WECHAT_APP_ID", universalLink: "WECHAT_UNIVERICAL_LINK")
WXApi.startLog(by: .detail) { log in
print(#line, "wechat sdk wxapi: " + log)
}Setup Authgear delegate and call WeChat SDK when sendWechatAuthRequest is triggered
// Replace self with the object that you implement the AuthgearDelegate
authgear.delegate = self
// Replace WECHAT_APP_ID with wechat app id
extension MyClass: AuthgearDelegate {
func sendWechatAuthRequest(_ state: String) {
let req = SendAuthReq()
req.openID = "WECHAT_APP_ID"
req.scope = "snsapi_userinfo"
req.state = state
WXApi.send(req)
}
}Handle universal link
// Update App Delegate
func application(_ application: NSApplication,
continue userActivity: NSUserActivity,
restorationHandler: @escaping ([NSUserActivityRestoring]) -> Void) -> Bool {
// wechat sdk handle, replace self with object implement WXApiDelegate
WXApi.handleOpenUniversalLink(userActivity, delegate: self)
// authgear sdk handle
return authgear.application(application, continue: userActivity, restorationHandler: restorationHandler)
}
// If your app has opted into Scenes, Update Scene Delegate
func scene(_ scene: UIScene, continue userActivity: NSUserActivity) {
// wechat sdk handle, replace self with object implement WXApiDelegate
WXApi.handleOpenUniversalLink(userActivity, delegate: self)
// authgear sdk handle
authgear.scene(scene, continue: userActivity)
}
// Implement WXApiDelegate
extension MyClass: WXApiDelegate {
func onReq(_ req: BaseReq) {}
func onResp(_ resp: BaseResp) {
// Receive code from WeChat, send callback to authgear
// by calling `authgear.wechatAuthCallback`
if resp.isKind(of: SendAuthResp.self) {
if resp.errCode == 0 {
let _resp = resp as! SendAuthResp
if let code = _resp.code, let state = _resp.state {
authgear.wechatAuthCallback(code: code, state: state) { result in
switch result {
case .success():
// send wechat auth callback to authgear successfully
case let .failure(error):
// failed to send wechat auth callback to authgear
}
}
}
} else {
// failed to obtain code from wechat sdk
}
}
}
}Provide wechatRedirectURI when calling authenticate and promoteAnonymousUser in authgear sdk
// Replace "WECHAT_REDICRECT_URI_FOR_AUTHGEAR" with link defined above
container?.authenticate(
redirectURI: "REDIRECT_URI",
prompt: "login",
wechatRedirectURI: "WECHAT_REDICRECT_URI_FOR_AUTHGEAR"
) { result in
}
// For anonymous user support only
// Replace "WECHAT_REDICRECT_URI_FOR_AUTHGEAR" with link defined above
container?.promoteAnonymousUser(
redirectURI: "REDIRECT_URI",
wechatRedirectURI: "WECHAT_REDICRECT_URI_FOR_AUTHGEAR"
) { result in
}
// Open setting page
// Replace "WECHAT_REDICRECT_URI_FOR_AUTHGEAR" with link defined above
container?.open(
page: .settings,
wechatRedirectURI: "WECHAT_REDICRECT_URI_FOR_AUTHGEAR"
)Here is the completed example.
Setup Authgear iOS SDK.
Follow Android接入指南 to setup Wechat SDK. For the coding part, we will further explain in the below steps.
Login WeChat Open platform, open the application detail page, update the development information Android section.
Fill in application signature, you can obtain it with command keytool -list -v -keystore YOUR_KEYSTORE_FILE_PATH. WeChat needs the certificate fingerprint in MD5, remove : in the fingerprint. It should be string in length 32.
Fill in your package name
We will need to define a custom url for Authgear SDK to trigger delegate function when user click "Login with WeChat" button. Here is the example, you should update it with your own scheme.
"WECHAT_REDICRECT_URI_FOR_AUTHGEAR": com.myapp://host/open_wechat_app
Go to Authgear portal, do the following:
In the portal, go to Authentication > Social / Enterprise Login.
Enable Sign in with WeChat (Mobile/移动应用).
Fill in Client ID with the AppID.
Fill in Client Secret with the AppSecret.
Fill in 原始 ID with the 原始 ID.
Add WECHAT_REDICRECT_URI_FOR_AUTHGEAR above in WeChat redirect URIs.
Save the settings.
Update the code
Update application AndroidManifest.xml
<!-- Your application configuration. Omitted here for brevity -->
<application>
<!-- Other activities or entries -->
<!-- It should be added when setting up Authgear SDK -->
<activity android:name="com.oursky.authgear.OauthRedirectActivity"
android:exported="true"
android:launchMode="singleTask">
<intent-filter>
<action android:name="android.intent.action.VIEW" />
<category android:name="android.intent.category.DEFAULT" />
<category android:name="android.intent.category.BROWSABLE" />
<!-- This is the redirectURI, It should be added when setting up Authgear SDK -->
<data android:scheme="com.myapp"
android:host="host"
android:pathPrefix="/path"/>
<!-- Add this for WeChat setup, this should match the WECHAT_REDICRECT_URI_FOR_AUTHGEAR defined above -->
<data android:scheme="com.myapp"
android:host="host"
android:pathPrefix="/open_wechat_app"/>
</intent-filter>
</activity>
<!-- Add this for WeChat SDK setup, replace YOUR_PACKAGE_NAME-->
<activity
android:name=".wxapi.WXEntryActivity"
android:exported="true"
android:label="@string/app_name"
android:launchMode="singleTask"
android:taskAffinity="YOUR_PACKAGE_NAME"
android:theme="@android:style/Theme.Translucent.NoTitleBar"></activity>
</application>Configure WeChat SDK
private IWXAPI wechatAPI;
private setupWechatSDK() {
wechatAPI = WXAPIFactory.createWXAPI(app, YOUR_WECHAT_APP_ID, true);
wechatAPI.registerApp(YOUR_WECHAT_APP_ID);
}Setup Authgear delegate
mAuthgear.setDelegate(new AuthgearDelegate() {
@Override
public void sendWechatAuthRequest(String state) {
if (!wechatAPI.isWXAppInstalled()) {
// User have not installed WeChat app, show them the error
return;
}
SendAuth.Req req = new SendAuth.Req();
req.scope = "snsapi_userinfo";
req.state = state;
wechatAPI.sendReq(req);
}
});Create wxapi directory in the directory named after your package name and create WXEntryActivity activity. In WXEntryActivity, pass the received intent and the object that implements IWXAPIEventHandler API to the handleIntent method of the IWXAPI API, as shown below:
api.handleIntent(getIntent(), this);You will be able to receive the authentication code and state in onResp method, call Authgear wechatAuthCallback with code and state.
mAuthgear.wechatAuthCallback(code, state, new OnWechatAuthCallbackListener() {
@Override
public void onWechatAuthCallback() {
}
@Override
public void onWechatAuthCallbackFailed(Throwable throwable) {
}
});Provide wechatRedirectURI when calling authorize and promoteAnonymousUser in Authgear SDK.
// Replace "WECHAT_REDICRECT_URI_FOR_AUTHGEAR" with link defined above
AuthenticateOptions options = new AuthenticateOptions(AUTHGEAR_REDIRECT_URI);
options.setWechatRedirectURI(WECHAT_REDICRECT_URI_FOR_AUTHGEAR);
mAuthgear.authenticate(options, new OnAuthenticateListener() {
@Override
public void onAuthenticated(@Nullable UserInfo userInfo) {
}
@Override
public void onAuthenticationFailed(@NonNull Throwable throwable) {
}
});
// For anonymous user support only
// Replace "WECHAT_REDICRECT_URI_FOR_AUTHGEAR" with link defined above
PromoteOptions options = new PromoteOptions(AUTHGEAR_REDIRECT_URI);
options.setWechatRedirectURI(WECHAT_REDICRECT_URI_FOR_AUTHGEAR);
mAuthgear.promoteAnonymousUser(options, new OnPromoteAnonymousUserListener() {
@Override
public void onPromoted(@NonNull UserInfo userInfo) {
}
@Override
public void onPromotionFailed(@NonNull Throwable throwable) {
}
});
// Open setting page
// Replace "WECHAT_REDICRECT_URI_FOR_AUTHGEAR" with link defined above
SettingOptions options = new SettingOptions();
options.setWechatRedirectURI(WECHAT_REDICRECT_URI_FOR_AUTHGEAR);
mAuthgear.open(Page.Settings, options);Here is the completed example.
Setup Authgear SDK
Follow iOS接入指南 and Android接入指南 to setup WeChat SDK. For the coding part, we will further explain in the below steps.
In iOS, after setting up the WechatOpenSDK, universal link should be enabled in your application. We will need two links for the setup. One is for the WeChat SDK used, another is for the Authgear SDK to trigger delegate function when user click "Login with WeChat" button. Here are the suggestion of the links.
IOS_WECHAT_UNIVERICAL_LINK: https://{YOUR_DOMAIN}/wechat
IOS_WECHAT_REDICRECT_URI_FOR_AUTHGEAR: https://{YOUR_DOMAIN}/open_wechat_app
In android, you need to sign your app to use WeChat SDK. Obtain your application signature by running command keytool -list -v -keystore YOUR_KEYSTORE_FILE_PATH with your keystore file. WeChat needs the certificate fingerprint in MD5, remove : in the fingerprint. It should be string in length 32.
Login WeChat Open platform, open the application detail page, update the development information iOS and Android sections.
In iOS
Fill in "Bundle ID" field with your app bundle id.
Fill in "Universal Links" with "IOS_WECHAT_UNIVERICAL_LINK" above.
In Android
Fill in application signature.
Fill in your package name
For android, we will need to define a custom url for Authgear SDK to trigger delegate function when user click "Login with WeChat" button. Here is the example, you should update it with your own scheme.
ANDROID_WECHAT_REDICRECT_URI_FOR_AUTHGEAR: com.myapp://host/open_wechat_app
Login Authgear portal, go to "Single-Sign On" page, then do the following:
Enable "Sign in with WeChat (Mobile/移动应用)"
Fill in "Client ID" with the WeChat "AppID".
Fill in "Client Secret" with the WeChat "AppSecret".
Fill in "原始 ID" with the WeChat "原始 ID".
Add "IOS_WECHAT_REDICRECT_URI_FOR_AUTHGEAR" and "ANDROID_WECHAT_REDICRECT_URI_FOR_AUTHGEAR" above into "WeChat redirect URIs"
Click save.
Update the code
In Android, Update application AndroidManifest.xml.
<!-- Your application configuration. Omitted here for brevity -->
<application>
<!-- Other activities or entries -->
<!-- It should be added when setting up Authgear SDK -->
<activity android:name="com.authgear.reactnative.OAuthRedirectActivity"
android:exported="true"
android:launchMode="singleTask">
<intent-filter>
<action android:name="android.intent.action.VIEW" />
<category android:name="android.intent.category.DEFAULT" />
<category android:name="android.intent.category.BROWSABLE" />
<!-- This is the redirectURI, It should be added when setting up Authgear SDK -->
<data android:scheme="com.myapp"
android:host="host"
android:pathPrefix="/path"/>
<!-- Add this for WeChat setup, this should match the WECHAT_REDICRECT_URI_FOR_AUTHGEAR defined above -->
<data android:scheme="com.myapp"
android:host="host"
android:pathPrefix="/open_wechat_app"/>
</intent-filter>
</activity>
<!-- Add this for WeChat SDK setup, replace YOUR_PACKAGE_NAME-->
<activity
android:name=".wxapi.WXEntryActivity"
android:exported="true"
android:label="@string/app_name"
android:launchMode="singleTask"
android:taskAffinity="YOUR_PACKAGE_NAME"
android:theme="@android:style/Theme.Translucent.NoTitleBar"></activity>
</application>In iOS, update your App Delegate
- (BOOL)application:(UIApplication *)application continueUserActivity:(NSUserActivity *)userActivity restorationHandler:(void (^)(NSArray *))restorationHandler {
[WXApi handleOpenUniversalLink:userActivity delegate:self];
[AGAuthgearReactNative application:application continueUserActivity:userActivity restorationHandler:restorationHandler];
return YES;
}Provide wechatRedirectURI when calling Authgear SDK authorize and promoteAnonymousUser in js
// REPLACE IOS_WECHAT_REDICRECT_URI_FOR_AUTHGEAR and ANDROID_WECHAT_REDICRECT_URI_FOR_AUTHGEAR
const wechatRedirectURI = Platform.select<string>({
android: 'ANDROID_WECHAT_REDICRECT_URI_FOR_AUTHGEAR',
ios: 'IOS_WECHAT_REDICRECT_URI_FOR_AUTHGEAR',
});
authgear
.authenticate({
redirectURI: "REDIRECT_URI",
wechatRedirectURI: wechatRedirectURI
});
// For anonymous user support only
authgear
.promoteAnonymousUser({
redirectURI: "REDIRECT_URI",
wechatRedirectURI: wechatRedirectURI
});
// Open setting page
authgear
.open(Page.Settings, {
wechatRedirectURI: wechatRedirectURI,
})Setup Authgear delegate and open WeChat SDK when sendWechatAuthRequest is triggered
authgear.delegate = {
sendWechatAuthRequest: (state) => {
// User click login with WeChat
// Implement native modules to use WeChat SDK to open
// WeChat app for authorization.
// After obtaining authorization code, call Authgear.wechatAuthCallback
// to complete the authorization.
const {WechatAuth} = NativeModules;
WechatAuth.sendWechatAuthRequest(state)
.then((result: {code: string; state: string}) => {
// Native module sending back the code after login with
// WeChat app. Call Authgear.wechatAuthCallback
return authgear.wechatAuthCallback(result.code, result.state);
})
.then(() => {
// Send WeChat callback to authgear successfully
})
.catch((err: Error) => {
// error ocurred
});
}
}Implement the NativeModules to use WeChat SDK to open WeChat app for authorization. Here is the completed example.
Setup Authgear SDK
Follow iOS接入指南 and Android接入指南 to setup WeChat SDK. For the coding part, we will further explain in the below steps.
In iOS, after setting up the WechatOpenSDK, universal link should be enabled in your application. We will need two links for the setup. One is for the WeChat SDK used, another is for the Authgear SDK to trigger delegate function when user click "Login with WeChat" button. Here are the suggestion of the links.
IOS_WECHAT_UNIVERICAL_LINK: https://{YOUR_DOMAIN}/wechat
IOS_WECHAT_REDICRECT_URI_FOR_AUTHGEAR: https://{YOUR_DOMAIN}/open_wechat_app
In android, you need to sign your app to use WeChat SDK. Obtain your application signature by running command keytool -list -v -keystore YOUR_KEYSTORE_FILE_PATH with your keystore file. WeChat needs the certificate fingerprint in MD5, remove : in the fingerprint. It should be string in length 32.
Login WeChat Open platform, open the application detail page, update the development information iOS and Android sections.
In iOS
Fill in "Bundle ID" field with your app bundle id.
Fill in "Universal Links" with "IOS_WECHAT_UNIVERICAL_LINK" above.
In Android
Fill in application signature.
Fill in your package name
For android, we will need to define a custom url for Authgear SDK to trigger delegate function when user click "Login with WeChat" button. Here is the example, you should update it with your own scheme.
ANDROID_WECHAT_REDICRECT_URI_FOR_AUTHGEAR: com.myapp://host/open_wechat_app
Login Authgear portal, go to "Single-Sign On" page, then do the following:
Enable "Sign in with WeChat (Mobile/移动应用)"
Fill in "Client ID" with the WeChat "AppID".
Fill in "Client Secret" with the WeChat "AppSecret".
Fill in "原始 ID" with the WeChat "原始 ID".
Add "IOS_WECHAT_REDICRECT_URI_FOR_AUTHGEAR" and "ANDROID_WECHAT_REDICRECT_URI_FOR_AUTHGEAR" above into "WeChat redirect URIs"
Click save.
Update the code
In Android, Update application AndroidManifest.xml.
<!-- Your application configuration. Omitted here for brevity -->
<application>
<!-- Other activities or entries -->
<!-- It should be added when setting up Authgear SDK -->
<activity android:name="com.authgear.flutter.OAuthRedirectActivity"
android:exported="true"
android:launchMode="singleTask">
<intent-filter>
<action android:name="android.intent.action.VIEW" />
<category android:name="android.intent.category.DEFAULT" />
<category android:name="android.intent.category.BROWSABLE" />
<!-- This is the redirectURI, It should be added when setting up Authgear SDK -->
<data android:scheme="com.myapp"
android:host="host"
android:pathPrefix="/path"/>
<!-- Add this for WeChat setup, this should match the WECHAT_REDICRECT_URI_FOR_AUTHGEAR defined above -->
<data android:scheme="com.myapp"
android:host="host"
android:pathPrefix="/open_wechat_app"/>
</intent-filter>
</activity>
<!-- Add this for WeChat SDK setup, replace YOUR_PACKAGE_NAME-->
<activity
android:name=".wxapi.WXEntryActivity"
android:exported="true"
android:label="@string/app_name"
android:launchMode="singleTask"
android:taskAffinity="YOUR_PACKAGE_NAME"
android:theme="@android:style/Theme.Translucent.NoTitleBar"></activity>
</application>Provide wechatRedirectURI.
// REPLACE IOS_WECHAT_REDICRECT_URI_FOR_AUTHGEAR and ANDROID_WECHAT_REDICRECT_URI_FOR_AUTHGEAR
var wechatRedirectURI = "";
if (Platform.isIOS) {
wechatRedirectURI = 'IOS_WECHAT_REDICRECT_URI_FOR_AUTHGEAR';
} else if (Platform.isAndroid) {
wechatRedirectURI = 'ANDROID_WECHAT_REDICRECT_URI_FOR_AUTHGEAR';
}
await authgear.authenticate(redirectURI: "REDIRECT_URI", wechatRedirectURI: wechatRedirectURI);
// For anonymous user support only
await authgear.promoteAnonymousUser(redirectURI: "REDIRECT_URI", wechatRedirectURI: wechatRedirectURI);
// Open setting page
await authgear.open(SettingsPage.settings, wechatRedirectURI: wechatRedirectURI);Provide sendWechatAuthRequest
final authgear = Authgear(
sendWechatAuthRequest: sendWechatAuthRequest,
);
Future<void> sendWechatAuthRequest(state: String) async {
// Implement your platform specific code to use WeChat SDK to open WeChat app.
// After success, pass the code back to Authgear.
await authgear.wechatAuthCallback(state: state, code: code);
}Implement the platform specific code to use WeChat SDK to open WeChat app for authorization. Here is the completed example.


Authgear supports enabling biometric login in the native mobile application. You will need to
Enable biometric login in your application via the portal.
In the mobile app, use the mobile SDK to enable biometric login for your users.
A pair of cryptographic keys will be generated upon registering biometric login. The private key will be stored securely in the device (using Keystore in Android and Keychain in iOS), while the public key is stored in the Authgear server. To authenticate the user, fingerprint or face is presented to unlock the private key, and a digital signed message is sent to the server to proof the authenticity of the user.
Sounds overwhelming? Authgear's magic handle all these for you. Follow this guide to enable biometric login in your app with a few lines of code.
In the portal, go to Authentication > Biometric.
Turn on Enable biometric authentication.
Save the settings.
authentication:
identities:
...
# Add biometric along with the other enabled identities
- biometric
identity:
biometric:
# Enable listing biometric login in user setting page, default false
list_enabled: trueBiometric login is usually used when you want the user to re-login after a relatively short period of time. For sensitive applications such as financial apps, it's recommended to use a short refresh token lifetime and a short idle timeout.
In the Authgear Portal, go to Applications
Select the client application that represent the integration with the mobile app
Set a short Refresh Token Lifetime to say 3,600 seconds (1 hour)
Enable Expire after idling
Set a short Idle Timeout, to say 1,800 seconds (30 minutes)
By doing so, the end-user's session will be expired 1 hour after their login, or after 30 minutes of inactivity. The end-user will need to authenticate themself again with biometric, even if the app process has not yet been killed.
Apart from the short token lifetimes, it's also common for sensitive apps to ask the user to re-login by biometric after the app process is killed and relaunched.
The SDK should be configured to use TransientTokenStorage so the tokens are stored in memory, and will be cleared when the app is closed. So the end-users must authenticate with biometrics again.
let authgear = Authgear(
clientId: "{your_clien_id}",
endpoint: "{your_app_endpoint}",
tokenStorage: TransientTokenStorage())
authgear.configure() { result in
switch result {
case .success():
// configured successfully
case let .failure(error):
// failed to configured
}
}public class MyAwesomeApplication extends Application {
// The client ID of the oauth client.
private static final String CLIENT_ID = "a_random_generated_string"
// Deployed authgear's endpoint
private static final String AUTHGEAR_ENDPOINT = "http://<myapp>.authgear.cloud/"
private Authgear mAuthgear;
public void onCreate() {
super.onCreate();
mAuthgear = new Authgear(this, CLIENT_ID, AUTHGEAR_ENDPOINT, new TransientTokenStorage());
mAuthgear.configure(new OnConfigureListener() {
@Override
public void onConfigured() {
// Authgear can be used.
}
@Override
public void onConfigurationFailed(@NonNull Throwable throwable) {
Log.d(TAG, throwable.toString());
// Something went wrong, check the client ID or endpoint.
}
});
}
public Authgear getAuthgear() {
return mAuthgear;
}
}import React, { useCallback } from "react";
import { View, Button } from "react-native";
import authgear, { TransientTokenStorage } from "@authgear/react-native";
function LoginScreen() {
const onPress = useCallback(() => {
// Normally you should only configure once when the app launches.
authgear
.configure({
clientID: "client_id",
endpoint: "http://<myapp>.authgear.cloud",
tokenStorage: new TransientTokenStorage()
})
.then(() => {
authgear
.authenticate({
redirectURI: "com.myapp.example://host/path",
})
.then(({ userInfo }) => {
console.log(userInfo);
});
});
}, []);
return (
<View>
<Button onPress={onPress} title="Authenticate" />
</View>
);
}Future<void> _init() async {
_authgear = Authgear(
endpoint: "ENDPOINT",
clientID: "CLIENT_ID",
tokenStorage: TransientTokenStorage()
);
await _authgear.configure();
}import authgearCapacitor, { TransientTokenStorage, CancelError as CapacitorCancelError } from "@authgear/capacitor";
import authgearWeb, { SessionState, UserInfo, CancelError as WebCancelError } from "@authgear/web";
import { Capacitor } from "@capacitor/core";
import { useCallback, useState } from "react";
function isPlatformWeb(): boolean {
return Capacitor.getPlatform() === "web";
}
const CLIENT_ID = "client_id";
const ENDPOINT = "http://<myapp>.authgear.cloud";
function AuthenticationScreen() {
const [isAlertOpen, setIsAlertOpen] = useState(false);
const [alertHeader, setAlertHeader] = useState("");
const [alertMessage, setAlertMessage] = useState("");
const [loading, setLoading] = useState(false);
const [initialized, setInitialized] = useState(false);
const [sessionState, setSessionState] = useState<SessionState | null>(() => {
if (isPlatformWeb()) {
return authgearWeb.sessionState;
}
return authgearCapacitor.sessionState;
});
const showError = useCallback((e: any) => {
const json = JSON.parse(JSON.stringify(e));
json["constructor.name"] = e?.constructor?.name;
json["message"] = e?.message;
let message = JSON.stringify(json);
if (e instanceof WebCancelError || e instanceof CapacitorCancelError) {
// Cancel is not an error actually.
return;
}
setIsAlertOpen(true);
setAlertHeader("Error");
setAlertMessage(message);
}, []);
const postConfigure = useCallback(async () => {
const sessionState = isPlatformWeb()
? authgearWeb.sessionState
: authgearCapacitor.sessionState;
if (sessionState !== "AUTHENTICATED") {
setInitialized(true);
return;
}
if (isPlatformWeb()) {
await authgearWeb.fetchUserInfo();
} else {
await authgearCapacitor.fetchUserInfo();
}
setInitialized(true);
}, []);
const configure = useCallback(async () => {
setLoading(true);
try {
if (isPlatformWeb()) {
await authgearWeb.configure({
clientID: CLIENT_ID,
endpoint: ENDPOINT,
sessionType: "refresh_token",
isSSOEnabled: false,
});
} else {
await authgearCapacitor.configure({
clientID: CLIENT_ID,
endpoint: ENDPOINT,
tokenStorage: new TransientTokenStorage()
});
}
await postConfigure();
} catch (e) {
showError(e);
} finally {
setLoading(false);
}
}, [
CLIENT_ID,
ENDPOINT
]);
}using System;
using Android.App;
using Android.Content.PM;
using Android.Runtime;
using Android.OS;
using Xamarin.Forms;
using Authgear.Xamarin;
namespace MyApp.Droid
{
public class MainActivity : global::Xamarin.Forms.Platform.Android.FormsAppCompatActivity
{
protected override void OnCreate(Bundle savedInstanceState)
{
// ...
var authgear = new AuthgearSdk(this, new AuthgearOptions
{
ClientId = CLIENT_ID,
AuthgearEndpoint = ENDPOINT,
TokenStorage = new TransientTokenStorage()
});
DependencyService.RegisterSingleton<AuthgearSdk>(authgear);
LoadApplication(new App());
// ...
}
// other methods are omitted for brevity.
}
}In the following section, we will show you how to use biometric login in the SDK. In the SDK code snippet, authgear is referring to the configured Authgear container.
In the SDKs, a set of biometric options is required to check the support or enable biometric on the device.
There are two options on iOS:
localizedReason is the message string the user will see when FaceID or TouchID is presented
constraint is an enum that constraint the access of key stored under different conditions:
biometryAny: The key is still accessible by Touch ID if fingers are added or removed, or by Face ID if the user is re-enrolled
BiometricCurrentSet: The key is invalidated if fingers are added or removed for Touch ID, or if the user re-enrolls for Face ID
See reference in Apple Developers Doc on biometryAny and biometryCurrentSet.
There are 6 options on Android:
title is the Title of the biometric dialog presented to the users
subtitle is the subtitle of the biometric dialog presented to the users
description is the description of the biometric dialog presented to the users
negativeButtonText is what the dismiss button says in the biometric dialog
constraint is an array defines the requirement of security level, which can be BIOMETRIC_STRONG, BIOMETRIC_WEAK, DEVICE_CREDENTIAL. See reference in Android developers documentation on BiometricManager.Authenticators``
invalidatedByBiometricEnrollment is a boolean that controls if the key pair will be invalidated if a new biometric is enrolled, or when all existing biometrics are deleted. See reference in Android developers documentation on KeyGenParameterSpec.Builder.
Always check if the current device supports biometric login before calling any biometric API, including before enabling biometric login and before using biometric to login.
// check if current device supports biometric login
var supported = false
do {
try authgear.checkBiometricSupported()
supported = true
} catch {}
if supported {
// biometric login is supported
}boolean supported = false;
try {
// biometric login is supported SDK_INT >= 23 (Marshmallow)
if (Build.VERSION.SDK_INT >= 23) {
// check if current device supports biometric login
authgear.checkBiometricSupported(
this.getApplication(),
ALLOWED
);
supported = true;
}
} catch (Exception e) {}
if (supported) {
// biometric login is supported
}// We will need the options for the other biometric api
const biometricOptions = {
ios: {
localizedReason: 'Use biometric to authenticate',
constraint: 'biometryCurrentSet' as const,
},
android: {
title: 'Biometric Authentication',
subtitle: 'Biometric authentication',
description: 'Use biometric to authenticate',
negativeButtonText: 'Cancel',
constraint: ['BIOMETRIC_STRONG' as const],
invalidatedByBiometricEnrollment: true,
},
};
// check if current device supports biometric login
authgear
.checkBiometricSupported(biometricOptions)
.then(() => {
// biometric login is supported
})
.catch(() => {
// biometric login is not supported
});// We will need the options for the other biometric api
final ios = BiometricOptionsIOS(
localizedReason: "Use biometric to authenticate",
constraint: BiometricAccessConstraintIOS.biometryAny,
);
final android = BiometricOptionsAndroid(
title: "Biometric Authentication",
subtitle: "Biometric authentication",
description: "Use biometric to authenticate",
negativeButtonText: "Cancel",
constraint: [BiometricAccessConstraintAndroid.biometricStrong],
invalidatedByBiometricEnrollment: false,
);
try {
// check if current device supports biometric login
await authgear.checkBiometricSupported(ios: ios, android: android);
// biometric login is supported
} catch (e) {
// biometric login is not supported
}const biometricOptions: BiometricOptions = {
ios: {
localizedReason: "Use biometric to authenticate",
constraint: BiometricAccessConstraintIOS.BiometryCurrentSet,
policy: BiometricLAPolicy.deviceOwnerAuthenticationWithBiometrics,
},
android: {
title: "Biometric Authentication",
subtitle: "Biometric authentication",
description: "Use biometric to authenticate",
negativeButtonText: "Cancel",
constraint: [BiometricAccessConstraintAndroid.BiometricStrong],
invalidatedByBiometricEnrollment: true,
},
};
const updateBiometricState = useCallback(async () => {
if (isPlatformWeb()) {
return;
}
try {
await authgearCapacitor.checkBiometricSupported(biometricOptions);
const enabled = await authgearCapacitor.isBiometricEnabled();
setBiometricEnabled(enabled); //to be implemented in later step
} catch (e) {
console.error(e);
}
}, []);
// We will need the options for the other biometric api
var ios = new BiometricOptionsIos
{
LocalizedReason = "Use biometric to authenticate",
AccessConstraint = BiometricAccessConstraintIos.BiometricAny,
};
var android = new BiometricOptionsAndroid
{
Title = "Biometric Authentication",
Subtitle = "Biometric authentication",
Description = "Use biometric to authenticate",
NegativeButtonText = "Cancel",
AccessConstraint = BiometricAccessConstraintAndroid.BiometricOnly,
InvalidatedByBiometricEnrollment = false,
};
var biometricOptions = new BiometricOptions
{
Ios = ios,
Android = android
};
try
{
// check if current device supports biometric login
authgear.EnsureBiometricIsSupported(biometricOptions);
// biometric login is supported
}
catch
{
// biometric login is not supported
}Enable biometric login for logged in user
// provide localizedReason for requesting authentication
// which displays in the authentication dialog presented to the user
authgear.enableBiometric(
localizedReason: "REPLACE_WITH_LOCALIZED_REASON",
constraint: .biometryCurrentSet
) { result in
if case let .failure(error) = result {
// failed to enable biometric with error
} else {
// enabled biometric successfully
}
}// We will need the options for the other biometric api
BiometricOptions biometricOptions = new BiometricOptions(
activity, // FragmentActivity
"Biometric authentication", // title
"Biometric authentication", // subtitle
"Use biometric to authenticate", // description
"Cancel", // negativeButtonText
ALLOWED, // allowedAuthenticators
true // invalidatedByBiometricEnrollment
);
authgear.enableBiometric(
biometricOptions,
new OnEnableBiometricListener() {
@Override
public void onEnabled() {
// enabled biometric login successfully
}
@Override
public void onFailed(Throwable throwable) {
// failed to enable biometric with error
}
}
);authgear
.enableBiometric(biometricOptions)
.then(() => {
// enabled biometric login successfully
})
.catch((err) => {
// failed to enable biometric with error
});try {
await authgear.enableBiometric(ios: ios, android: android);
// enabled biometric login successfully
} catch (e) {
// failed to enable biometric with error
}const enableBiometric = useCallback(async () => {
setLoading(true);
try {
await authgearCapacitor.enableBiometric(biometricOptions);
} catch (e: unknown) {
showError(e);
} finally {
setLoading(false);
await updateBiometricState();
}
}, [showError, updateBiometricState]);
const onClickEnableBiometric = useCallback(
(e: MouseEvent<HTMLIonButtonElement>) => {
e.preventDefault();
e.stopPropagation();
enableBiometric();
},
[enableBiometric]
);try
{
await authgear.EnableBiometricAsync(biometricOptions);
// enabled biometric login successfully
}
catch
{
// failed to enable biometric with error
}Before asking the user to log in with biometric, Check if biometric login has been enabled on the current device. I.e. Is the key pair exist on the device (Keystore in Android and Keychain in iOS).
This method will still return true even if all the fingerprint and facial data has been removed from the device. Before this method, you should use the "checkBiometricSupported" to check if biometry is supported in the device level.
var enabled = (try? authgear.isBiometricEnabled()) ?? falseboolean enabled = false;
try {
enabled = authgear.isBiometricEnabled();
} catch (Exception e) {}authgear
.isBiometricEnabled()
.then((enabled) => {
// show if biometric login is enabled
})
.catch(() => {
// failed to check the enabled status
});try {
final enabled = await authgear.isBiometricEnabled();
// show if biometric login is enabled
} catch (e) {
// failed to check the enabled status
}const [biometricEnabled, setBiometricEnabled] = useState<boolean>(false);try
{
var enabled = await authgear.GetIsBiometricEnabledAsync();
// show if biometric login is enabled
}
catch
{
// failed to check the enabled status
}If biometric is supported and enabled, you can use the Authenticate Biometric method to log the user in. If the key pair is invalidated due to changes in the biometry settings, e.g added fingerprint or re-enrolled face data, the biometricPrivateKeyNotFound will be thrown. You should handle the error by the Disable Biometric method, and ask the user to register biometric login again.
authgear.authenticateBiometric { result in
switch result {
case let .success(userInfo):
let userInfo = userInfo
// logged in successfully
case let .failure(error):
// failed to login
}
}authgear.authenticateBiometric(
biometricOptions,
new OnAuthenticateBiometricListener() {
@Override
public void onAuthenticated(UserInfo userInfo) {
// logged in successfully
}
@Override
public void onAuthenticationFailed(Throwable throwable) {
// failed to login
}
}
);authgear
.authenticateBiometric(biometricOptions)
.then(({userInfo}) => {
// logged in successfully
})
.catch((e) => {
// failed to login
});try {
final userInfo = await authgear.authenticateBiometric(ios: ios, android: android);
// logged in successfully
} catch (e) {
// failed to login
} const showUserInfo = useCallback((userInfo: UserInfo) => {
const message = JSON.stringify(userInfo, null, 2);
setIsAlertOpen(true);
setAlertHeader("UserInfo");
setAlertMessage(message);
}, []);
const authenticateBiometric = useCallback(async () => {
setLoading(true);
try {
const { userInfo } = await authgearCapacitor.authenticateBiometric(
biometricOptions
);
showUserInfo(userInfo);
} catch (e: unknown) {
showError(e);
} finally {
setLoading(false);
await updateBiometricState();
}
}, [showError, showUserInfo, updateBiometricState]);try
{
var userInfo = await authgear.AuthenticateBiometricAsync(biometricOptions);
// logged in successfully
}
catch
{
// failed to login
}do {
try authgear.disableBiometric()
// disabled biometric login successfully
} catch {
// failed to disable biometric login
}try {
authgear.disableBiometric();
// disabled biometric login successfully
} catch (Exception e) {
// failed to disable biometric login
}authgear
.disableBiometric()
.then(() => {
// disabled biometric login successfully
})
.catch((err) => {
// failed to disable biometric login
});try {
await authgear.disableBiometric();
// disabled biometric login successfully
} catch (e) {
// failed to disable biometric login
} const disableBiometric = useCallback(async () => {
setLoading(true);
try {
await authgearCapacitor.disableBiometric();
} catch (e: unknown) {
showError(e);
} finally {
setLoading(false);
await updateBiometricState();
}
}, [showError, updateBiometricState]);try
{
await authgear.DisableBiometricAsync();
// disabled biometric login successfully
}
catch
{
// failed to disable biometric login
}In all methods related to biometric, the SDK may throw the following errors that describe the status of the biometry enrollment or the key pair stored on the device.
if let authgearError = error as? AuthgearError {
switch authgearError {
case .cancel:
// user cancel
case .biometricPrivateKeyNotFound:
// biometric info has changed. e.g. Touch ID or Face ID has changed.
// user have to set up biometric authentication again
case .biometricNotSupportedOrPermissionDenied:
// user has denied the permission of using Face ID
case .biometricNoPasscode:
// device does not have passcode set up
case .biometricNoEnrollment:
// device does not have Face ID or Touch ID set up
case .biometricLockout:
// the biometric is locked out due to too many failed attempts
default:
// other error
// you may consider showing a generic error message to the user
}
}import com.oursky.authgear.BiometricLockoutException;
import com.oursky.authgear.BiometricNoEnrollmentException;
import com.oursky.authgear.BiometricNoPasscodeException;
import com.oursky.authgear.BiometricNotSupportedOrPermissionDeniedException;
import com.oursky.authgear.BiometricPrivateKeyNotFoundException;
import com.oursky.authgear.CancelException;
if (e instanceof CancelException) {
// user cancel
} else if (e instanceof BiometricPrivateKeyNotFoundException) {
// biometric info has changed
// user have to set up biometric authentication again
} else if (e instanceof BiometricNoEnrollmentException) {
// device does not have biometric set up
} else if (e instanceof BiometricNotSupportedOrPermissionDeniedException) {
// biometric is not supported in the current device
// or user has denied the permission of using biometric
} else if (e instanceof BiometricNoPasscodeException) {
// device does not have unlock credential set up
} else if (e instanceof BiometricLockoutException) {
// the biometric is locked out due to too many failed attempts
} else {
// other error
// you may consider showing a generic error message to the user
}import {
CancelError,
BiometricPrivateKeyNotFoundError,
BiometricNotSupportedOrPermissionDeniedError,
BiometricNoEnrollmentError,
BiometricNoPasscodeError,
BiometricLockoutError,
} from '@authgear/react-native'
if (e instanceof CancelError) {
// user cancel
} else if (e instanceof BiometricPrivateKeyNotFoundError) {
// biometric info has changed. e.g. Touch ID or Face ID has changed.
// user have to set up biometric authentication again
} else if (e instanceof BiometricNoEnrollmentError) {
// device does not have biometric set up
// e.g. have not set up Face ID or Touch ID in the device
} else if (e instanceof BiometricNotSupportedOrPermissionDeniedError) {
// biometric is not supported in the current device
// or user has denied the permission of using Face ID
} else if (e instanceof BiometricNoPasscodeError) {
// device does not have unlock credential or passcode set up
} else if (e instanceof BiometricLockoutError) {
// the biometric is locked out due to too many failed attempts
} else {
// other error
// you may consider showing a generic error message to the user
}try {
// ...
} on CancelException catch (e) {
// user cancel
} on BiometricPrivateKeyNotFoundException catch (e) {
// biometric info has changed. e.g. Touch ID or Face ID has changed.
// user have to set up biometric authentication again
} on BiometricNoEnrollmentException catch (e) {
// device does not have biometric set up
// e.g. have not set up Face ID or Touch ID in the device
} on BiometricNotSupportedOrPermissionDeniedException catch (e) {
// biometric is not supported in the current device
// or user has denied the permission of using Face ID
} on BiometricNoPasscodeException catch (e) {
// device does not have unlock credential or passcode set up
} on BiometricLockoutException catch (e) {
// the biometric is locked out due to too many failed attempts
} catch (e) {
// other error
// you may consider showing a generic error message to the user
}import {
CancelError,
BiometricPrivateKeyNotFoundError,
BiometricNotSupportedOrPermissionDeniedError,
BiometricNoEnrollmentError,
BiometricNoPasscodeError,
BiometricLockoutError,
} from '@authgear/capacitor'
if (e instanceof CancelError) {
// user cancel
} else if (e instanceof BiometricPrivateKeyNotFoundError) {
// biometric info has changed. e.g. Touch ID or Face ID has changed.
// user have to set up biometric authentication again
} else if (e instanceof BiometricNoEnrollmentError) {
// device does not have biometric set up
// e.g. have not set up Face ID or Touch ID in the device
} else if (e instanceof BiometricNotSupportedOrPermissionDeniedError) {
// biometric is not supported in the current device
// or user has denied the permission of using Face ID
} else if (e instanceof BiometricNoPasscodeError) {
// device does not have unlock credential or passcode set up
} else if (e instanceof BiometricLockoutError) {
// the biometric is locked out due to too many failed attempts
} else {
// other error
// you may consider showing a generic error message to the user
}try
{
// ...
}
catch (OperationCanceledException ex)
{
// user cancel
}
catch (BiometricPrivateKeyNotFoundException ex)
{
// biometric info has changed. e.g. Touch ID or Face ID has changed.
// user have to set up biometric authentication again
}
catch (BiometricNoEnrollmentException ex)
{
// device does not have biometric set up
// e.g. have not set up Face ID or Touch ID in the device
}
catch (BiometricNotSupportedOrPermissionDeniedException ex)
{
// biometric is not supported in the current device
// or user has denied the permission of using Face ID
}
catch (BiometricNoPasscodeException ex)
{
// device does not have unlock credential or passcode set up
}
catch (BiometricLockoutException ex)
{
// the biometric is locked out due to too many failed attempts
}
catch
{
// other error
// you may consider showing a generic error message to the user
}The full list of events
Occurs right before the user creation. User can be created by user signup, user signup as an anonymous user, or created by the admin via the Portal or Admin API.
This event supports Mutations on the user object
{
"type": "user.pre_create",
"payload": {
"user": {
"id": "338deafa-400b-4589-a922-2c92d670b757",
"created_at": "2006-01-02T03:04:05.123456Z",
"updated_at": "2006-01-02T03:04:05.123456Z",
"is_anonymous": false,
"is_verified": true,
"is_disabled": false,
"is_deactivated": false,
"can_reauthenticate": true,
"standard_attributes": {
"email": "[email protected]",
"email_verified": true,
"updated_at": 1136171045
}
},
"identities": [
{
"id": "239d585d-9b90-4148-9aa2-2e3131b5847a",
"created_at": "2006-01-02T03:04:05.123456Z",
"updated_at": "2006-01-02T03:04:05.123456Z",
"type": "login_id",
"claims": {
"email": "[email protected]",
"https://authgear.com/claims/login_id/key": "email",
"https://authgear.com/claims/login_id/original_value": "[email protected]",
"https://authgear.com/claims/login_id/type": "email",
"https://authgear.com/claims/login_id/value": "[email protected]"
}
}
]
}
}Occurs right before the update of the user profile.
This event supports Mutations on the user object
{
"type": "user.profile.pre_update",
"payload": {
"user": {
"id": "338deafa-400b-4589-a922-2c92d670b757",
"created_at": "2006-01-02T03:04:05.123456Z",
"updated_at": "2006-01-02T03:04:05.123456Z",
"last_login_at": "2006-01-02T03:04:05.123456Z",
"is_anonymous": false,
"is_verified": true,
"is_disabled": false,
"is_deactivated": false,
"can_reauthenticate": true,
"standard_attributes": {
"email": "[email protected]",
"email_verified": true,
"name": "Chris",
"updated_at": 1136171045
}
}
}
}Occurs right before account deletion is scheduled.
This event does not support mutations.
{
"type": "user.pre_schedule_deletion",
"payload": {
"user": {
"id": "338deafa-400b-4589-a922-2c92d670b757",
"created_at": "2006-01-02T03:04:05.123456Z",
"updated_at": "2006-01-02T03:04:05.123456Z",
"last_login_at": "2006-01-02T03:04:05.123456Z",
"is_anonymous": false,
"is_verified": true,
"is_disabled": true,
"is_deactivated": true,
"delete_at": "2022-09-30T15:18:19.040081Z",
"can_reauthenticate": true,
"standard_attributes": {
"email": "[email protected]",
"email_verified": true,
"updated_at": 1136171045
}
}
}
}Occurs right before the access token is issued. Use this event to add custom fields to the JWT access token.
This event supports Mutations on the JWT payload
{
"type": "oidc.jwt.pre_create",
"payload": {
"user": {
"id": "338deafa-400b-4589-a922-2c92d670b757",
"created_at": "2006-01-02T03:04:05.123456Z",
"updated_at": "2006-01-02T03:04:05.123456Z",
"last_login_at": "2006-01-02T03:04:05.123456Z",
"is_anonymous": false,
"is_verified": true,
"is_disabled": true,
"is_deactivated": true,
"delete_at": "2022-09-30T15:18:19.040081Z",
"can_reauthenticate": true,
"standard_attributes": {
"email": "[email protected]",
"email_verified": true,
"updated_at": 1136171045
}
},
"jwt": {
"payload": {
"iss": "https://myapp.authgear.cloud",
"aud": ["YOUR_CLIENT_ID"],
"sub": "338deafa-400b-4589-a922-2c92d670b757"
}
}
}
}Occurs after a new user is created. User can be created by user signup, user signup as an anonymous user, or created by the admin via the Portal or Admin API.
{
"type": "user.created",
"payload": {
"user": {
"id": "338deafa-400b-4589-a922-2c92d670b757",
"created_at": "2006-01-02T03:04:05.123456Z",
"updated_at": "2006-01-02T03:04:05.123456Z",
"last_login_at": "2006-01-02T03:04:05.123456Z",
"is_anonymous": false,
"is_verified": true,
"is_disabled": false,
"is_deactivated": false,
"can_reauthenticate": true,
"standard_attributes": {
"email": "[email protected]",
"email_verified": true,
"updated_at": 1136171045
}
},
"identities": [
{
"id": "239d585d-9b90-4148-9aa2-2e3131b5847a",
"created_at": "2006-01-02T03:04:05.123456Z",
"updated_at": "2006-01-02T03:04:05.123456Z",
"type": "login_id",
"claims": {
"email": "[email protected]",
"https://authgear.com/claims/login_id/key": "email",
"https://authgear.com/claims/login_id/original_value": "[email protected]",
"https://authgear.com/claims/login_id/type": "email",
"https://authgear.com/claims/login_id/value": "[email protected]"
}
}
]
}
}Occurs when the user profile is updated.
{
"type": "user.profile.updated",
"payload": {
"user": {
"id": "338deafa-400b-4589-a922-2c92d670b757",
"created_at": "2006-01-02T03:04:05.123456Z",
"updated_at": "2006-01-02T03:04:05.123456Z",
"last_login_at": "2006-01-02T03:04:05.123456Z",
"is_anonymous": false,
"is_verified": true,
"is_disabled": false,
"is_deactivated": false,
"can_reauthenticate": true,
"standard_attributes": {
"email": "[email protected]",
"email_verified": true,
"name": "Chris",
"updated_at": 1136171045
}
}
}
}Occurs after the user logged in.
{
"type": "user.authenticated",
"payload": {
"user": {
"id": "338deafa-400b-4589-a922-2c92d670b757",
"created_at": "2006-01-02T03:04:05.123456Z",
"updated_at": "2006-01-02T03:04:05.123456Z",
"last_login_at": "2006-01-02T03:04:05.123456Z",
"is_anonymous": false,
"is_verified": true,
"is_disabled": false,
"is_deactivated": false,
"can_reauthenticate": true,
"standard_attributes": {
"email": "[email protected]",
"email_verified": true,
"updated_at": 1136171045
}
},
"session": {
"id": "6e6e5d9b-7f85-4a8f-a157-2de94694dfea",
"created_at": "2006-01-02T03:04:05.123456Z",
"updated_at": "2006-01-02T03:04:05.123456Z",
"type": "idp",
"amr": ["pwd"],
"lastAccessedAt": "2006-01-02T03:04:05.123456Z",
"createdByIP": "127.0.0.1",
"lastAccessedByIP": "127.0.0.1",
"lastAccessedByIPCountryCode": "",
"lastAccessedByIPEnglishCountryName": "",
"displayName": "Chrome 104.0.0"
}
}
}Occurs when the user was disabled.
{
"type": "user.disabled",
"payload": {
"user": {
"id": "338deafa-400b-4589-a922-2c92d670b757",
"created_at": "2006-01-02T03:04:05.123456Z",
"updated_at": "2006-01-02T03:04:05.123456Z",
"last_login_at": "2006-01-02T03:04:05.123456Z",
"is_anonymous": false,
"is_verified": true,
"is_disabled": true,
"is_deactivated": false,
"can_reauthenticate": true,
"standard_attributes": {
"email": "[email protected]",
"email_verified": true,
"updated_at": 1136171045
}
}
}
}Occurs when the user was re-enabled.
{
"type": "user.reenabled",
"payload": {
"user": {
"id": "338deafa-400b-4589-a922-2c92d670b757",
"created_at": "2006-01-02T03:04:05.123456Z",
"updated_at": "2006-01-02T03:04:05.123456Z",
"last_login_at": "2006-01-02T03:04:05.123456Z",
"is_anonymous": false,
"is_verified": true,
"is_disabled": false,
"is_deactivated": false,
"can_reauthenticate": true,
"standard_attributes": {
"email": "[email protected]",
"email_verified": true,
"updated_at": 1136171045
}
}
}
}Occurs whenever an anonymous user is promoted to a normal user.
{
"type": "user.anonymous.promoted",
"payload": {
"anonymous_user": {
"id": "7a009f88-c636-4245-91ec-7b174dc6a1a1",
"created_at": "2006-01-02T03:04:05.123456Z",
"updated_at": "2006-01-02T03:04:05.123456Z",
"last_login_at": "2006-01-02T03:04:05.123456Z",
"is_anonymous": false,
"is_verified": true,
"is_disabled": false,
"is_deactivated": false,
"can_reauthenticate": true,
"standard_attributes": {
"email": "[email protected]",
"email_verified": true,
"updated_at": 1136171045
}
},
"user": {
"id": "7a009f88-c636-4245-91ec-7b174dc6a1a1",
"created_at": "2006-01-02T03:04:05.123456Z",
"updated_at": "2006-01-02T03:04:05.123456Z",
"last_login_at": "2006-01-02T03:04:05.123456Z",
"is_anonymous": false,
"is_verified": true,
"is_disabled": false,
"is_deactivated": false,
"can_reauthenticate": true,
"standard_attributes": {
"email": "[email protected]",
"email_verified": true,
"updated_at": 1136171045
}
},
"identities": [
{
"id": "1450234b-5e2c-4aa0-b400-f2d9d70a2f45",
"created_at": "2006-01-02T03:04:05.123456Z",
"updated_at": "2006-01-02T03:04:05.123456Z",
"type": "login_id",
"claims": {
"email": "[email protected]",
"https://authgear.com/claims/login_id/key": "email",
"https://authgear.com/claims/login_id/original_value": "[email protected]",
"https://authgear.com/claims/login_id/type": "email",
"https://authgear.com/claims/login_id/value": "[email protected]"
}
}
]
}
}Occurs when an account deletion was scheduled.
{
"type": "user.deletion_scheduled",
"payload": {
"user": {
"id": "338deafa-400b-4589-a922-2c92d670b757",
"created_at": "2006-01-02T03:04:05.123456Z",
"updated_at": "2006-01-02T03:04:05.123456Z",
"last_login_at": "2006-01-02T03:04:05.123456Z",
"is_anonymous": false,
"is_verified": true,
"is_disabled": true,
"is_deactivated": true,
"delete_at": "2006-01-02T03:04:05.123456Z",
"can_reauthenticate": true,
"standard_attributes": {
"email": "[email protected]",
"email_verified": true,
"updated_at": 1136171045
}
}
}
}Occurs when an account deletion was unscheduled.
{
"type": "user.deletion_unscheduled",
"payload": {
"user": {
"id": "338deafa-400b-4589-a922-2c92d670b757",
"created_at": "2006-01-02T03:04:05.123456Z",
"updated_at": "2006-01-02T03:04:05.123456Z",
"last_login_at": "2006-01-02T03:04:05.123456Z",
"is_anonymous": false,
"is_verified": true,
"is_disabled": false,
"is_deactivated": false,
"can_reauthenticate": true,
"standard_attributes": {
"email": "[email protected]",
"email_verified": true,
"updated_at": 1136171045
}
}
}
}Occurs when the user was deleted.
{
"type": "user.deleted",
"payload": {
"user": {
"id": "338deafa-400b-4589-a922-2c92d670b757",
"created_at": "2006-01-02T03:04:05.123456Z",
"updated_at": "2006-01-02T03:04:05.123456Z",
"last_login_at": "2006-01-02T03:04:05.123456Z",
"is_anonymous": false,
"is_verified": false,
"is_disabled": false,
"is_deactivated": false,
"can_reauthenticate": false,
"standard_attributes": {
"email": "[email protected]",
"email_verified": false,
"updated_at": 1136171045
}
}
}
}Occurs when a new email is added to an existing user. Email can be added by the user in the setting page, added by the admin through the Admin API or Portal.
{
"type": "identity.email.added",
"payload": {
"user": {
"id": "338deafa-400b-4589-a922-2c92d670b757",
"created_at": "2006-01-02T03:04:05.123456Z",
"updated_at": "2006-01-02T03:04:05.123456Z",
"last_login_at": "2006-01-02T03:04:05.123456Z",
"is_anonymous": false,
"is_verified": true,
"is_disabled": false,
"is_deactivated": false,
"can_reauthenticate": true,
"standard_attributes": {
"email": "[email protected]",
"email_verified": true,
"phone_number": "+447400123456",
"phone_number_verified": true,
"updated_at": 1136171045
}
},
"identity": {
"id": "a0c55481-147e-4a58-876e-10dffedfd5cd",
"created_at": "2006-01-02T03:04:05.123456Z",
"updated_at": "2006-01-02T03:04:05.123456Z",
"type": "login_id",
"claims": {
"email": "[email protected]",
"https://authgear.com/claims/login_id/key": "email",
"https://authgear.com/claims/login_id/original_value": "[email protected]",
"https://authgear.com/claims/login_id/type": "email",
"https://authgear.com/claims/login_id/value": "[email protected]"
}
}
}
}Occurs when an email address is removed from an existing user. Email can be removed by the user in the setting page, removed by admin through admin API or Portal.
{
"type": "identity.email.removed",
"payload": {
"user": {
"id": "338deafa-400b-4589-a922-2c92d670b757",
"created_at": "2006-01-02T03:04:05.123456Z",
"updated_at": "2006-01-02T03:04:05.123456Z",
"last_login_at": "2006-01-02T03:04:05.123456Z",
"is_anonymous": false,
"is_verified": true,
"is_disabled": false,
"is_deactivated": false,
"can_reauthenticate": true,
"standard_attributes": {
"phone_number": "+447400123456",
"phone_number_verified": true,
"updated_at": 1136171045
}
},
"identity": {
"id": "239d585d-9b90-4148-9aa2-2e3131b5847a",
"created_at": "2006-01-02T03:04:05.123456Z",
"updated_at": "2006-01-02T03:04:05.123456Z",
"type": "login_id",
"claims": {
"email": "[email protected]",
"https://authgear.com/claims/login_id/key": "email",
"https://authgear.com/claims/login_id/original_value": "[email protected]",
"https://authgear.com/claims/login_id/type": "email",
"https://authgear.com/claims/login_id/value": "[email protected]"
}
}
}
}Occurs when an email address is updated. Email can be updated by the user on the setting page.
{
"type": "identity.email.updated",
"payload": {
"user": {
"id": "338deafa-400b-4589-a922-2c92d670b757",
"created_at": "2006-01-02T03:04:05.123456Z",
"updated_at": "2006-01-02T03:04:05.123456Z",
"last_login_at": "2006-01-02T03:04:05.123456Z",
"is_anonymous": false,
"is_verified": true,
"is_disabled": false,
"is_deactivated": false,
"can_reauthenticate": true,
"standard_attributes": {
"email": "[email protected]",
"email_verified": true,
"updated_at": 1136171045
}
},
"new_identity": {
"id": "239d585d-9b90-4148-9aa2-2e3131b5847a",
"created_at": "2006-01-02T03:04:05.123456Z",
"updated_at": "2006-01-02T03:04:05.123456Z",
"type": "login_id",
"claims": {
"email": "[email protected]",
"https://authgear.com/claims/login_id/key": "email",
"https://authgear.com/claims/login_id/original_value": "[email protected]",
"https://authgear.com/claims/login_id/type": "email",
"https://authgear.com/claims/login_id/value": "[email protected]"
}
},
"old_identity": {
"id": "239d585d-9b90-4148-9aa2-2e3131b5847a",
"created_at": "2006-01-02T03:04:05.123456Z",
"updated_at": "2006-01-02T03:04:05.123456Z",
"type": "login_id",
"claims": {
"email": "[email protected]",
"https://authgear.com/claims/login_id/key": "email",
"https://authgear.com/claims/login_id/original_value": "[email protected]",
"https://authgear.com/claims/login_id/type": "email",
"https://authgear.com/claims/login_id/value": "[email protected]"
}
}
}
}Occurs when an email address is change from unverified to verified for an existing user. Email can be verified by the user in the setting page, mark verified by admin through admin API or Portal.
{
"type": "identity.email.verified",
"payload": {
"user": {
"id": "338deafa-400b-4589-a922-2c92d670b757",
"created_at": "2006-01-02T03:04:05.123456Z",
"updated_at": "2006-01-02T03:04:05.123456Z",
"last_login_at": "2006-01-02T03:04:05.123456Z",
"is_anonymous": false,
"is_verified": true,
"is_disabled": false,
"is_deactivated": false,
"can_reauthenticate": true,
"standard_attributes": {
"email": "[email protected]",
"email_verified": true,
"updated_at": 1136171045
}
},
"identity": {
"id": "239d585d-9b90-4148-9aa2-2e3131b5847a",
"created_at": "2006-01-02T03:04:05.123456Z",
"updated_at": "2006-01-02T03:04:05.123456Z",
"type": "login_id",
"claims": {
"email": "[email protected]",
"https://authgear.com/claims/login_id/key": "email",
"https://authgear.com/claims/login_id/type": "email",
"https://authgear.com/claims/login_id/value": "[email protected]"
}
}
}
}Occurs when an email address is unverified. Email can be unverified using Admin API.
{
"type": "identity.email.unverified",
"payload": {
"user": {
"id": "338deafa-400b-4589-a922-2c92d670b757",
"created_at": "2006-01-02T03:04:05.123456Z",
"updated_at": "2006-01-02T03:04:05.123456Z",
"last_login_at": "2006-01-02T03:04:05.123456Z",
"is_anonymous": false,
"is_verified": false,
"is_disabled": false,
"is_deactivated": false,
"can_reauthenticate": true,
"standard_attributes": {
"email": "[email protected]",
"email_verified": false,
"updated_at": 1136171045
}
},
"identity": {
"id": "239d585d-9b90-4148-9aa2-2e3131b5847a",
"created_at": "2006-01-02T03:04:05.123456Z",
"updated_at": "2006-01-02T03:04:05.123456Z",
"type": "login_id",
"claims": {
"email": "[email protected]",
"https://authgear.com/claims/login_id/key": "email",
"https://authgear.com/claims/login_id/type": "email",
"https://authgear.com/claims/login_id/value": "[email protected]"
}
}
}
}Occurs when a new phone number is added to an existing user. Phone numbers can be added by the user in the setting page, added by admin through admin API or Portal.
{
"type": "user.phone.added",
"payload": {
"user": {
"id": "338deafa-400b-4589-a922-2c92d670b757",
"created_at": "2006-01-02T03:04:05.123456Z",
"updated_at": "2006-01-02T03:04:05.123456Z",
"last_login_at": "2006-01-02T03:04:05.123456Z",
"is_anonymous": false,
"is_verified": true,
"is_disabled": false,
"is_deactivated": false,
"can_reauthenticate": true,
"standard_attributes": {
"email": "[email protected]",
"email_verified": true,
"phone_number": "+447400123456",
"phone_number_verified": true,
"updated_at": 1136171045
}
},
"identity": {
"id": "9fa5668d-a796-4817-93e1-d4096e5966ac",
"created_at": "2006-01-02T03:04:05.123456Z",
"updated_at": "2006-01-02T03:04:05.123456Z",
"type": "login_id",
"claims": {
"https://authgear.com/claims/login_id/key": "phone",
"https://authgear.com/claims/login_id/original_value": "+447400123456",
"https://authgear.com/claims/login_id/type": "phone",
"https://authgear.com/claims/login_id/value": "+447400123456",
"phone_number": "+447400123456"
}
}
}
}Occurs when a phone number is removed from an existing user. Phone numbers can be removed by the user on the setting page, removed by admin through admin API or Portal.
{
"type": "identity.phone.removed",
"payload": {
"user": {
"id": "338deafa-400b-4589-a922-2c92d670b757",
"created_at": "2006-01-02T03:04:05.123456Z",
"updated_at": "2006-01-02T03:04:05.123456Z",
"last_login_at": "2006-01-02T03:04:05.123456Z",
"is_anonymous": false,
"is_verified": true,
"is_disabled": false,
"is_deactivated": false,
"can_reauthenticate": true,
"standard_attributes": {
"email": "[email protected]",
"email_verified": true,
"updated_at": 1136171045
}
},
"identity": {
"id": "9fa5668d-a796-4817-93e1-d4096e5966ac",
"created_at": "2006-01-02T03:04:05.123456Z",
"updated_at": "2006-01-02T03:04:05.123456Z",
"type": "login_id",
"claims": {
"https://authgear.com/claims/login_id/key": "phone",
"https://authgear.com/claims/login_id/original_value": "+447400123455",
"https://authgear.com/claims/login_id/type": "phone",
"https://authgear.com/claims/login_id/value": "+447400123455",
"phone_number": "+447400123455"
}
}
}
}Occurs when a phone number is updated. Phone numbers can be updated by the user on the setting page.
{
"type": "identity.phone.updated",
"payload": {
"user": {
"id": "338deafa-400b-4589-a922-2c92d670b757",
"created_at": "2006-01-02T03:04:05.123456Z",
"updated_at": "2006-01-02T03:04:05.123456Z",
"last_login_at": "2006-01-02T03:04:05.123456Z",
"is_anonymous": false,
"is_verified": true,
"is_disabled": false,
"is_deactivated": false,
"can_reauthenticate": true,
"standard_attributes": {
"email": "[email protected]",
"email_verified": true,
"phone_number": "+447400123455",
"phone_number_verified": true,
"updated_at": 1136171045
}
},
"new_identity": {
"id": "9fa5668d-a796-4817-93e1-d4096e5966ac",
"created_at": "2006-01-02T03:04:05.123456Z",
"updated_at": "2006-01-02T03:04:05.123456Z",
"type": "login_id",
"claims": {
"https://authgear.com/claims/login_id/key": "phone",
"https://authgear.com/claims/login_id/original_value": "+447400123455",
"https://authgear.com/claims/login_id/type": "phone",
"https://authgear.com/claims/login_id/value": "+447400123455",
"phone_number": "+447400123455"
}
},
"old_identity": {
"id": "9fa5668d-a796-4817-93e1-d4096e5966ac",
"created_at": "2006-01-02T03:04:05.123456Z",
"updated_at": "2006-01-02T03:04:05.123456Z",
"type": "login_id",
"claims": {
"https://authgear.com/claims/login_id/key": "phone",
"https://authgear.com/claims/login_id/original_value": "+447400123456",
"https://authgear.com/claims/login_id/type": "phone",
"https://authgear.com/claims/login_id/value": "+447400123456",
"phone_number": "+447400123456"
}
}
}
}Occurs when a phone number is change from unverified to verified for an existing user. Phone can be verified by the user in the setting page, mark verified by admin through admin API or Portal.
{
"type": "identity.phone.verified",
"payload": {
"user": {
"id": "338deafa-400b-4589-a922-2c92d670b757",
"created_at": "2006-01-02T03:04:05.123456Z",
"updated_at": "2006-01-02T03:04:05.123456Z",
"last_login_at": "2006-01-02T03:04:05.123456Z",
"is_anonymous": false,
"is_verified": true,
"is_disabled": false,
"is_deactivated": false,
"can_reauthenticate": true,
"standard_attributes": {
"email": "[email protected]",
"email_verified": true,
"phone_number": "+447400123455",
"phone_number_verified": true,
"updated_at": 1136171045
}
},
"identity": {
"id": "9fa5668d-a796-4817-93e1-d4096e5966ac",
"created_at": "2006-01-02T03:04:05.123456Z",
"updated_at": "2006-01-02T03:04:05.123456Z",
"type": "login_id",
"claims": {
"https://authgear.com/claims/login_id/key": "phone",
"https://authgear.com/claims/login_id/type": "phone",
"https://authgear.com/claims/login_id/value": "+447400123455",
"phone_number": "+447400123455"
}
}
}
}Occurs when a phone number is unverified. Phone numbers can be unverified using Admin API.
{
"type": "identity.phone.unverified",
"payload": {
"user": {
"id": "338deafa-400b-4589-a922-2c92d670b757",
"created_at": "2006-01-02T03:04:05.123456Z",
"updated_at": "2006-01-02T03:04:05.123456Z",
"last_login_at": "2006-01-02T03:04:05.123456Z",
"is_anonymous": false,
"is_verified": false,
"is_disabled": false,
"is_deactivated": false,
"can_reauthenticate": true,
"standard_attributes": {
"email": "[email protected]",
"email_verified": true,
"phone_number": "+447400123455",
"phone_number_verified": false,
"updated_at": 1136171045
}
},
"identity": {
"id": "9fa5668d-a796-4817-93e1-d4096e5966ac",
"created_at": "2006-01-02T03:04:05.123456Z",
"updated_at": "2006-01-02T03:04:05.123456Z",
"type": "login_id",
"claims": {
"https://authgear.com/claims/login_id/key": "phone",
"https://authgear.com/claims/login_id/type": "phone",
"https://authgear.com/claims/login_id/value": "+447400123455",
"phone_number": "+447400123455"
}
}
}
}Occurs when a new username is added to an existing user. Username can be added by the user in setting page, added by admin through Admin API or Portal.
{
"type": "identity.username.added",
"payload": {
"user": {
"id": "338deafa-400b-4589-a922-2c92d670b757",
"created_at": "2006-01-02T03:04:05.123456Z",
"updated_at": "2006-01-02T03:04:05.123456Z",
"last_login_at": "2006-01-02T03:04:05.123456Z",
"is_anonymous": false,
"is_verified": true,
"is_disabled": false,
"is_deactivated": false,
"can_reauthenticate": true,
"standard_attributes": {
"email": "[email protected]",
"email_verified": true,
"preferred_username": "user01",
"updated_at": 1136171045
}
},
"identity": {
"id": "38683500-f6ce-477d-b944-1f915a451995",
"created_at": "2006-01-02T03:04:05.123456Z",
"updated_at": "2006-01-02T03:04:05.123456Z",
"type": "login_id",
"claims": {
"https://authgear.com/claims/login_id/key": "username",
"https://authgear.com/claims/login_id/original_value": "user01",
"https://authgear.com/claims/login_id/type": "username",
"https://authgear.com/claims/login_id/value": "user01",
"preferred_username": "user01"
}
}
}
}Occurs when the username is removed from an existing user. The username can be removed by the user on the setting page, removed by admin through admin API or Portal.
{
"type": "identity.username.removed",
"payload": {
"user": {
"id": "338deafa-400b-4589-a922-2c92d670b757",
"created_at": "2006-01-02T03:04:05.123456Z",
"updated_at": "2006-01-02T03:04:05.123456Z",
"last_login_at": "2006-01-02T03:04:05.123456Z",
"is_anonymous": false,
"is_verified": true,
"is_disabled": false,
"is_deactivated": false,
"can_reauthenticate": true,
"standard_attributes": {
"email": "[email protected]",
"email_verified": true,
"updated_at": 1136171045
}
},
"identity": {
"id": "38683500-f6ce-477d-b944-1f915a451995",
"created_at": "2006-01-02T03:04:05.123456Z",
"updated_at": "2006-01-02T03:04:05.123456Z",
"type": "login_id",
"claims": {
"https://authgear.com/claims/login_id/key": "username",
"https://authgear.com/claims/login_id/original_value": "user02",
"https://authgear.com/claims/login_id/type": "username",
"https://authgear.com/claims/login_id/value": "user02",
"preferred_username": "user02"
}
}
}
}Occurs when the username is updated. The username can be updated by the user on the setting page.
{
"type": "identity.username.updated",
"payload": {
"user": {
"id": "338deafa-400b-4589-a922-2c92d670b757",
"created_at": "2006-01-02T03:04:05.123456Z",
"updated_at": "2006-01-02T03:04:05.123456Z",
"last_login_at": "2006-01-02T03:04:05.123456Z",
"is_anonymous": false,
"is_verified": true,
"is_disabled": false,
"is_deactivated": false,
"can_reauthenticate": true,
"standard_attributes": {
"email": "[email protected]",
"email_verified": true,
"preferred_username": "user02",
"updated_at": 1136171045
}
},
"new_identity": {
"id": "38683500-f6ce-477d-b944-1f915a451995",
"created_at": "2006-01-02T03:04:05.123456Z",
"updated_at": "2006-01-02T03:04:05.123456Z",
"type": "login_id",
"claims": {
"https://authgear.com/claims/login_id/key": "username",
"https://authgear.com/claims/login_id/original_value": "user02",
"https://authgear.com/claims/login_id/type": "username",
"https://authgear.com/claims/login_id/value": "user02",
"preferred_username": "user02"
}
},
"old_identity": {
"id": "38683500-f6ce-477d-b944-1f915a451995",
"created_at": "2006-01-02T03:04:05.123456Z",
"updated_at": "2006-01-02T03:04:05.123456Z",
"type": "login_id",
"claims": {
"https://authgear.com/claims/login_id/key": "username",
"https://authgear.com/claims/login_id/original_value": "user01",
"https://authgear.com/claims/login_id/type": "username",
"https://authgear.com/claims/login_id/value": "user01",
"preferred_username": "user01"
}
}
}
}Occurs when a user has connected to a new OAuth provider.
{
"type": "identity.oauth.connected",
"payload": {
"user": {
"id": "338deafa-400b-4589-a922-2c92d670b757",
"created_at": "2006-01-02T03:04:05.123456Z",
"updated_at": "2006-01-02T03:04:05.123456Z",
"last_login_at": "2006-01-02T03:04:05.123456Z",
"is_anonymous": false,
"is_verified": true,
"is_disabled": false,
"is_deactivated": false,
"can_reauthenticate": true,
"standard_attributes": {
"email": "[email protected]",
"email_verified": true,
"updated_at": 1136171045
}
},
"identity": {
"id": "f22425cf-68b2-45f8-936d-3c54c9cdf5c7",
"created_at": "2006-01-02T03:04:05.123456Z",
"updated_at": "2006-01-02T03:04:05.123456Z",
"type": "oauth",
"claims": {
"email": "[email protected]",
"email_verified": true,
"family_name": "",
"given_name": "",
"https://authgear.com/claims/oauth/profile": {
"at_hash": "",
"aud": ["xxx.apps.googleusercontent.com"],
"azp": "xxx.apps.googleusercontent.com",
"email": "[email protected]",
"email_verified": true,
"exp": "2006-01-02T03:04:05Z",
"family_name": "",
"given_name": "",
"iat": "2006-01-02T03:04:05Z",
"iss": "https://accounts.google.com",
"locale": "en",
"name": "",
"nonce": "",
"picture": "https://lh3.googleusercontent.com/a/xxx",
"sub": ""
},
"https://authgear.com/claims/oauth/provider_alias": "google",
"https://authgear.com/claims/oauth/provider_type": "google",
"https://authgear.com/claims/oauth/subject_id": "",
"locale": "en",
"name": "",
"picture": "https://lh3.googleusercontent.com/a/xxx"
}
}
}
}Occurs when a user is disconnected from an OAuth provider. It can be done by the user disconnecting their OAuth provider in the setting page, or the admin removing the OAuth identity through admin API or Portal.
{
"type": "identity.oauth.disconnected",
"payload": {
"user": {
"id": "338deafa-400b-4589-a922-2c92d670b757",
"created_at": "2006-01-02T03:04:05.123456Z",
"updated_at": "2006-01-02T03:04:05.123456Z",
"last_login_at": "2006-01-02T03:04:05.123456Z",
"is_anonymous": false,
"is_verified": true,
"is_disabled": false,
"is_deactivated": false,
"can_reauthenticate": true,
"standard_attributes": {
"email": "[email protected]",
"email_verified": true,
"updated_at": 1136171045
}
},
"identity": {
"id": "f22425cf-68b2-45f8-936d-3c54c9cdf5c7",
"created_at": "2006-01-02T03:04:05.123456Z",
"updated_at": "2006-01-02T03:04:05.123456Z",
"type": "oauth",
"claims": {
"email": "[email protected]",
"email_verified": true,
"family_name": "",
"given_name": "",
"https://authgear.com/claims/oauth/profile": {
"at_hash": "",
"aud": ["xxx.apps.googleusercontent.com"],
"azp": "xxx.apps.googleusercontent.com",
"email": "[email protected]",
"email_verified": true,
"exp": "2006-01-02T03:04:05Z",
"family_name": "",
"given_name": "",
"iat": "2006-01-02T03:04:05Z",
"iss": "https://accounts.google.com",
"locale": "en",
"name": "",
"nonce": "",
"picture": "https://lh3.googleusercontent.com/a/xxx",
"sub": ""
},
"https://authgear.com/claims/oauth/provider_alias": "google",
"https://authgear.com/claims/oauth/provider_type": "google",
"https://authgear.com/claims/oauth/subject_id": "",
"locale": "en",
"name": "",
"picture": "https://lh3.googleusercontent.com/a/xxx"
}
}
}
}Occurs when the user enabled biometric login.
{
"type": "identity.biometric.enabled",
"payload": {
"user": {
"id": "338deafa-400b-4589-a922-2c92d670b757",
"created_at": "2006-01-02T03:04:05.123456Z",
"updated_at": "2006-01-02T03:04:05.123456Z",
"last_login_at": "2006-01-02T03:04:05.123456Z",
"is_anonymous": false,
"is_verified": true,
"is_disabled": false,
"is_deactivated": false,
"can_reauthenticate": true,
"standard_attributes": {
"email": "[email protected]",
"email_verified": true,
"updated_at": 1136171045
}
},
"identity": {
"id": "5cb77960-634b-4c0e-8a0e-6c2c73fb8f47",
"created_at": "2006-01-02T03:04:05.123456Z",
"updated_at": "2006-01-02T03:04:05.123456Z",
"type": "biometric",
"claims": {
"https://authgear.com/claims/biometric/device_info": {
"ios": {
"NSBundle": {
"CFBundleDisplayName": "Authgear demo iOS",
"CFBundleExecutable": "ios_example",
"CFBundleIdentifier": "com.authgear.exampleapp.ios",
"CFBundleName": "ios_example",
"CFBundleShortVersionString": "1.0",
"CFBundleVersion": "1653565975"
},
"NSProcessInfo": {
"isMacCatalystApp": false,
"isiOSAppOnMac": false
},
"UIDevice": {
"model": "iPhone",
"name": "iPhone",
"systemName": "iOS",
"systemVersion": "16.1.1",
"userInterfaceIdiom": "phone"
},
"uname": {
"machine": "iPhone13,3",
"nodename": "Users-iPhone",
"release": "22.1.0",
"sysname": "Darwin",
"version": "Darwin Kernel Version 22.1.0: Thu Oct 6 19:34:22 PDT 2022; root:xnu-8792.42.7~1/RELEASE_ARM64_T8101"
}
}
},
"https://authgear.com/claims/biometric/formatted_device_info": "iPhone 12 Pro",
"https://authgear.com/claims/biometric/key_id": "1CC9D95A-6578-4557-8279-C4D5699D3549"
}
}
}
}Occurs when biometric login is disabled. It will be triggered only when the user disabled it from the settings page or the admin disabled it from the Admin API or portal.
{
"type": "identity.biometric.disabled",
"payload": {
"user": {
"id": "338deafa-400b-4589-a922-2c92d670b757",
"created_at": "2006-01-02T03:04:05.123456Z",
"updated_at": "2006-01-02T03:04:05.123456Z",
"last_login_at": "2006-01-02T03:04:05.123456Z",
"is_anonymous": false,
"is_verified": true,
"is_disabled": false,
"is_deactivated": false,
"can_reauthenticate": true,
"standard_attributes": {
"email": "[email protected]",
"email_verified": true,
"updated_at": 1136171045
}
},
"identity": {
"id": "5cb77960-634b-4c0e-8a0e-6c2c73fb8f47",
"created_at": "2006-01-02T03:04:05.123456Z",
"updated_at": "2006-01-02T03:04:05.123456Z",
"type": "biometric",
"claims": {
"https://authgear.com/claims/biometric/device_info": {
"ios": {
"NSBundle": {
"CFBundleDisplayName": "Authgear demo iOS",
"CFBundleExecutable": "ios_example",
"CFBundleIdentifier": "com.authgear.exampleapp.ios",
"CFBundleName": "ios_example",
"CFBundleShortVersionString": "1.0",
"CFBundleVersion": "1653565975"
},
"NSProcessInfo": {
"isMacCatalystApp": false,
"isiOSAppOnMac": false
},
"UIDevice": {
"model": "iPhone",
"name": "iPhone",
"systemName": "iOS",
"systemVersion": "16.1.1",
"userInterfaceIdiom": "phone"
},
"uname": {
"machine": "iPhone13,3",
"nodename": "Users-iPhone",
"release": "22.1.0",
"sysname": "Darwin",
"version": "Darwin Kernel Version 22.1.0: Thu Oct 6 19:34:22 PDT 2022; root:xnu-8792.42.7~1/RELEASE_ARM64_T8101"
}
}
},
"https://authgear.com/claims/biometric/formatted_device_info": "iPhone 12 Pro",
"https://authgear.com/claims/biometric/key_id": "1CC9D95A-6578-4557-8279-C4D5699D3549"
}
}
}
}The event may contain different objects. You can refer to the below for their attributes.
"payload":{
"user": {
"id": "string",
"created_at": "timestamp",
"updated_at": "timestamp",
"last_login_at": "timestamp",
"is_anonymous": boolean,
"is_verified": boolean,
"is_disabled": boolean,
"is_deactivated": boolean,
"can_reauthenticate": boolean,
"standard_attributes": {
...
},
"custom_attributes": {
...
}
}
}


