> For the complete documentation index, see [llms.txt](https://docs.authgear.com/llms.txt). Markdown versions of documentation pages are available by appending `.md` to page URLs; this page is available as [Markdown](https://docs.authgear.com/~/changes/S9PzpQKqtjCE4EDWHGO4/get-started/native-mobile-app/flutter.md).
# Flutter SDK
How to integrate with a Flutter app
This guide provides instructions on integrating Authgear with a Flutter app. Supported platforms include:
* Flutter 2.5.0 or higher
## Setup Application in Authgear
Signup for an Authgear Portal account in . Or you can use your self-deployed Authgear.
From the Project listing, create a new Project or select an existing Project. After that, we will need to create an application in the project.
{% tabs %}
{% tab title="Portal" %}
**Step 1: Create an application in the Portal**
1. Go to **Applications** on the left menu bar.
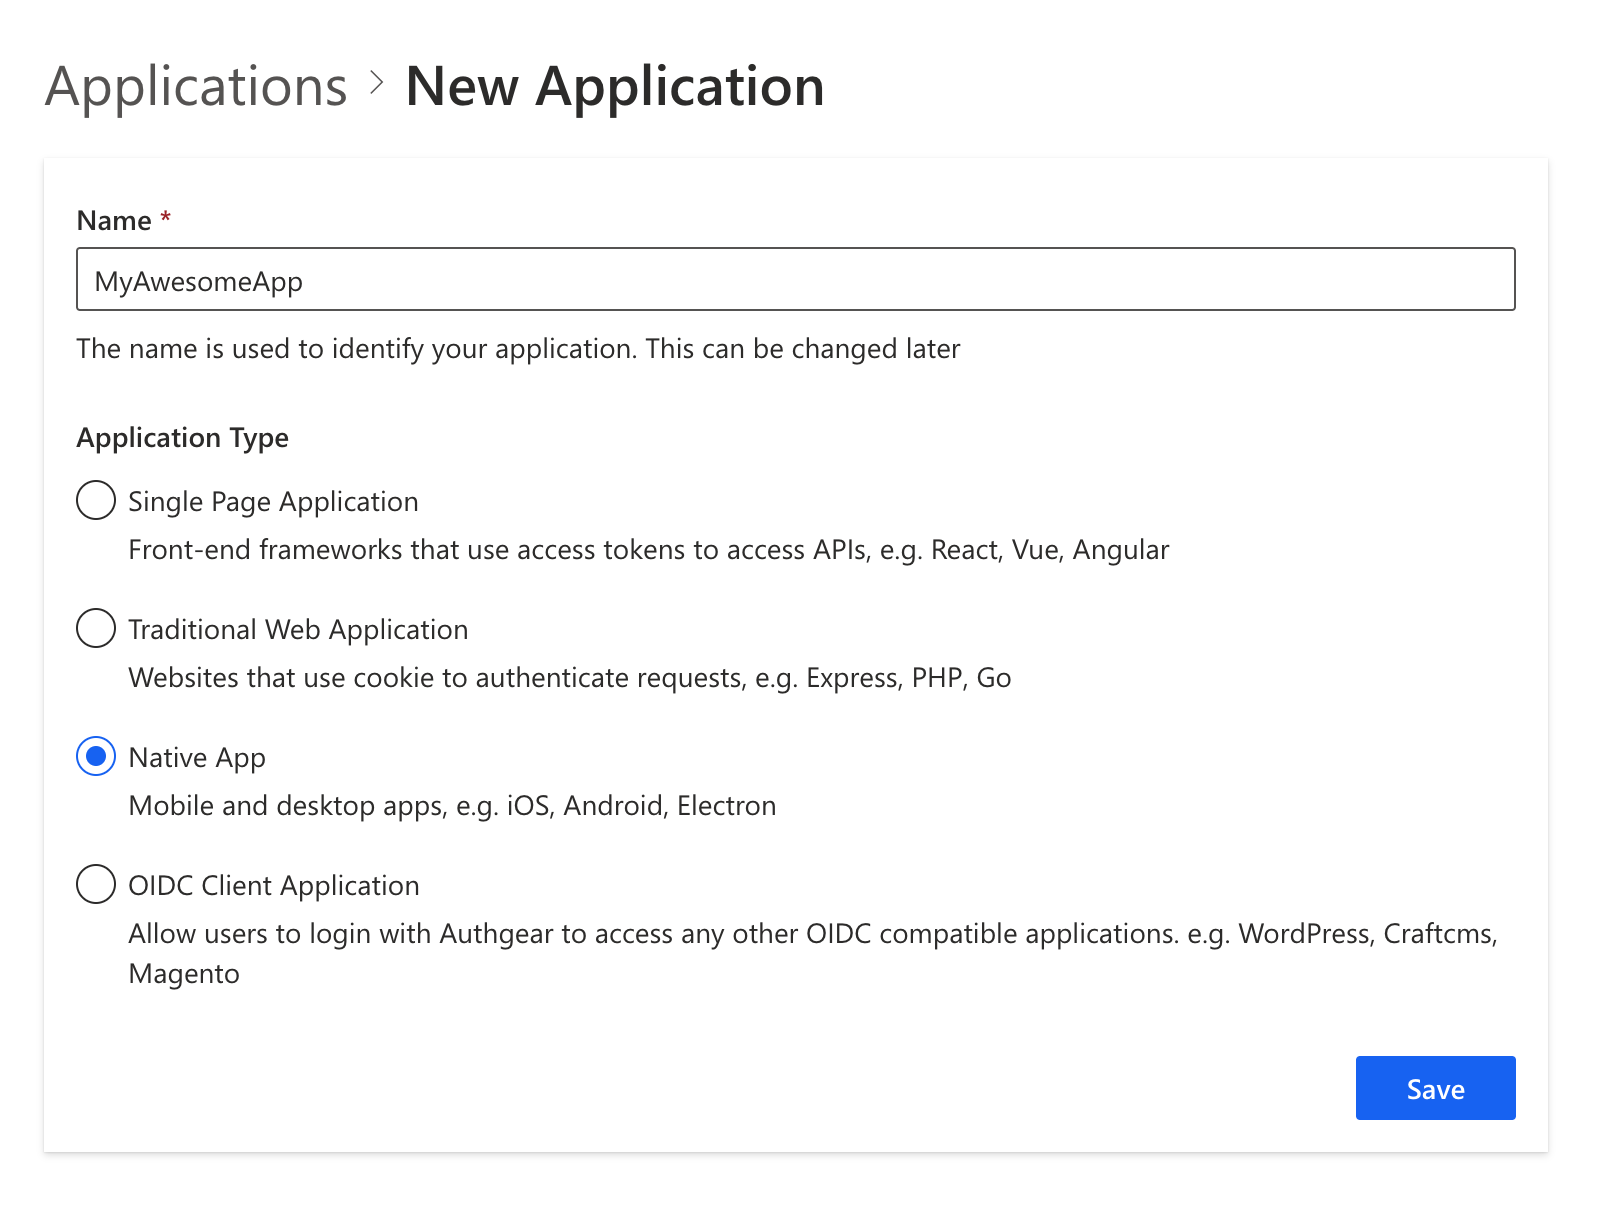
2. You will see the **"New Application"** page or Click **⊕Add Application** in the top tool bar.
3. Input the name of your application and select **Native App** as the application type. Click "Save".
4. You will see a list of guides that can help you for setting up, then click "Next".
Create Application
**Step 2: Configure the application**
1. In your IDE, define a custom URI scheme that the users will be redirected back to your app after they have authenticated with Authgear, e.g. `com.myapp.example://host/path`.\[^1]
2. Head back to Authgear Portal, fill in the Redirect URI that you have defined in the previous steps.
3. Click "Save" in the top tool bar and keep the **Client ID**. You can also obtain it again from the Applications list later.

{% hint style="info" %}
If you wish to [validate JSON Web Token (JWT) in your own application server](https://github.com/authgear/docs/blob/master/backend-integration/jwt/README.md), select "Issue JWT as access token".\[^2] If you wish to [forward authentication requests to Authgear Resolver Endpoint](https://github.com/authgear/docs/blob/master/backend-integration/nginx/README.md), leave this unchecked. See comparisons in [Backend Integration](https://github.com/authgear/docs/blob/master/backend-integration/README.md).
{% endhint %}

{% endtab %}
{% tab title="authgear.yaml (self-deployed)" %}
```yaml
oauth:
clients:
- name: your_app_name
client_id: a_random_generated_string
redirect_uris:
- "com.myapp.example://host/path"
grant_types:
- authorization_code
- refresh_token
response_types:
- code
- none
```
{% endtab %}
{% endtabs %}
## Create a Flutter app
Follow the documentation of Flutter to see how you can create a new Flutter app.
```bash
flutter create myapp
cd myapp
```
## Install the SDK
```bash
flutter pub add flutter_authgear
```
## Platform Integration
To finish the integration, setup the app to handle the redirectURI specified in the application. This part requires platform specific integration.
This declares the URL schemes supported by your app, so the device can redirect the user to the app after authentication using the redirect URI.
### Android
Add the following `` entry to the `AndroidManifest.xml` of your app. The intent system would dispatch the redirect URI to `OAuthRedirectActivity` and the SDK would handle the rest.
```markup
```
#### Targeting API level 30 or above (Android 11 or above)
If your Android app is targeting API level 30 or above (Android 11 or above), you need to add a `queries` section to `AndroidManifest.xml`.
```xml
```
### iOS
#### Declare URL Handling in Info.plist
In `Info.plist`, add the matching redirect URI by adding the key `CFBundleURLTypes` and the values inside `` as shown as the following example.
```markup
CFBundleURLTypesCFBundleTypeRoleEditorCFBundleURLSchemescom.myapp.example
```
## Try authenticate
Add this code to your app. This snippet configures authgear to connect to an authgear server deployed at `endpoint` with the client you have just setup via `clientID`, opens a browser for authentication, and then upon success redirects to the app via the `redirectURI` specified.
```dart
import 'package:flutter/material.dart';
import 'package:flutter_authgear/flutter_authgear.dart';
void main() {
runApp(const MyApp());
}
class MyApp extends StatefulWidget {
const MyApp({Key? key}) : super(key: key);
@override
State createState() => _MyAppState();
}
class _MyAppState extends State {
late Authgear _authgear;
@override
void initState() {
super.initState();
_init();
}
Future _init() async {
_authgear = Authgear(endpoint: "ENDPOINT", clientID: "CLIENT_ID");
await _authgear.configure();
}
@override
Widget build(BuildContext context) {
return MaterialApp(
title: "MyApp",
home: Scaffold(
appBar: AppBar(title: const Text("MyApp")),
body: TextButton(
child: Text("Authenticate"),
onPressed: _onPressedAuthenticate,
),
),
);
}
Future _onPressedAuthenticate() async {
try {
await _authgear.authenticate(redirectURI: "REDIRECT_URI");
} on CancelException {
}
}
}
```
Now, your user is logged in!
## Get the Logged In State
When you start launching the application. You may want to know if the user has logged in. (e.g. Show users the login page if they haven't logged in). The `sessionState` reflects the user logged in state in the SDK local state. That means even the `sessionState` is `SessionState.authenticated`, the session may be invalid if it is revoked remotely. After initializing the Authgear SDK, call `fetchUserInfo` to update the `sessionState` as soon as it is proper to do so.
```dart
// After authgear.configure, it only reflect SDK local state.
// value can be SessionState.noSession or SessionState.authenticated
SessionState state = authgear.sessionState;
UserInfo? userInfo;
try {
userInfo = await authgear.getUserInfo();
// read the userInfo if needed
} catch (e) {
// failed to fetch user info
// the refresh token maybe expired or revoked
}
// sessionState is now up to date
// it will change to SessionState.noSession if the session is invalid
state = authgear.sessionState;
```
The value of `sessionState` can be `SessionState.unknown`, `SessionState.noSession` or `SessionState.authenticated`. Initially, the `sessionState` is `SessionState.unknown`. After a call to `authgear.configure`, the session state would become `SessionState.authenticated` if a previous session was found, or `SessionState.noSession` if such session was not found.
## Fetching User Info
In some cases, you may need to obtain current user info through the SDK. (e.g. Display email address in the UI). Use the `fetchUserInfo` function to obtain the user info, see [example](/~/changes/S9PzpQKqtjCE4EDWHGO4/how-to-guide/user-management/user-profile.md#userinfo-endpoint).
## Using the Access Token in HTTP Requests
To include the access token to the HTTP requests to your application server, use `wrapHttpClient`.
The wrapped client will include the Authorization header in every HTTP request, and refresh access token automatically.
```dart
final originalClient = ...
final client = authgear.wrapHttpClient(originalClient);
```
## Logout
To log out the user from the current app session, you need to invoke the`logout`function.
```dart
await authgear.logout();
```
## Next steps
To protect your application server from unauthorized access. You will need to **integrate your backend with Authgear**.
{% content-ref url="/pages/-MbFM4jVKFT7n6gMYXXp" %}
[Backend Integration](/~/changes/S9PzpQKqtjCE4EDWHGO4/get-started/backend-api/backend-integration.md)
{% endcontent-ref %}
## Flutter SDK Reference
For detailed documentation on the Flutter SDK, visit [Flutter SDK Reference](https://authgear.github.io/authgear-sdk-flutter/)
### Footnote
\[^1]: For futher instruction on setting up custom URI scheme in Flutter, see
\[^2]: For more explaination on JWT, see
---
# Agent Instructions
This documentation is published with GitBook. GitBook is the documentation platform designed so that both humans and AI agents can read, navigate, and reason over technical content effectively. Learn more at gitbook.com.
## Querying This Documentation
If you need additional information that is not directly available in this page, you can query the documentation dynamically by asking a question.
Perform an HTTP GET request on the current page URL with the `ask` query parameter, and the optional `goal` query parameter:
```
GET https://docs.authgear.com/~/changes/S9PzpQKqtjCE4EDWHGO4/get-started/native-mobile-app/flutter.md?ask=&goal=
```
`ask` is the immediate question: it should be specific, self-contained, and written in natural language.
`goal` is optional and describes the broader end goal you are ultimately trying to accomplish on behalf of the user. GitBook uses it to tailor the answer towards what is most useful for that goal.
The response will contain a direct answer to the question and relevant excerpts and sources from the documentation.
Use this mechanism when the answer is not explicitly present in the current page, you need clarification or additional context, or you want to retrieve related documentation sections.